Posted in Uncategorized

Sea Glass Spheres

Being on the beach a lot, walking Buddy the Labrador, provides lots of beachcombing opportunities and lots of craft materials for me, especially sea glass and driftwood. This is only a small selection of the sea glass K has gathered on his dog walks.

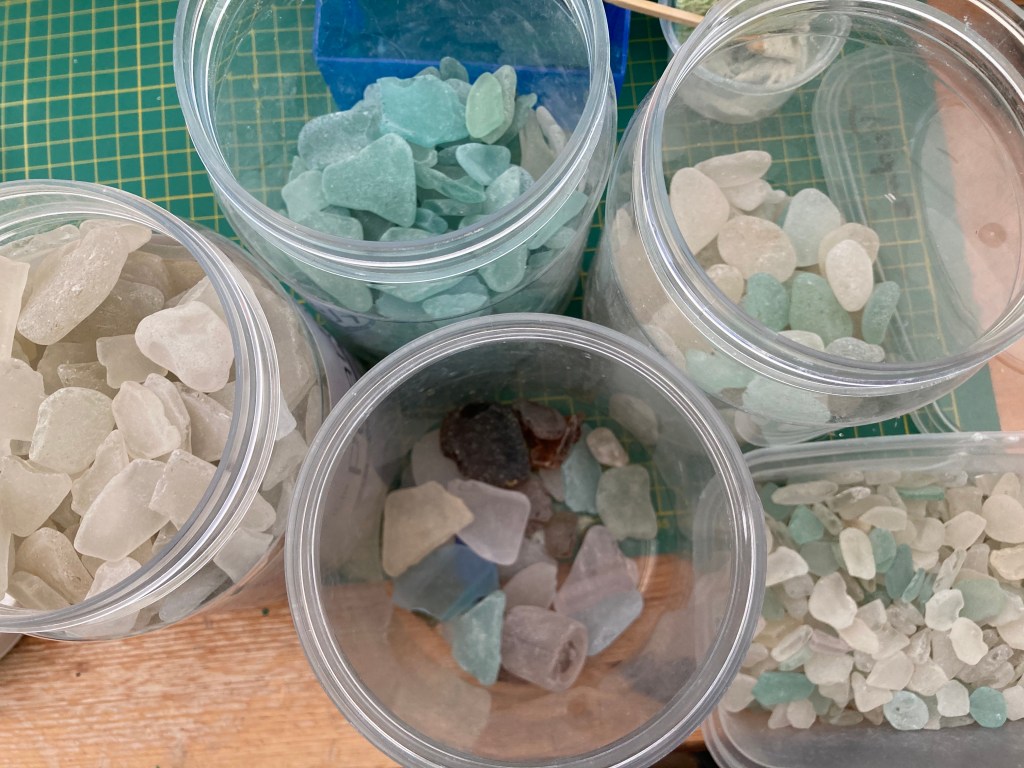
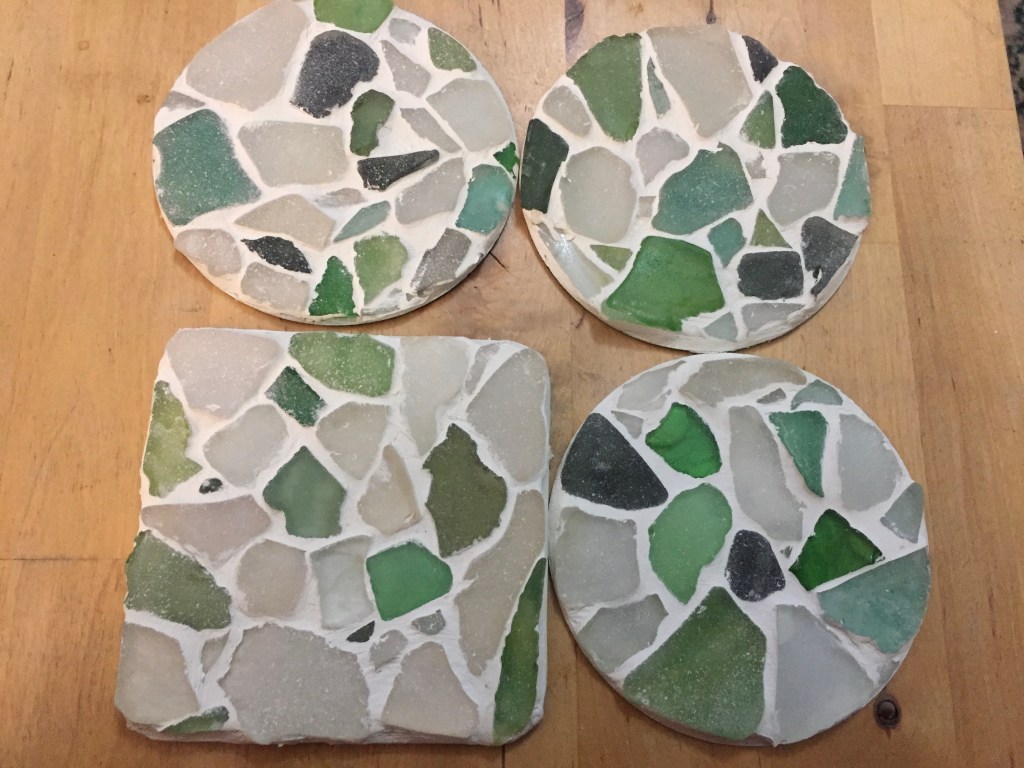
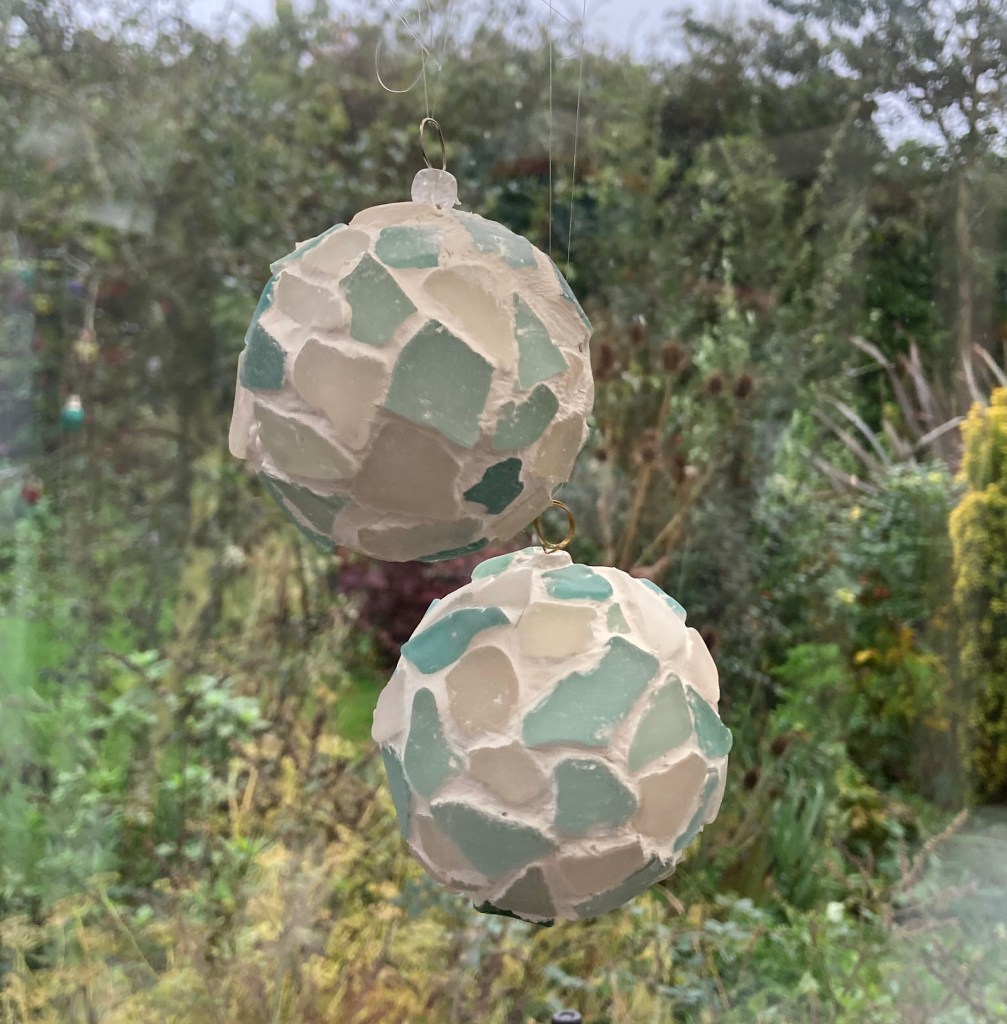
The action of the sea and sand has two effects on glass. The surface becomes abraded giving it a frosted appearance, then the corners and edges are smoothed away. Eventually a piece of glass will be transformed into a rounded translucent pebble and these, especially those in interesting colours, are the most sought after. Much of the sea glass in our collection is still quite angular, So I’ve been thinking of more ways to use it, especially since I made some mosaic coasters earlier this year. I had an assortment of polystyrene balls, so I wondered how they would work covered in a sea glass mosaic to make Christmas tree baubles.

I started with the loop to hold the hanging thread. I cut a piece of wire about 12 cm long and bent it round a pen to form a loop.

I threaded the ends through a glass bead and pushed them into the ball. I kept the ball in position on a toothpick pushed into a piece of polystyrene packaging, then began to glue the pieces of seagrass in place. I tried PVA glue first of all, but it doesn’t dry quick enough and the glass started to slide off. I needed a quick drying alternative.

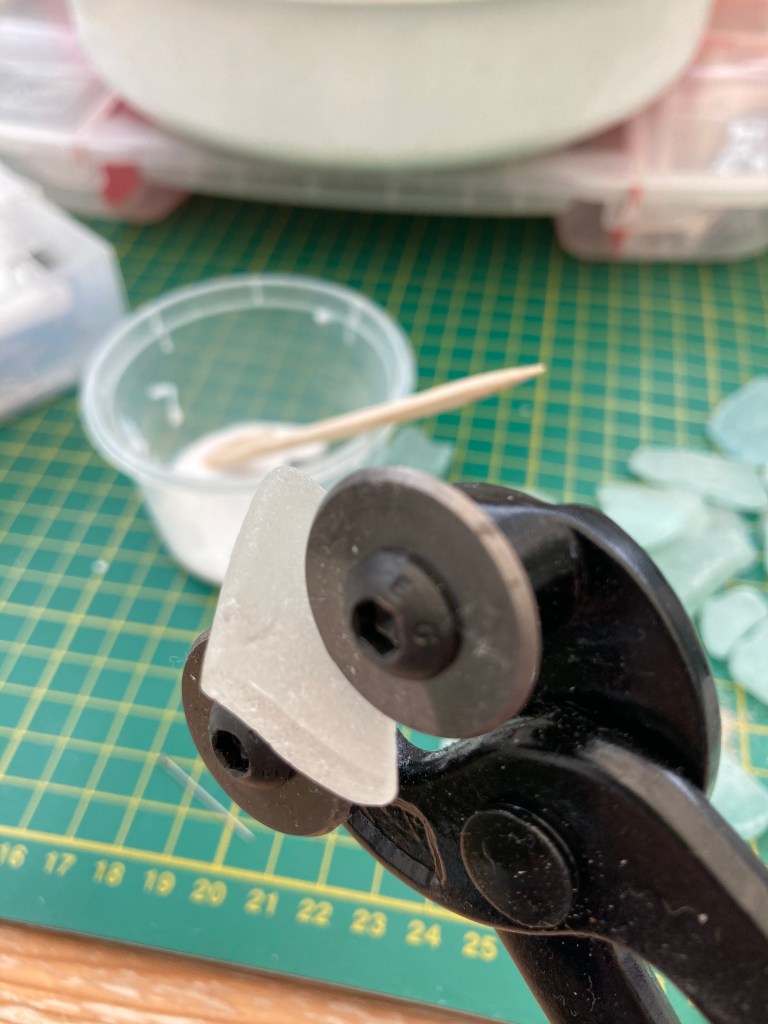
I ended up deploying my trusty glue gun. I’d avoided it at first as I thought the hot glue might melt the polystyrene but it was fine. I continued hot glueing the glass pieces to the ball, occasionally cutting a piece to fit with the tile cutters.

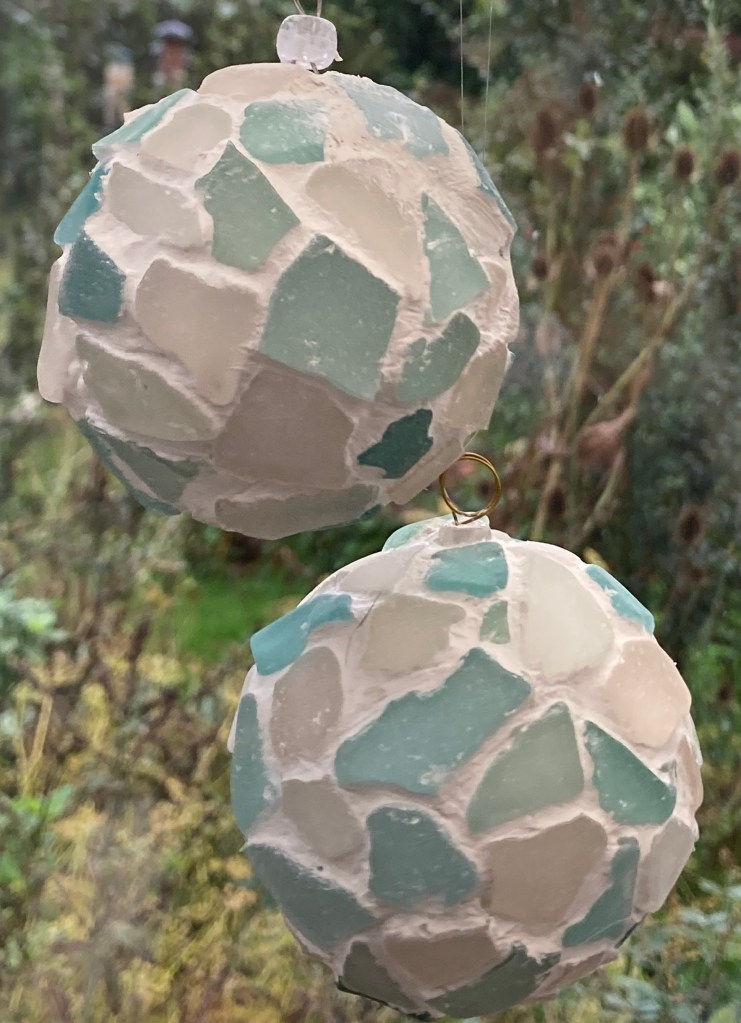
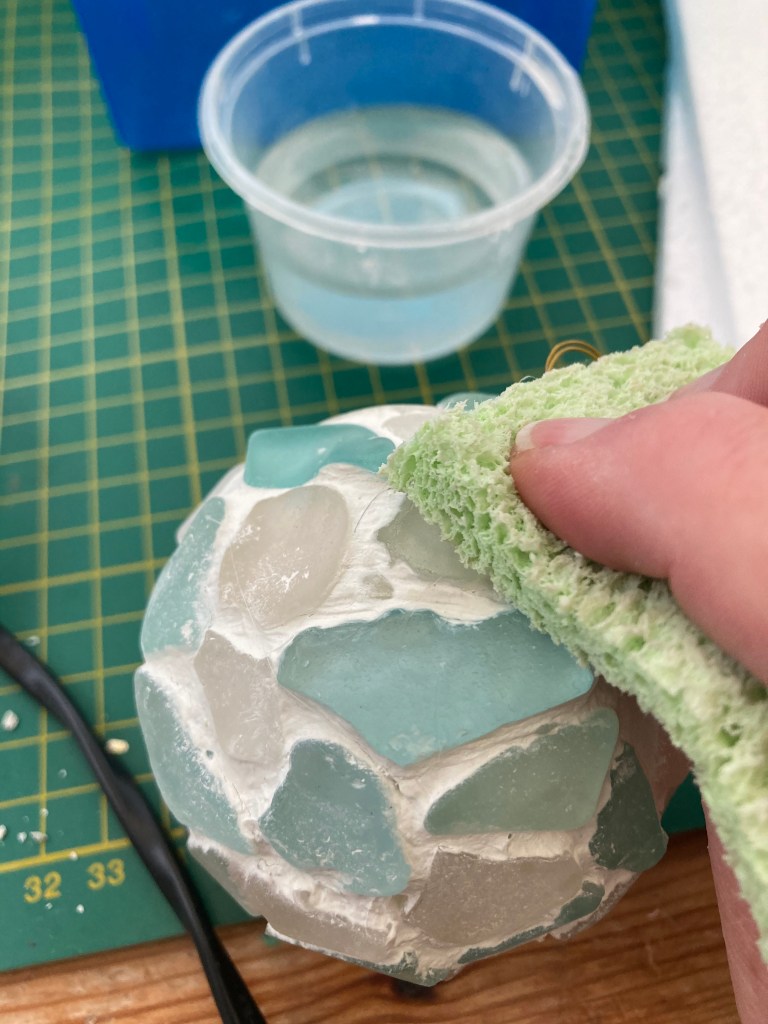
It was soon covered with glass sections. I then mixed up some grout and filled the gaps, pushing it into the spaces with a finger. I allowed this to dry slightly then wiped over the glass with a damp sponge to remove the excess.

Then it was simply a case of adding a hanging thread. You can spray with polyurethane varnish to protect the grouting and give the glass a sheen, or even shine it up with a tiny drop of vegetable oil.

I think this would work even better using a clear plastic base. I’ve see these in craft shops, with a hanging loop incorporated. This would make the whole bauble translucent.

Overall I’m happy with it. It might be a little bit early to think about Christmas decorations, but I can live with that!

Have you started thinking about Christmas decorations or presents yet?

Posted in Uncategorized

Sea Glass Mosaics

A few weeks ago I went on a mosaic course at The Amble Pin Cushion (you can read all about it here).

I realised I had a load of material that I could use for mosaic work. K, who takes the dog for long beach walks (he’s a big dog and needs a lot of exercise) is constantly beach combing and comes home with loads of sea glass, worn fragments of china, shells and pebbles. The best pieces of sea glass are those beautifully rounded translucent pebbles, but it takes years of abrasion from sand and shingle for them to get like that. Most of the pieces are newer and less sea-worn than that, with maybe just the sharp edges worn off and a slight abrasion to the surface.

The main issue here was that the glass pieces were all of different thicknesses – I tried to select flat ones of similar thickness. I drew around the old coasters I was covering and arranged the pieces on the template, leaving slight gaps in between. I used my newly purchased glass and tile cutters to make a few of the pieces fit. Most of what I had was colourless, – I wanted a green and white colour palette but had very little green glass. I raided my nail polish collection (I have a ridiculous amount of nail polish and am a bit obsessed with my nails). I painted the back of some of the glass pieces with different shades of green polish. I was really pleased with this – you could not tell the difference between the green glass, which comes in different shades of green, and the painted ones.

I painted the old coasters with white acrylic paint so the original design didn’t show through. When it was dry, I applied a thick coat of PVA glue, let it go tacky, then added another coat. When this started to dry I transferred the glass pieced and such them on the coaster – the thick glue was to allow for any differences in thickness: Thicker pieces were pressed fully into the glue, thinner ones, presser more lightly to get as uniform surface level as possible.

When the glue dried, I mixed up some grout and filled the gaps and edges with it, running a finger along each edge to neaten it. You really need to use your fingers to make sure all the crevices are filled, which is delightfully messy. Using a damp sponge, I gently removed as much grout as I could grout from the surface of the glass pieces before it dried and repeated to remove any residue after it had fully hardened.

I love my finished coaster! They are not perfectly flat, but are ideal for chunky coffee mugs (maybe less so for delicate champagne flutes!)

I’m going to try a few more and use some of the china fragments.

It’s been great to find something absorbing to do to take my mind off these troubled times. Have you been trying any new crafts and hobbies while we have to stay at home?