Posted in Uncategorized

Knit-a-Long Baby Blanket: Week 15 (Final Instalment)

After a bit of a delay, because Christmas and New Year have been hectic, here is the final part of the pattern – sorry if you’ve been waiting for it. My fault! Yvonne was on time as usual but I got caught up in other things and neglected the blog. Anyway, hope you had a lovely Festive Season and hoping that all of you have a fabulous 2024.

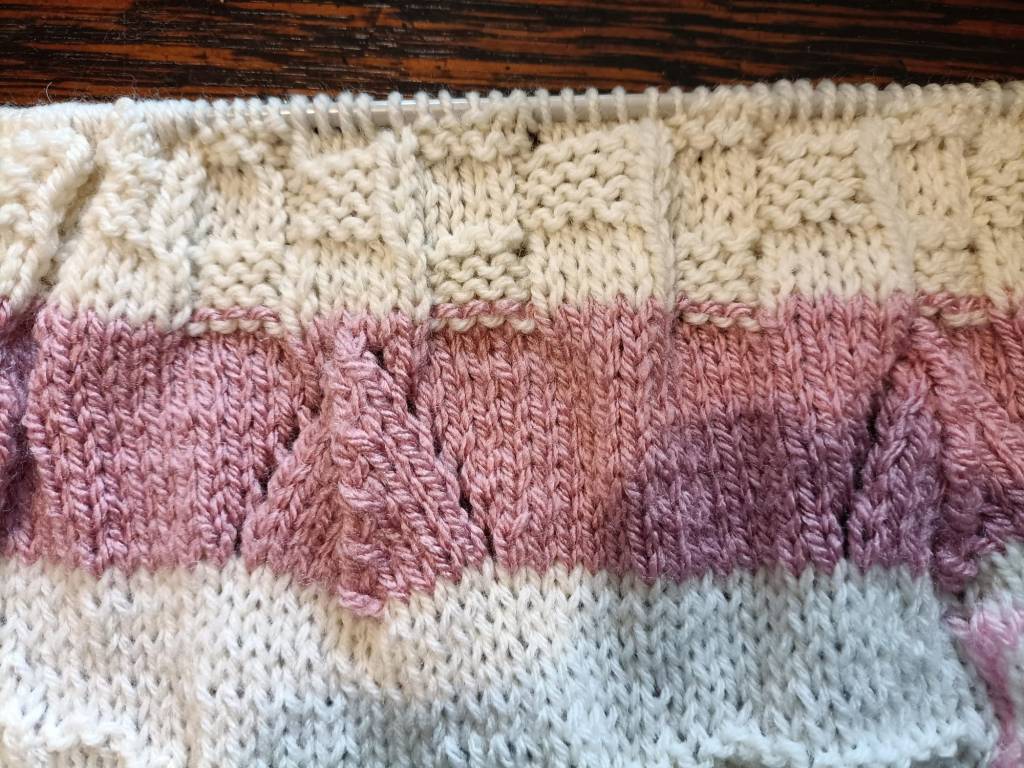
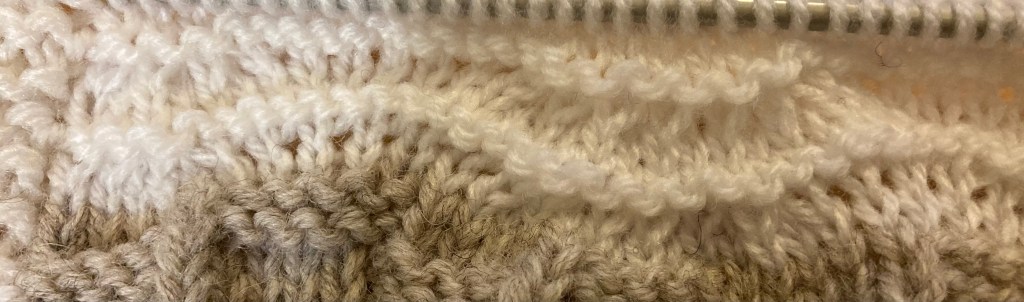
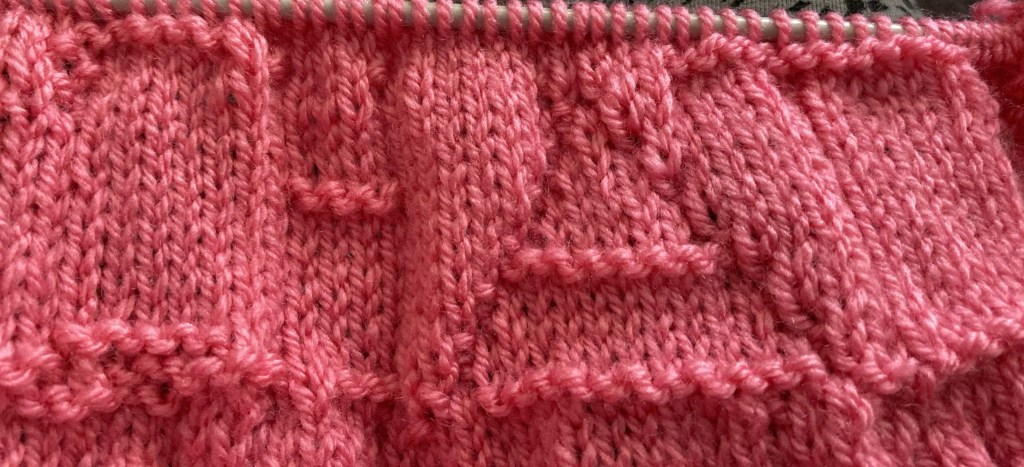
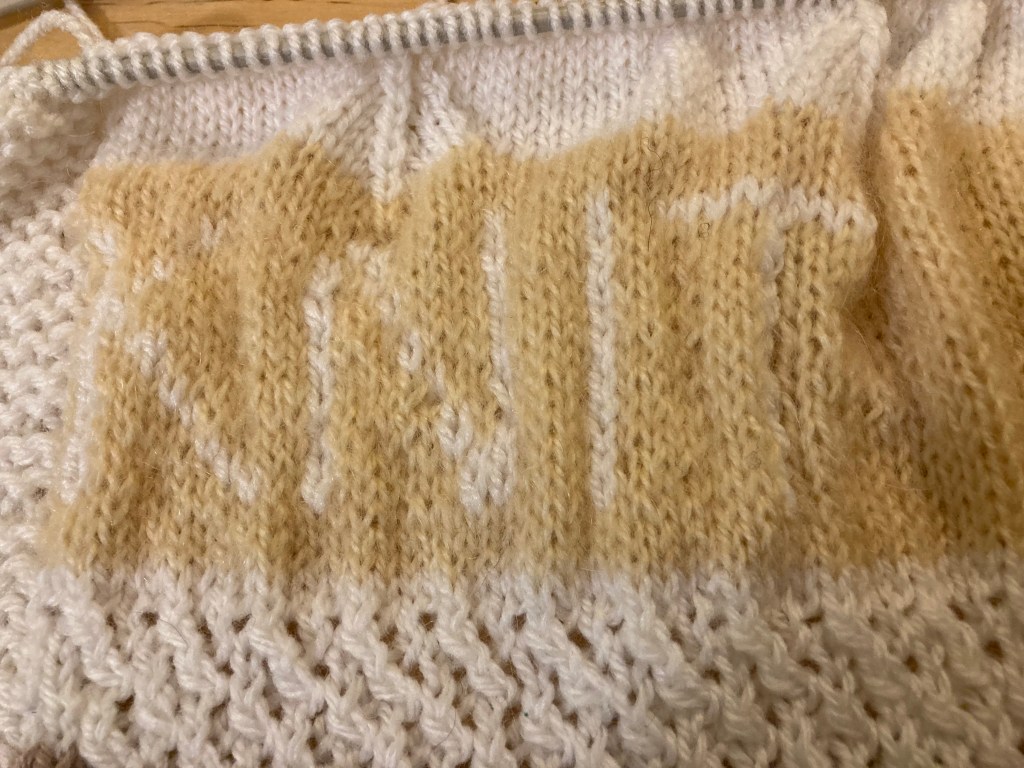
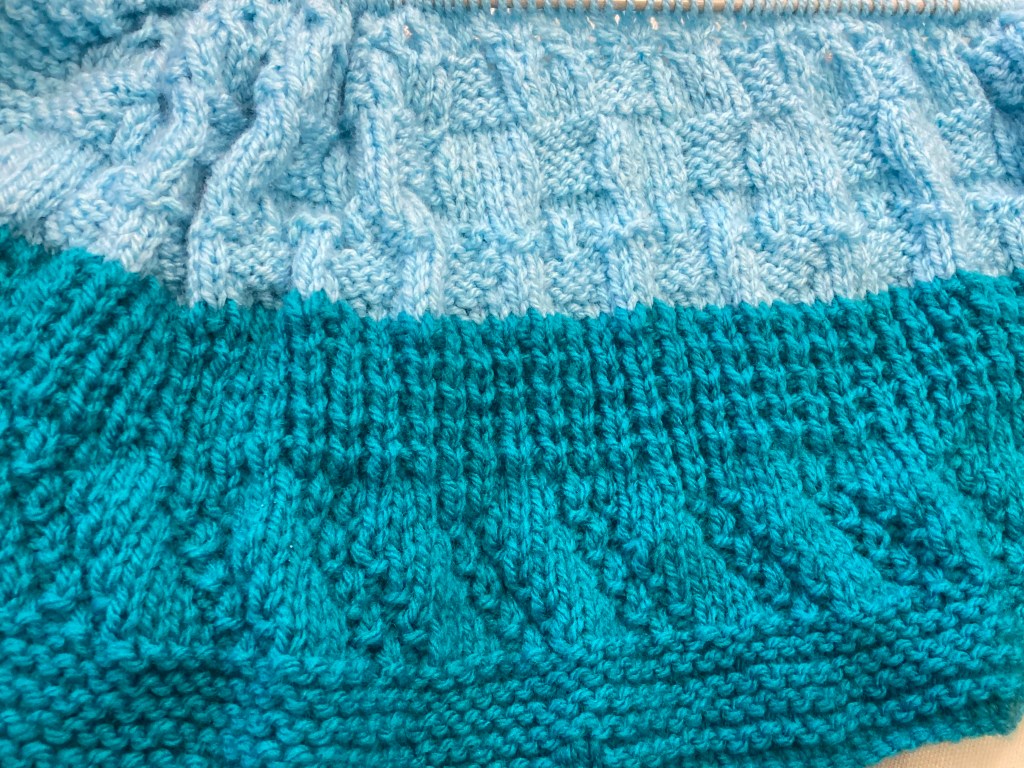
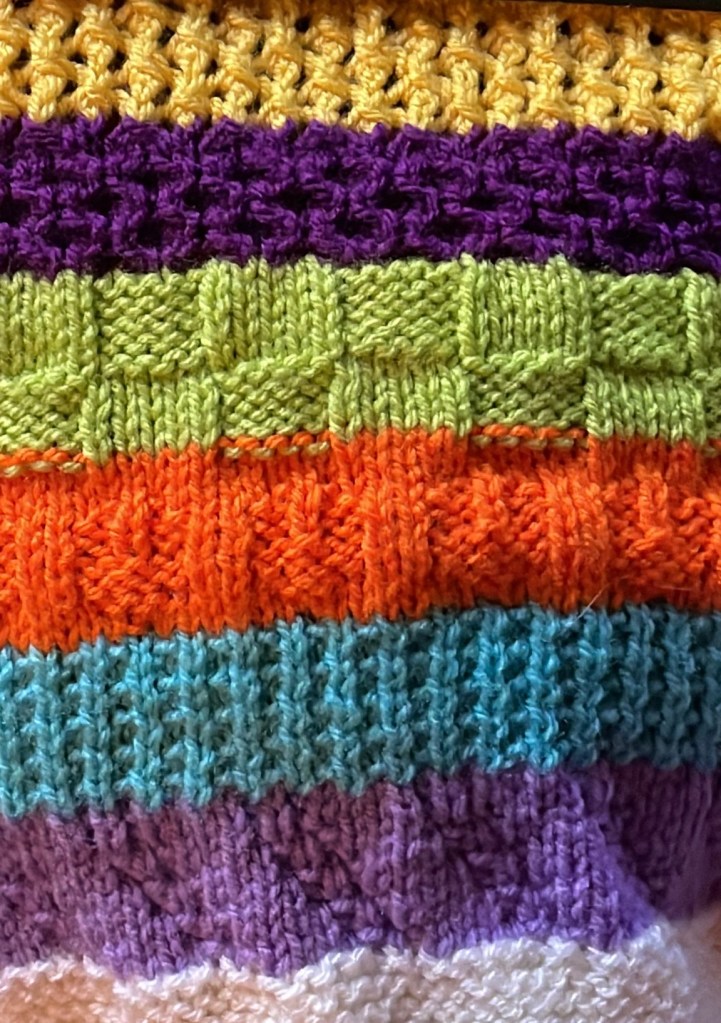
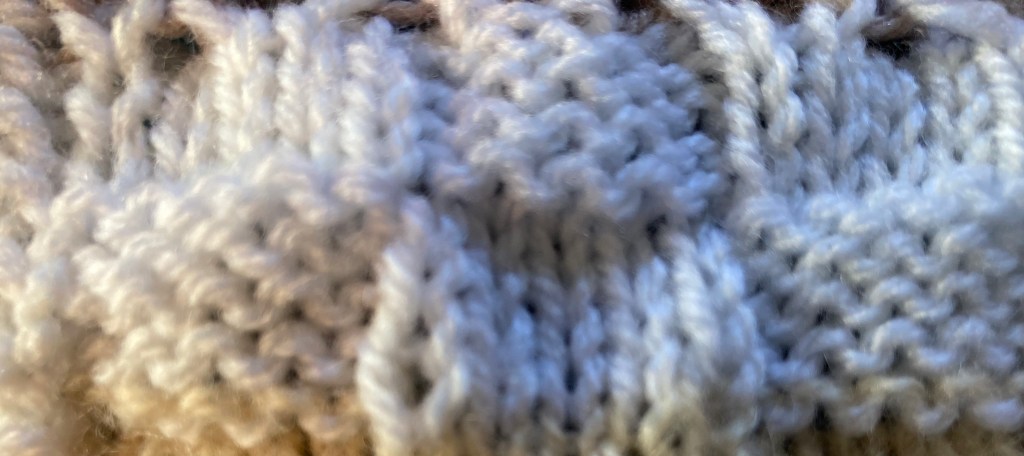
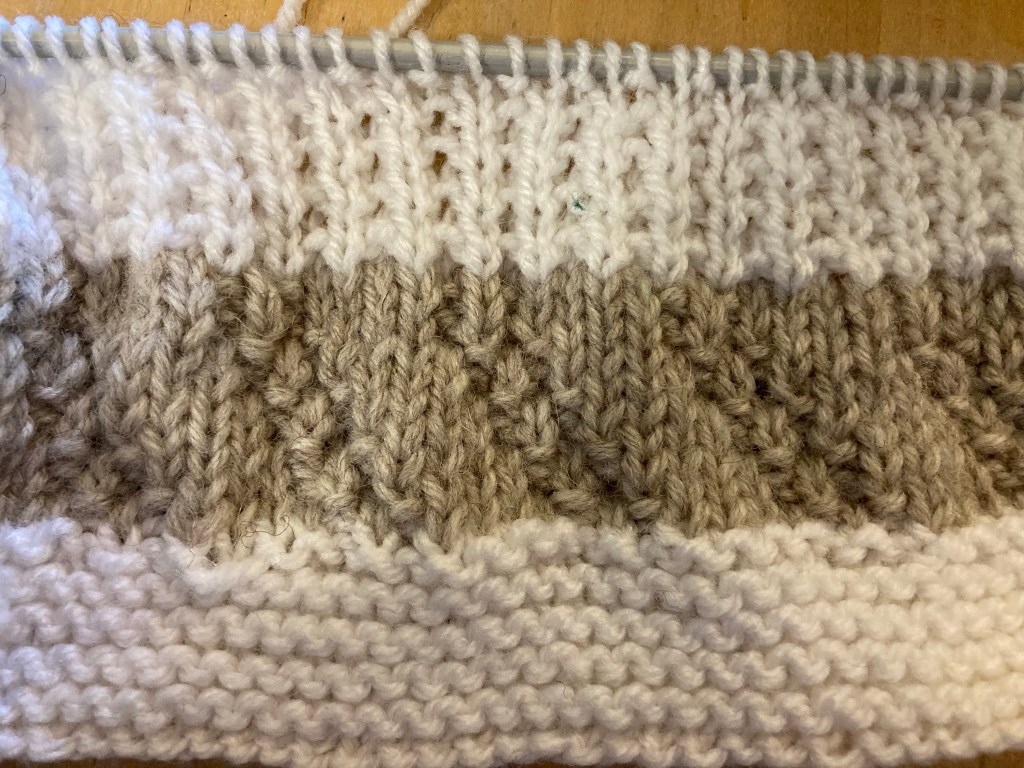
If you remember, the previous section was a checkerboard design of alternating plain and purl blocks of 3 stitches and 3 rows.

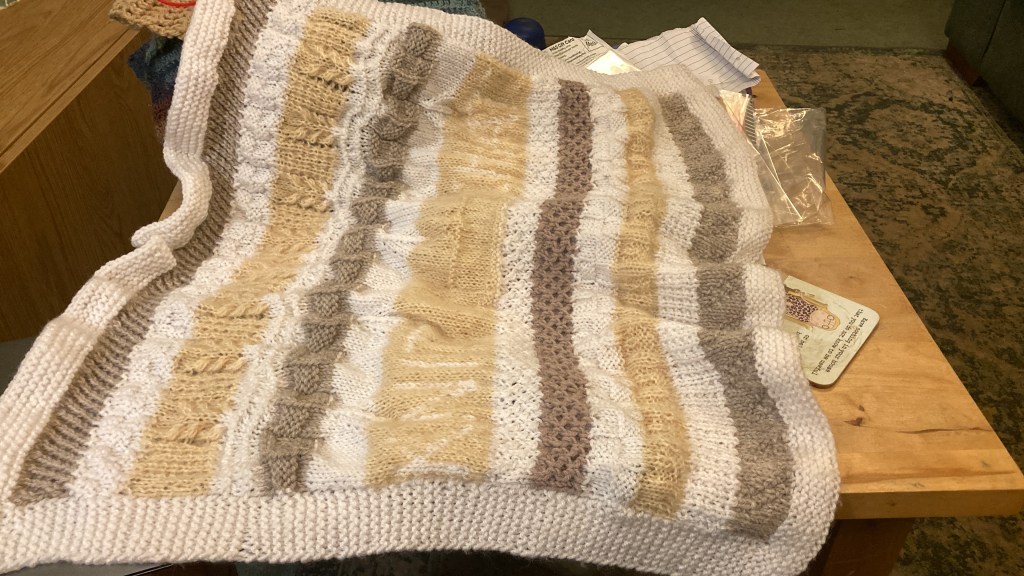
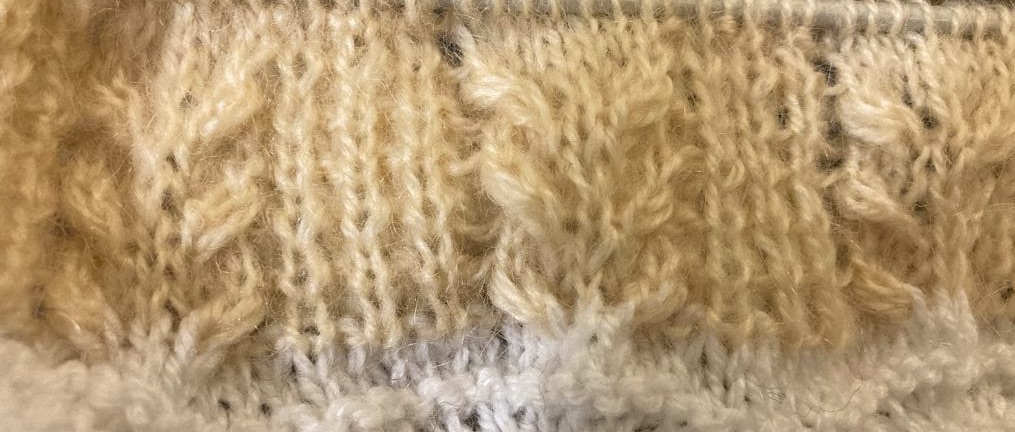
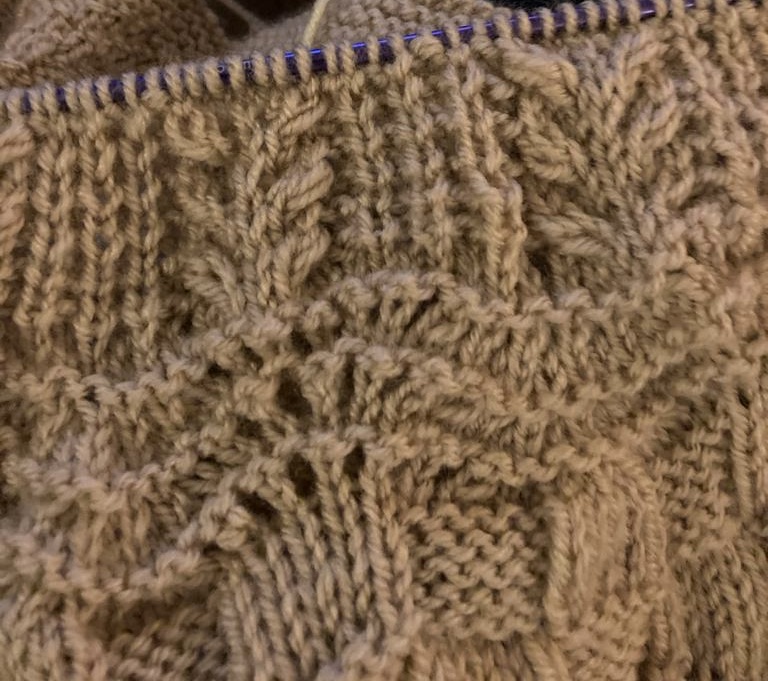
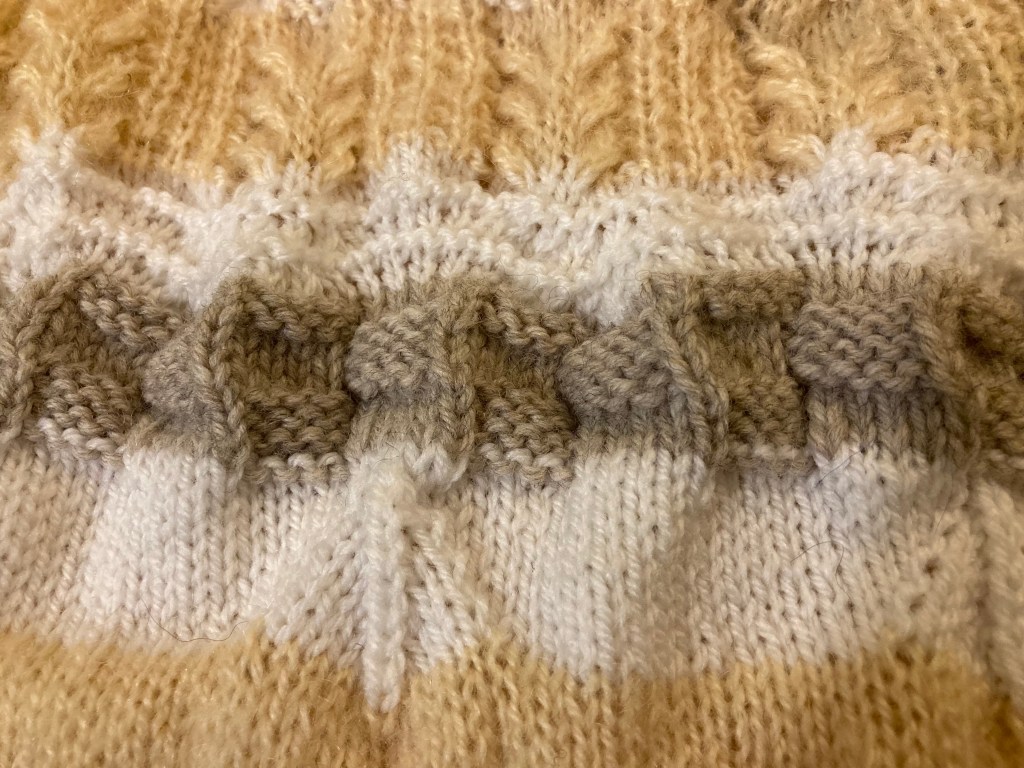
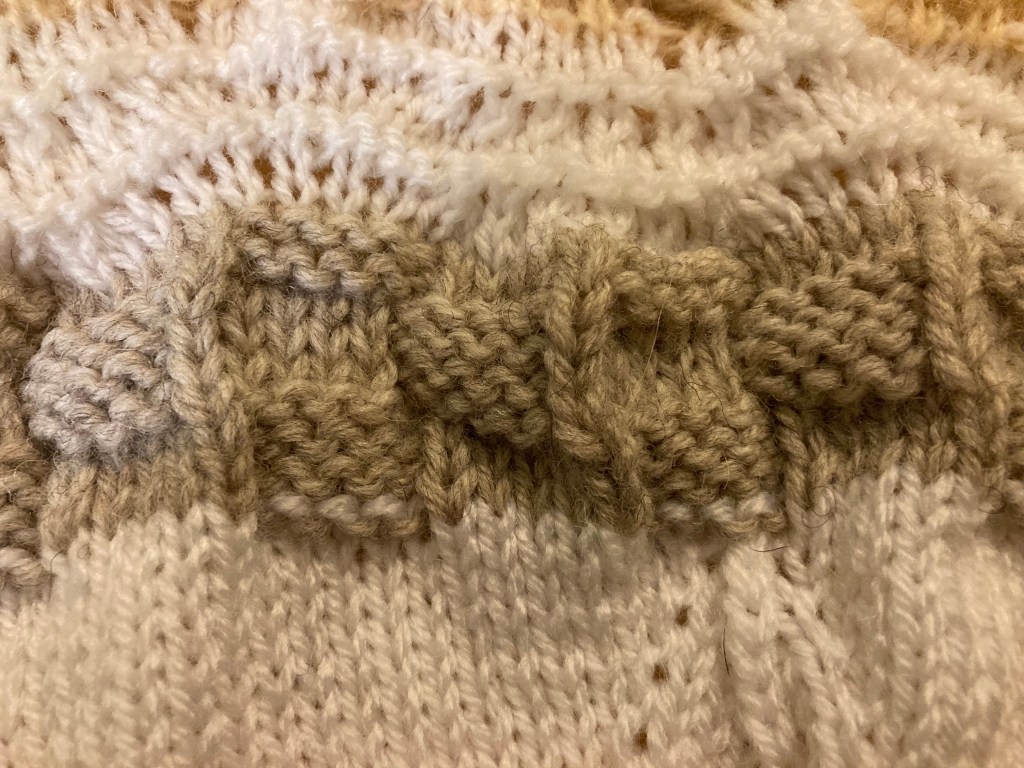
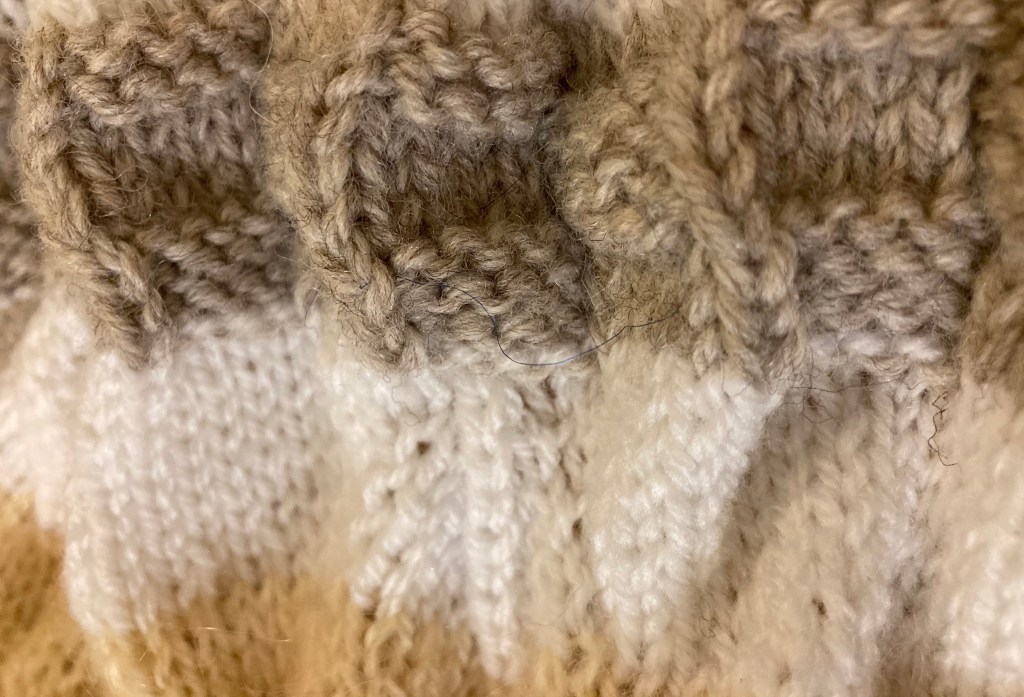
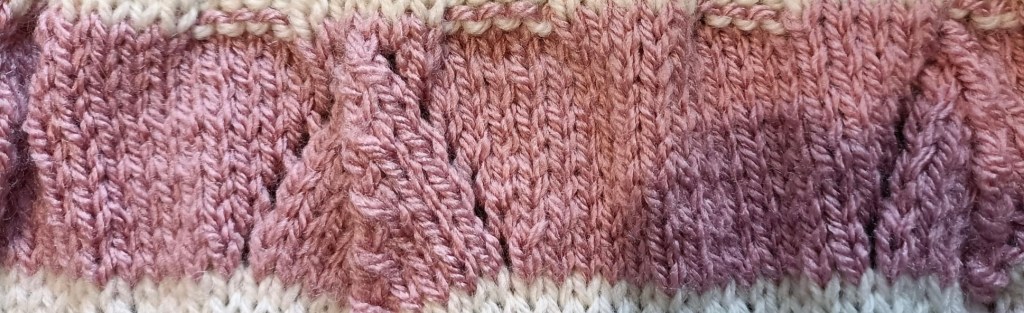
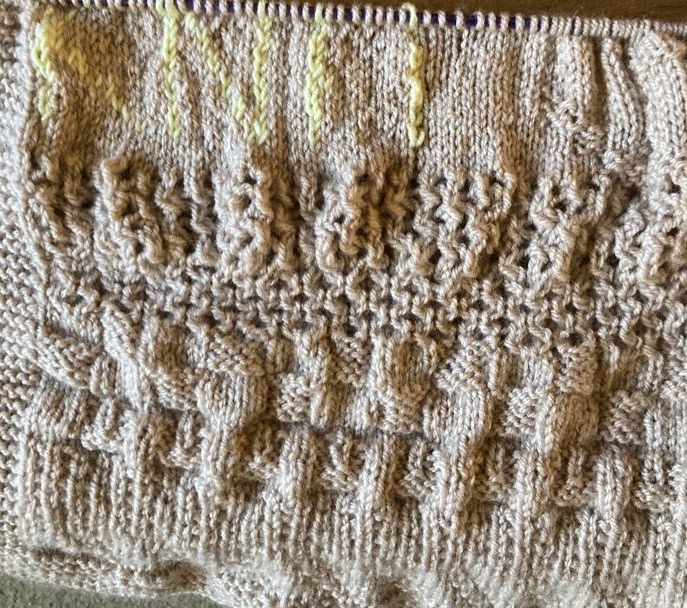
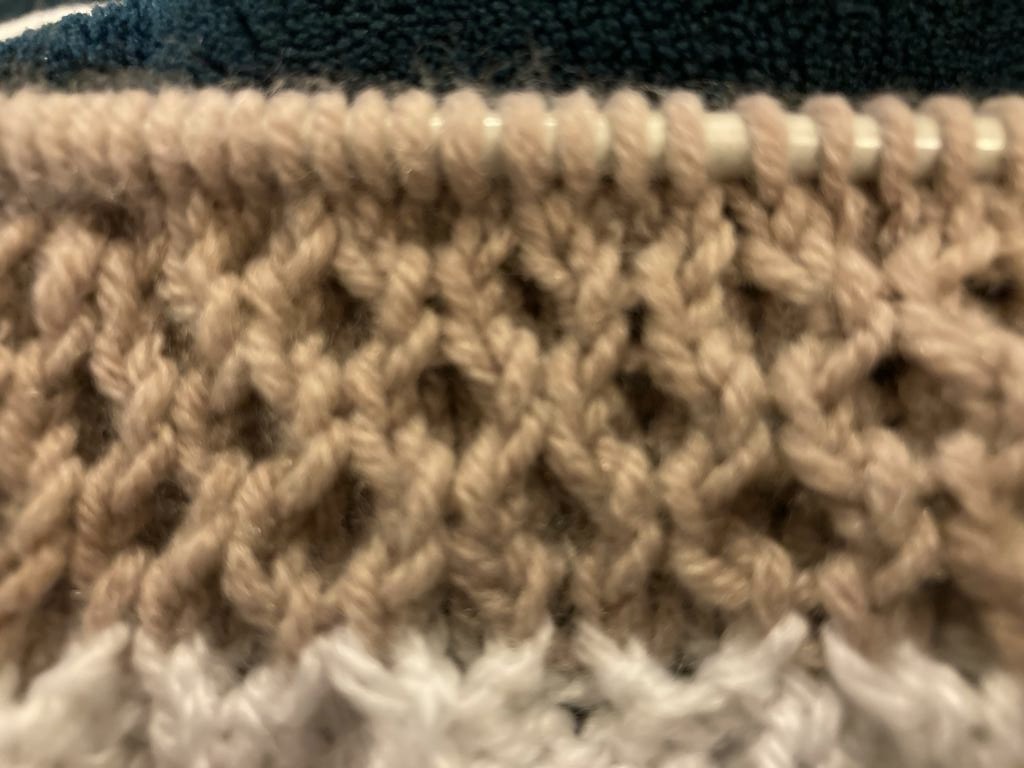
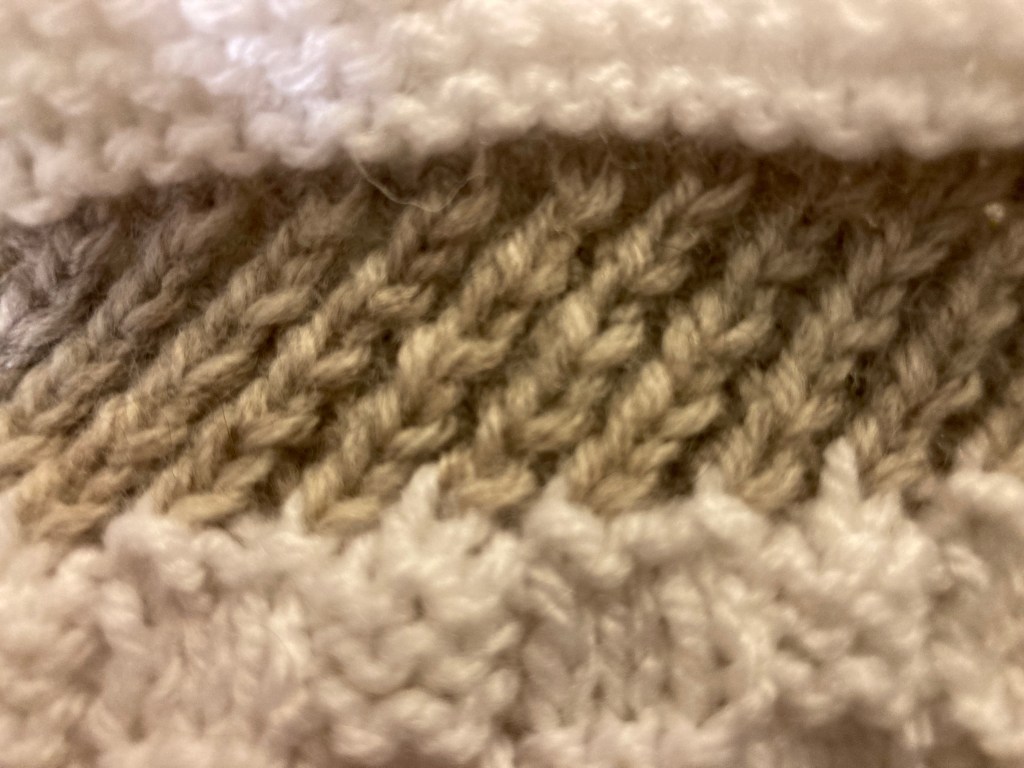
The final strip, before the garter stitch border looks rather like a diagonal rib.(see photo at top of post)

Yvonne writes,”I know you’ve all been waiting for the next instalment of our baby blanket and the final pattern which is pretty straightforward I think but we will see. So here we go…”

Week 15

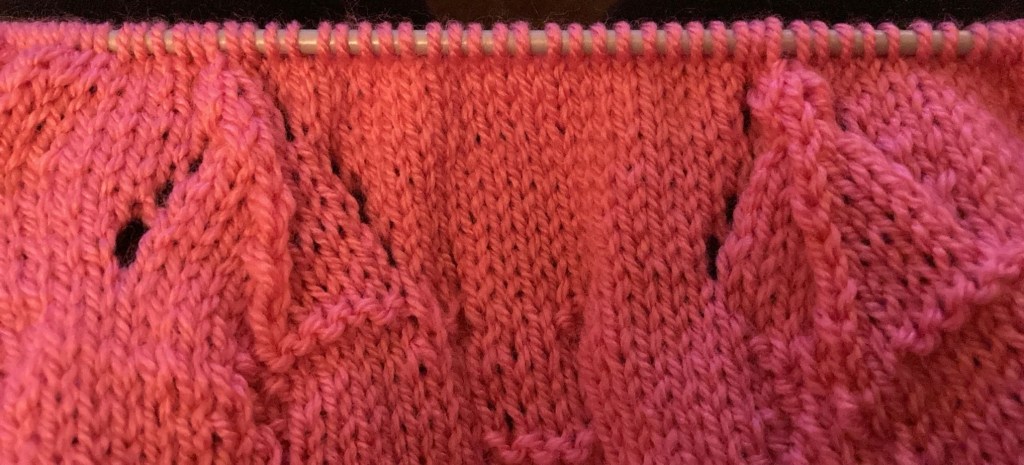
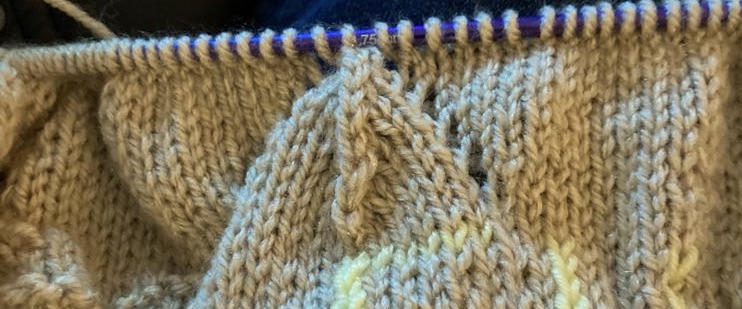
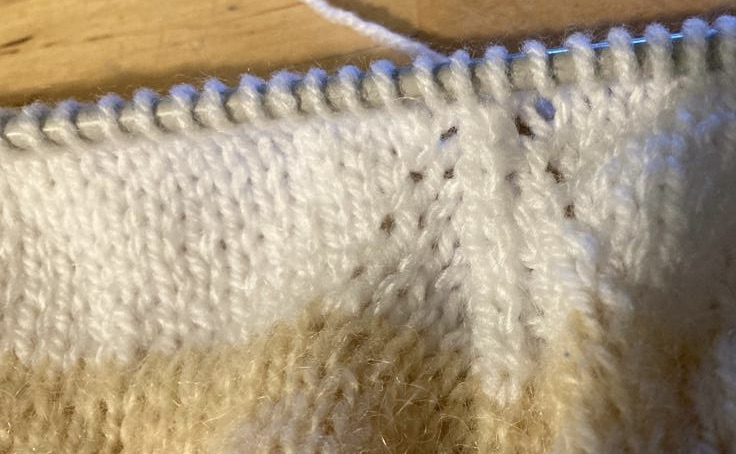
Row 1. Remembering the edge sts, then K1, *K2tog but don’t slip the sts off and K into first st again and slip both off together, repeat to end of the row.
Row 2. And all wrong side rows P.
Row 3. K2tog, and K into first st again slipping both off together to last st K1.
Repeat rows 1 and 3 with P rows in between and then first two rows again until 10 rows have been completed.

When you have completed the pattern finish with your 10 rows of garter stitch to finish your blanket. Cast off, sew in ends and you’re all done.

Yvonne adds, “I have really enjoyed doing this blanket with you all and hope you have too and also learned something new along the way. Thanks guys for attempting to do this and I know it hasn’t been easy so well done to you all.”

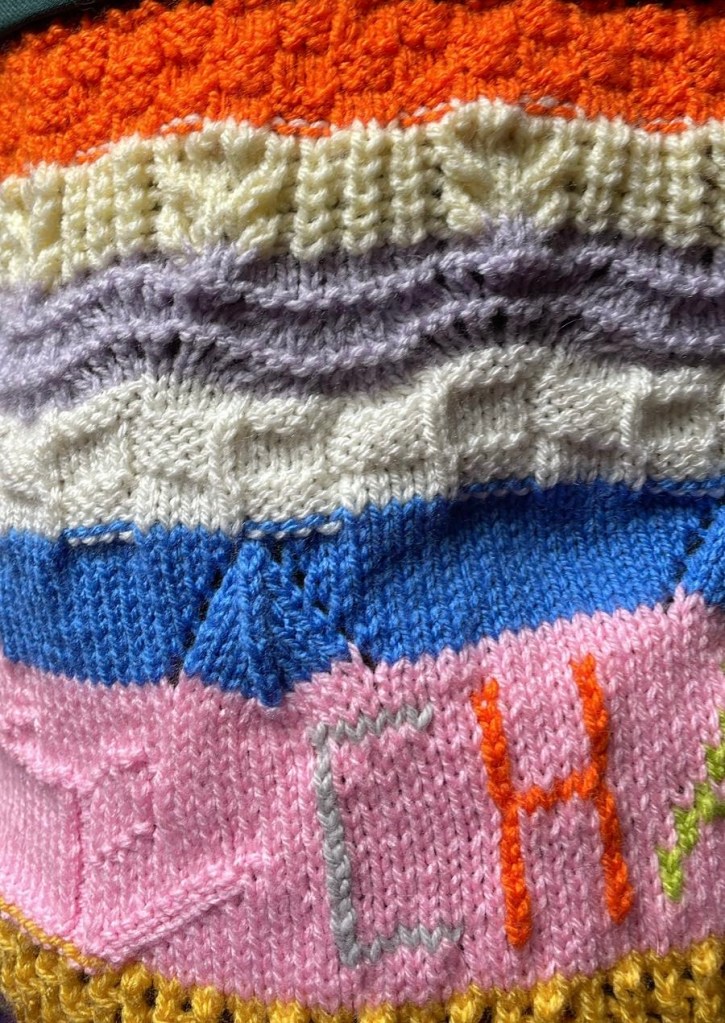
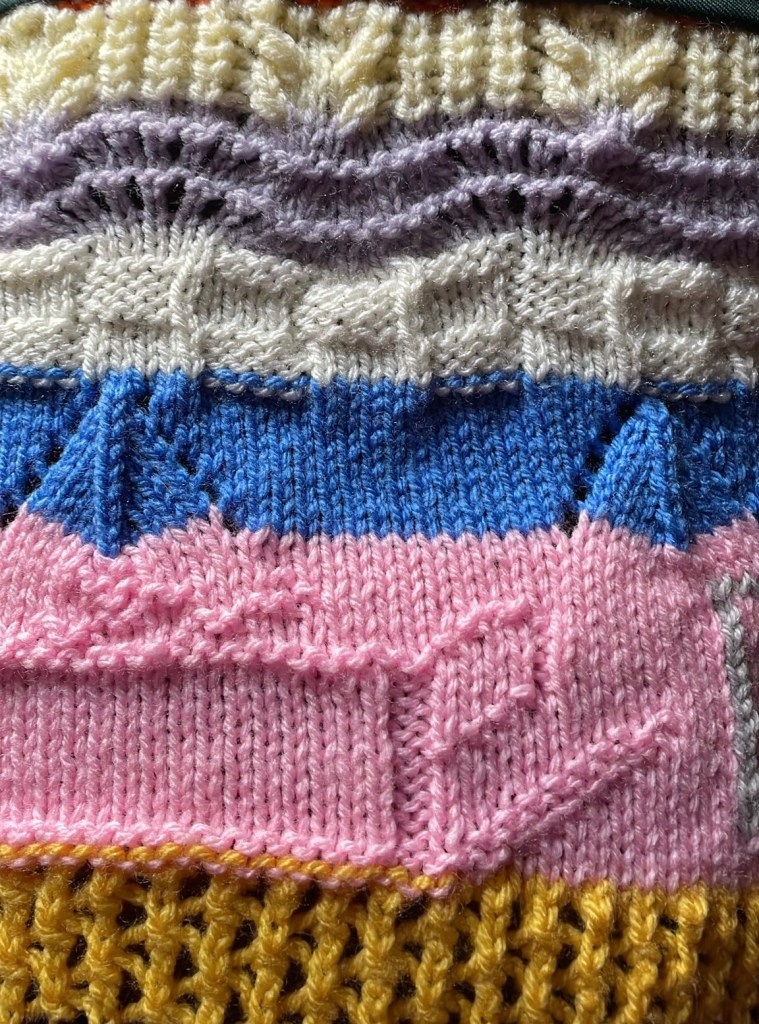
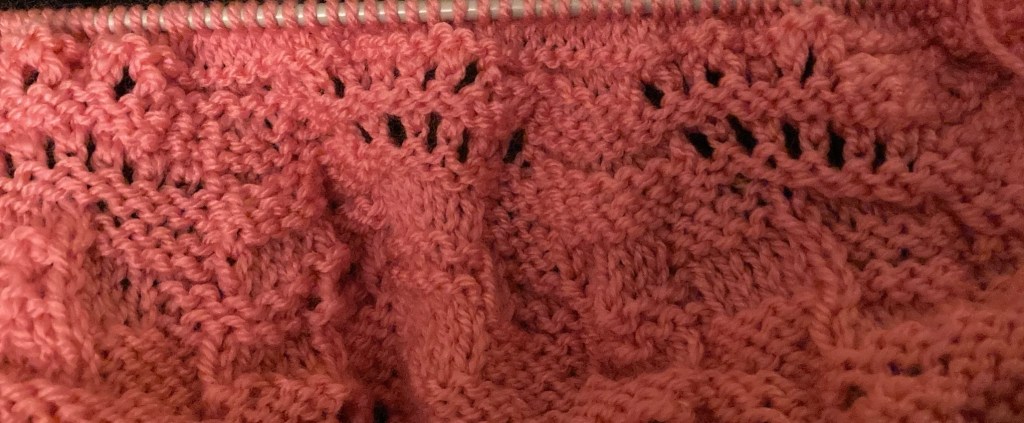
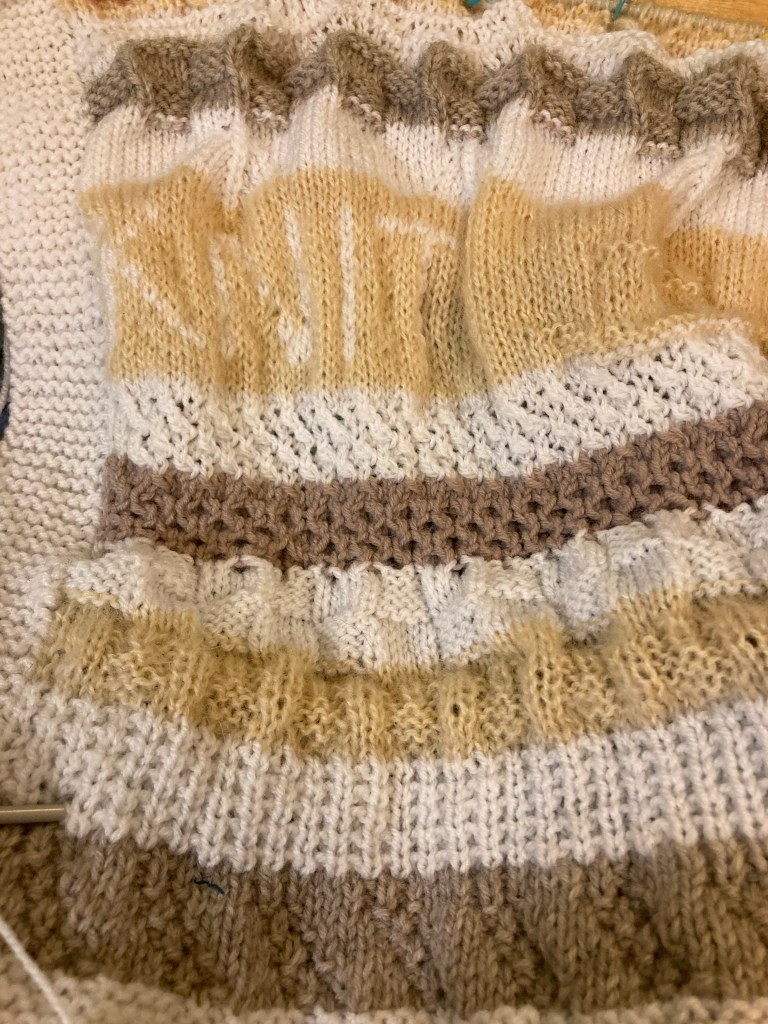
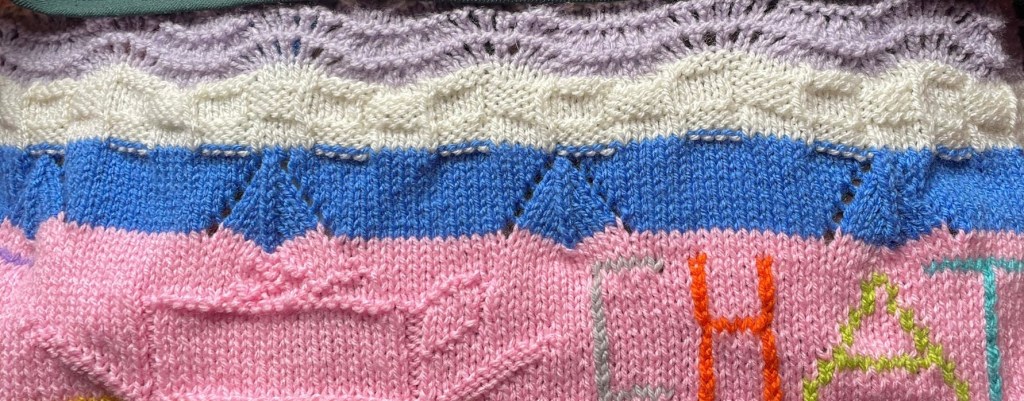
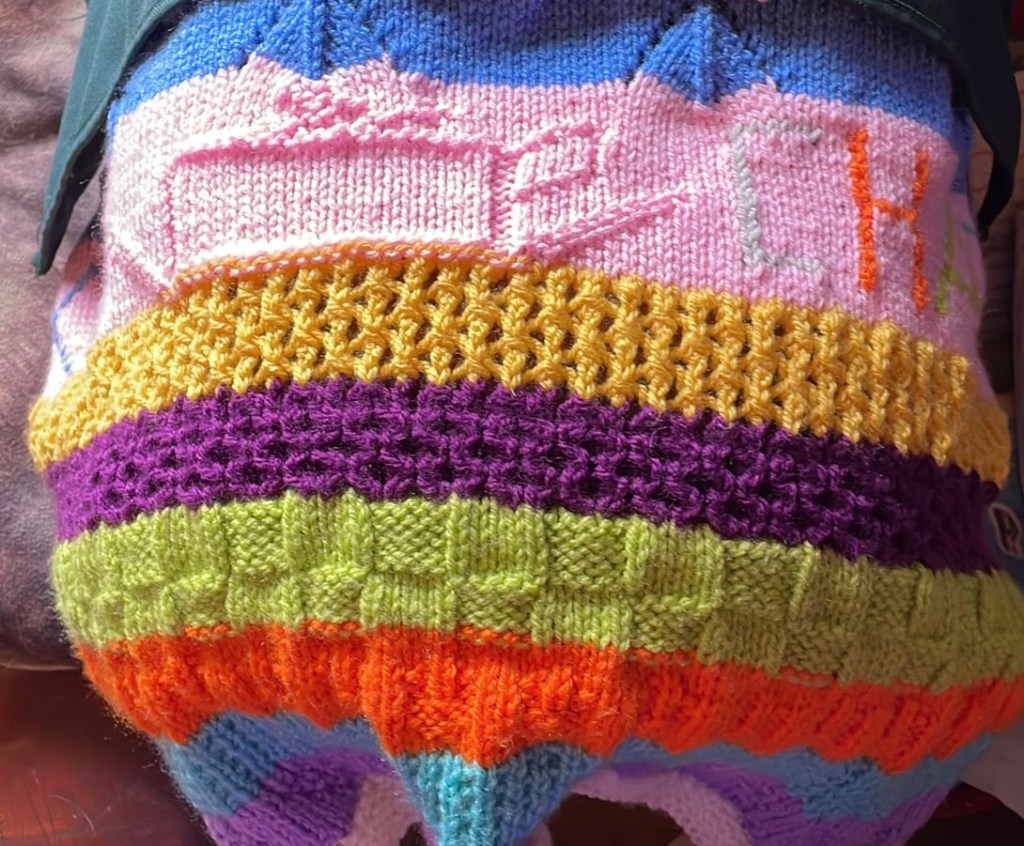
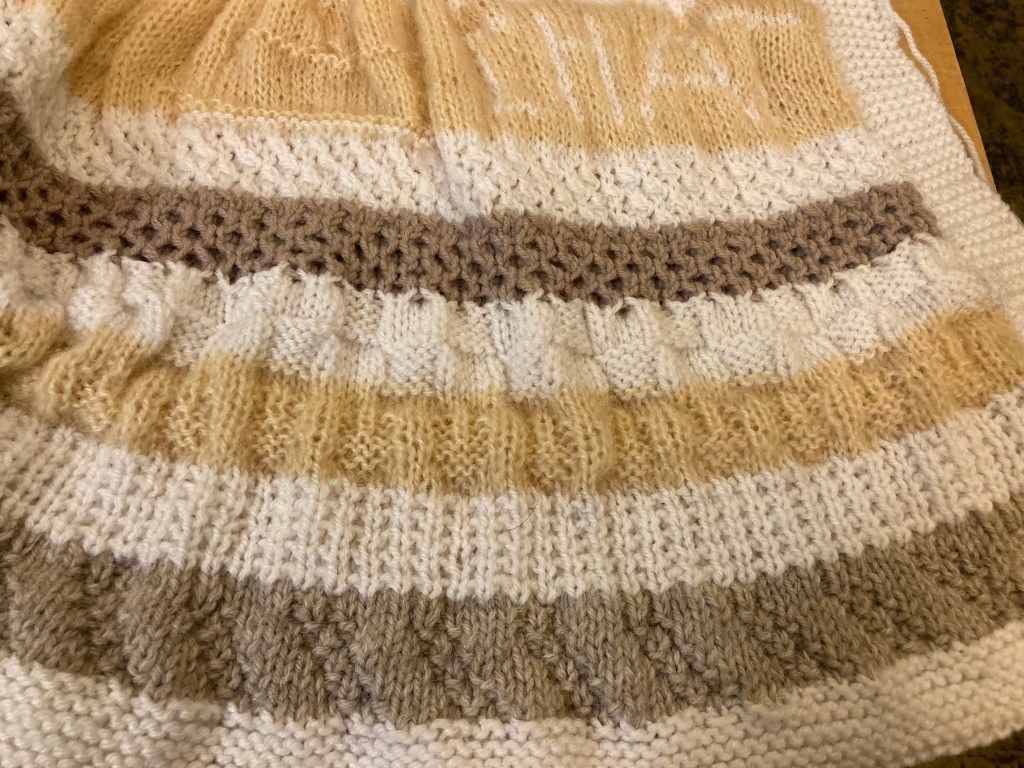
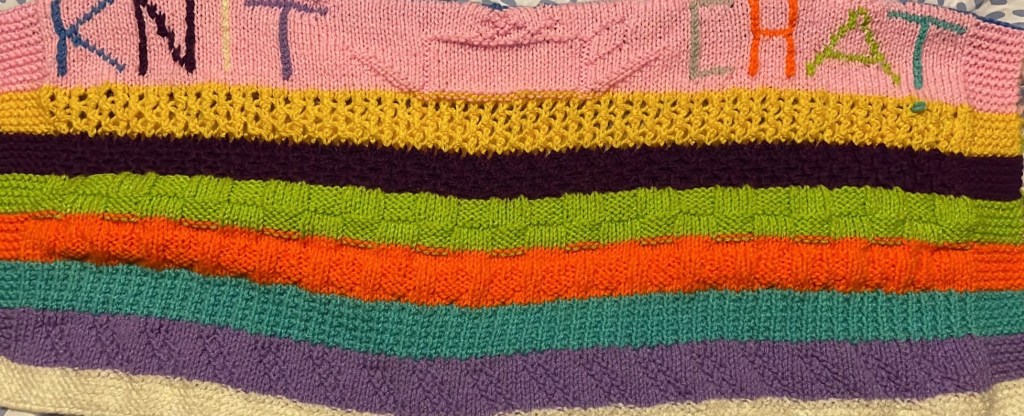
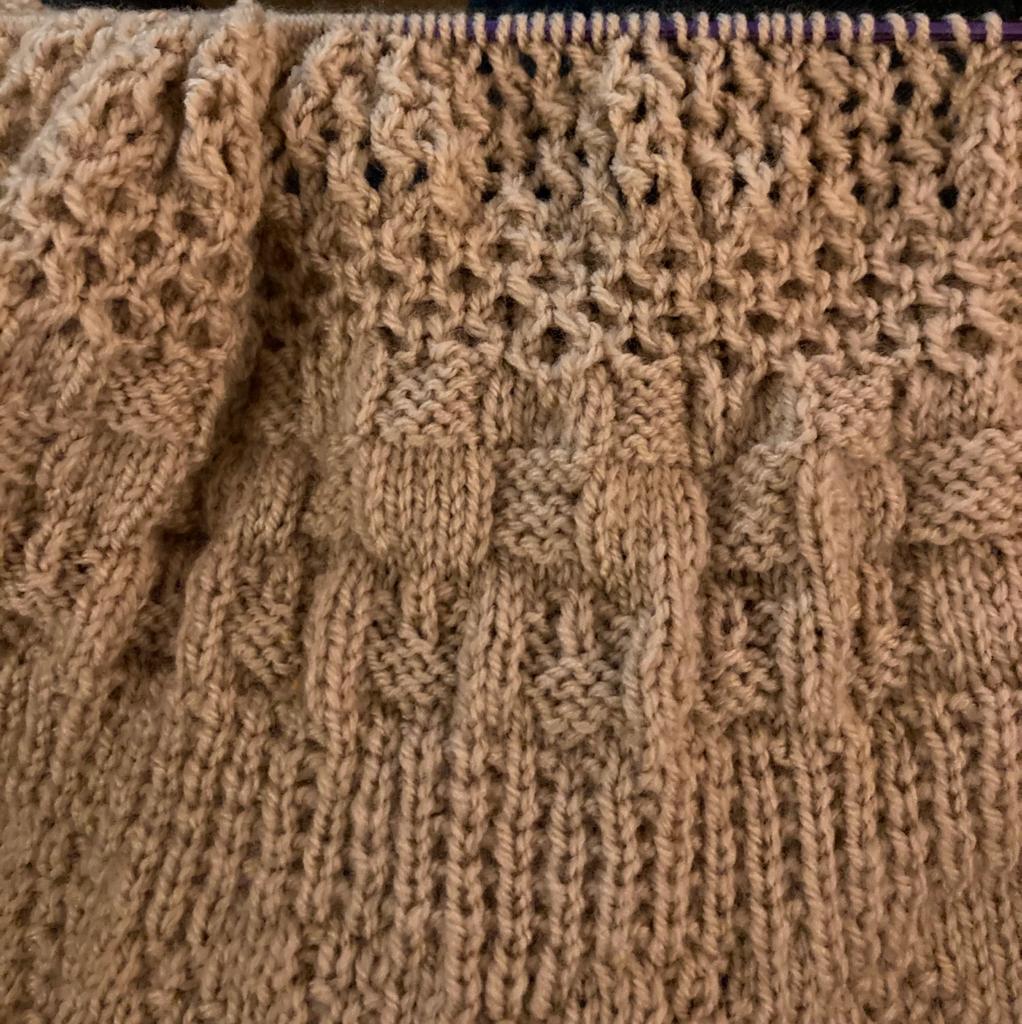
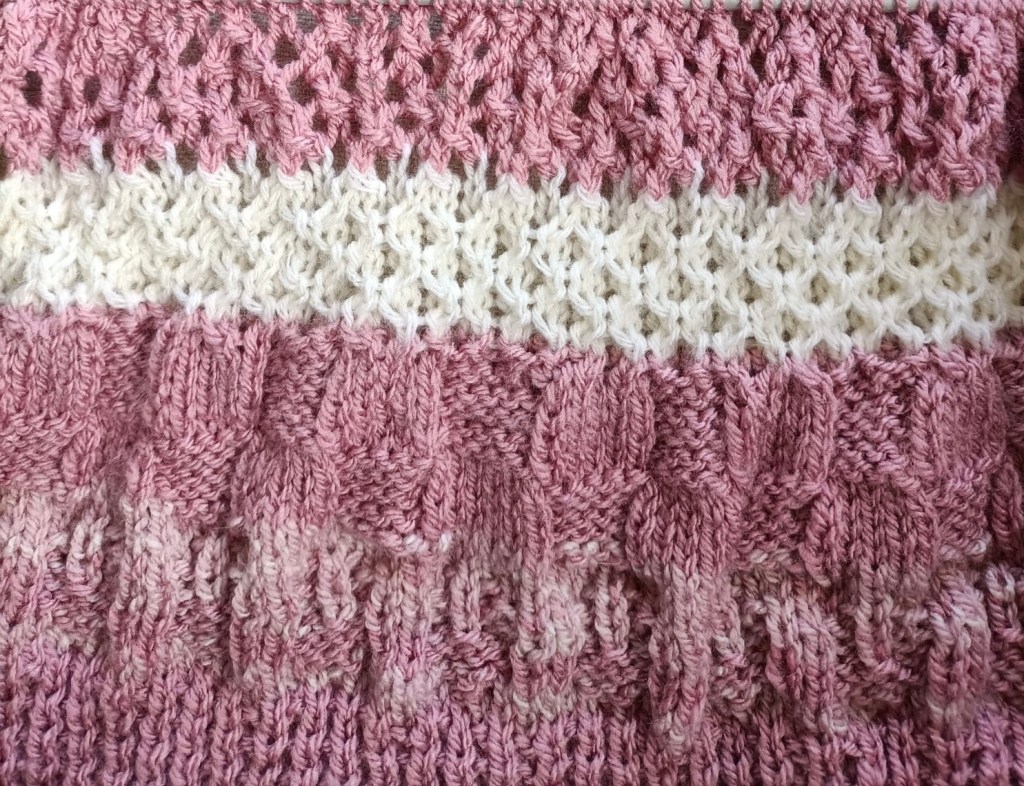
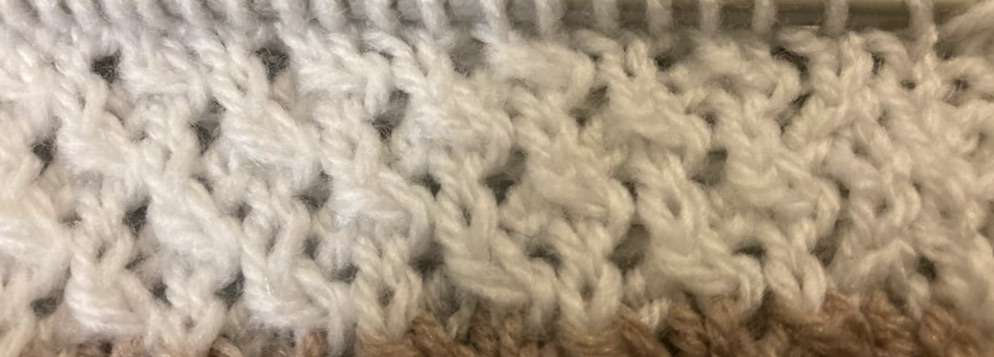
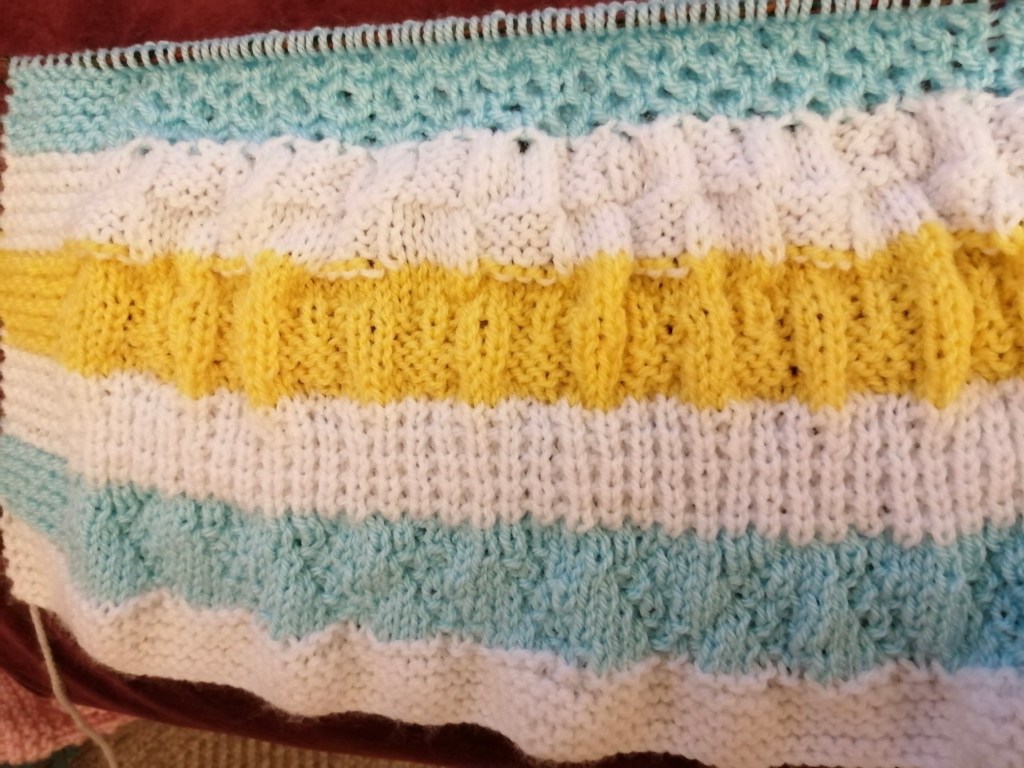
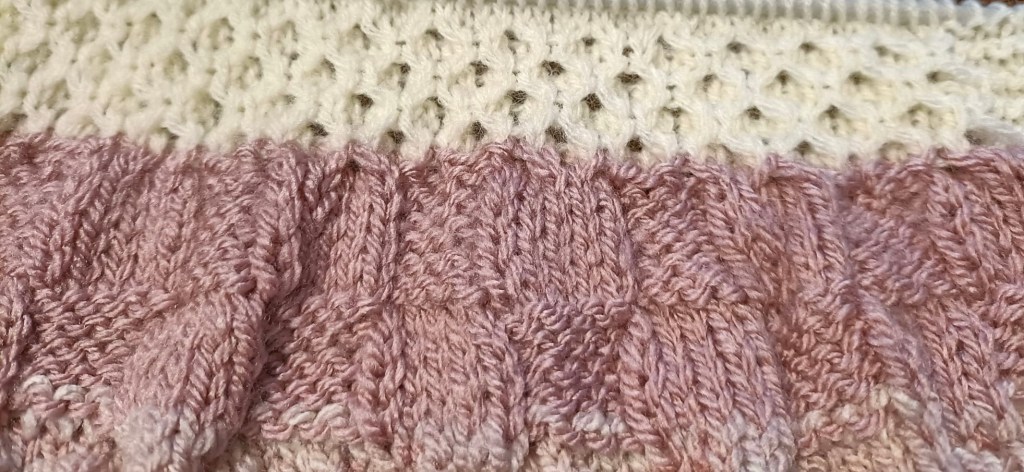
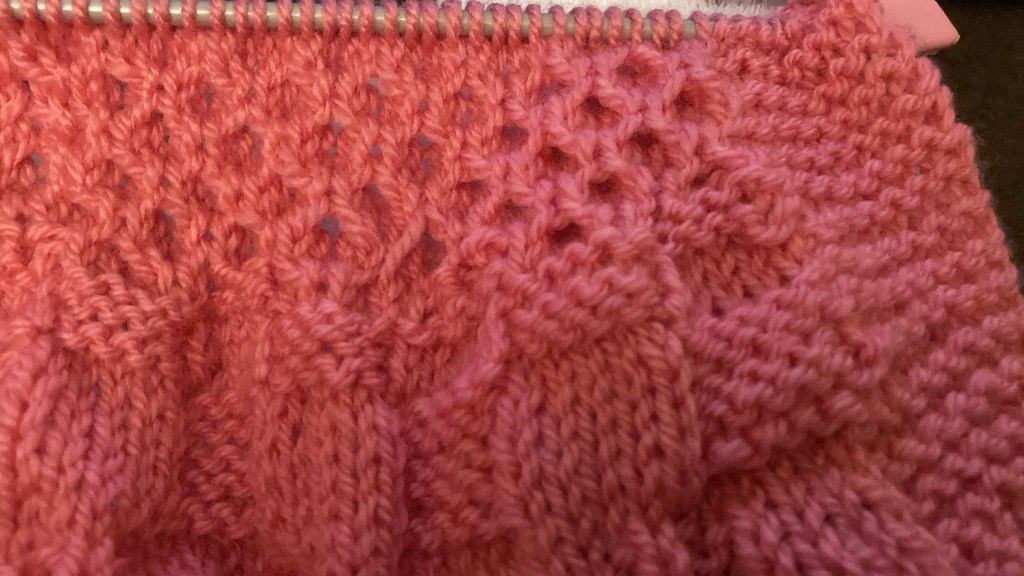
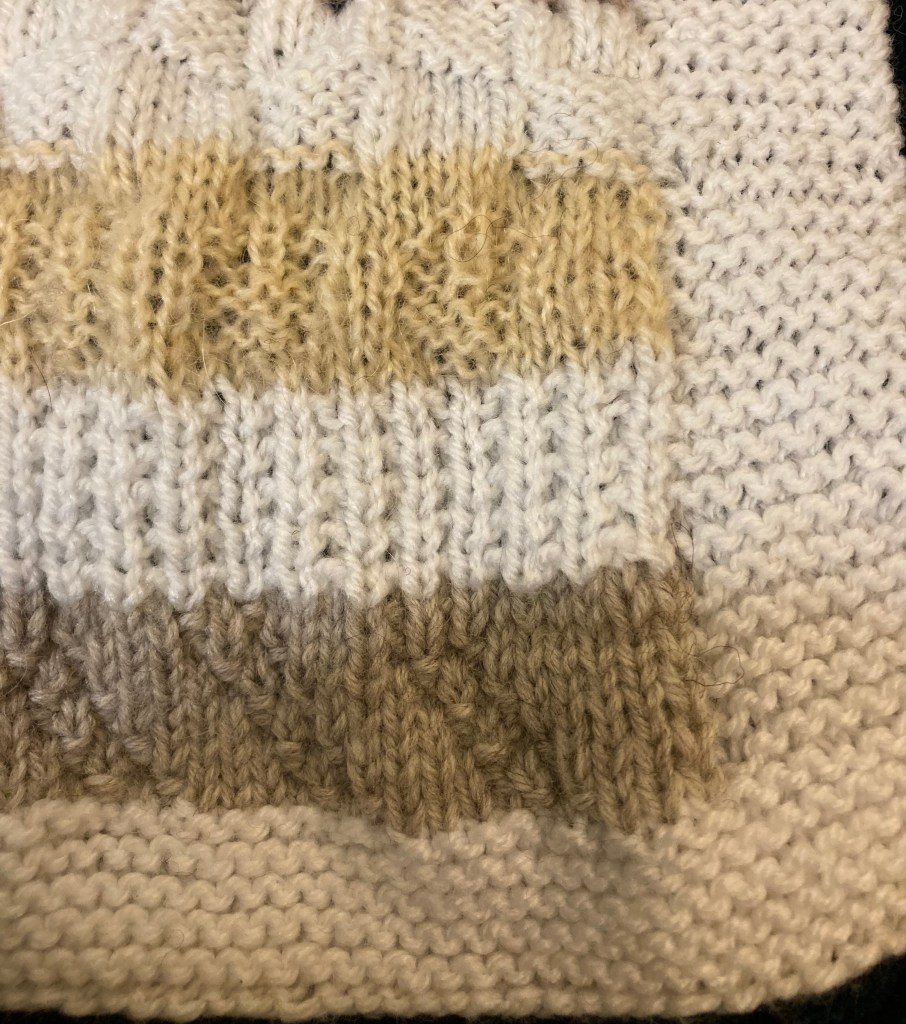
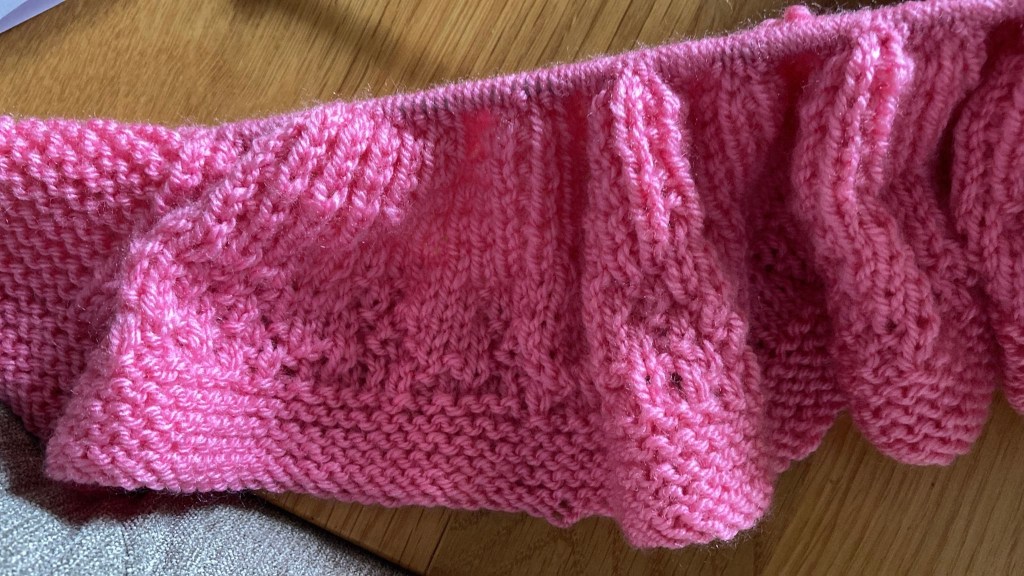
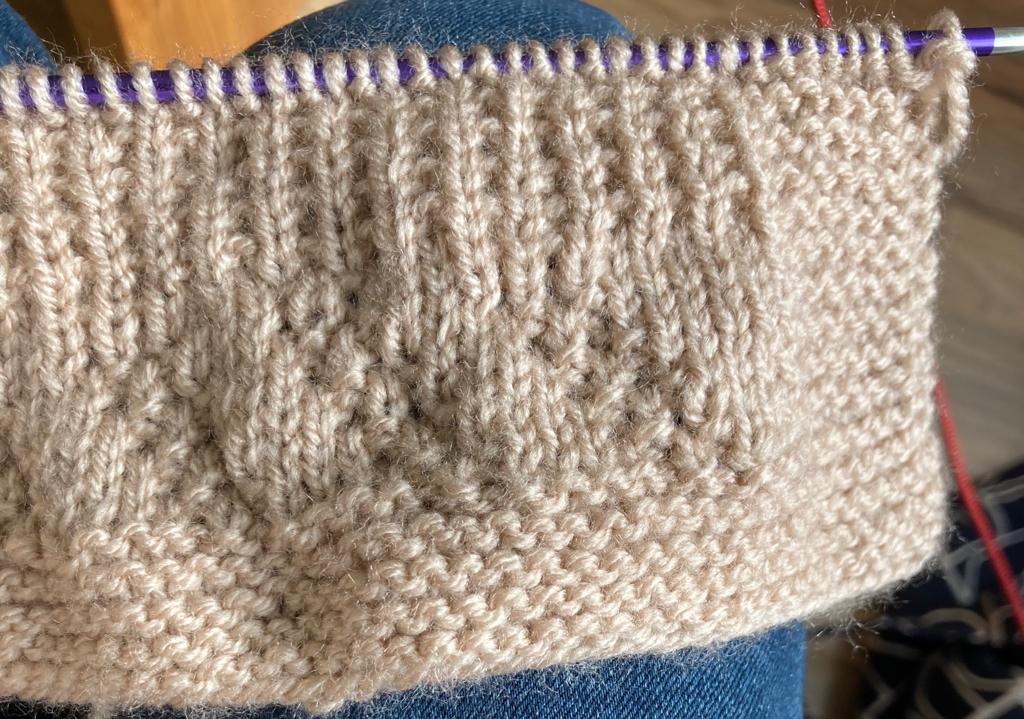
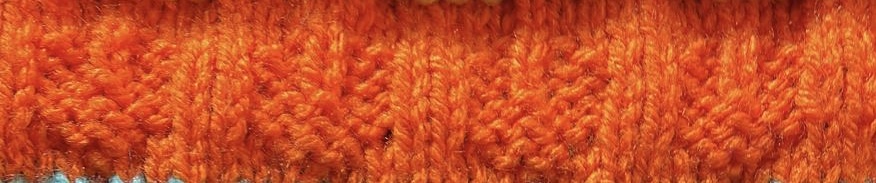
I’d like to thank Yvonne on behalf of all of us for creating this project – we’ve all had a blast doing it and we love how they all turned out. It really took us out of comfort zones to try some challenging new stitches. Here are some of the results, from A, L and R respectively

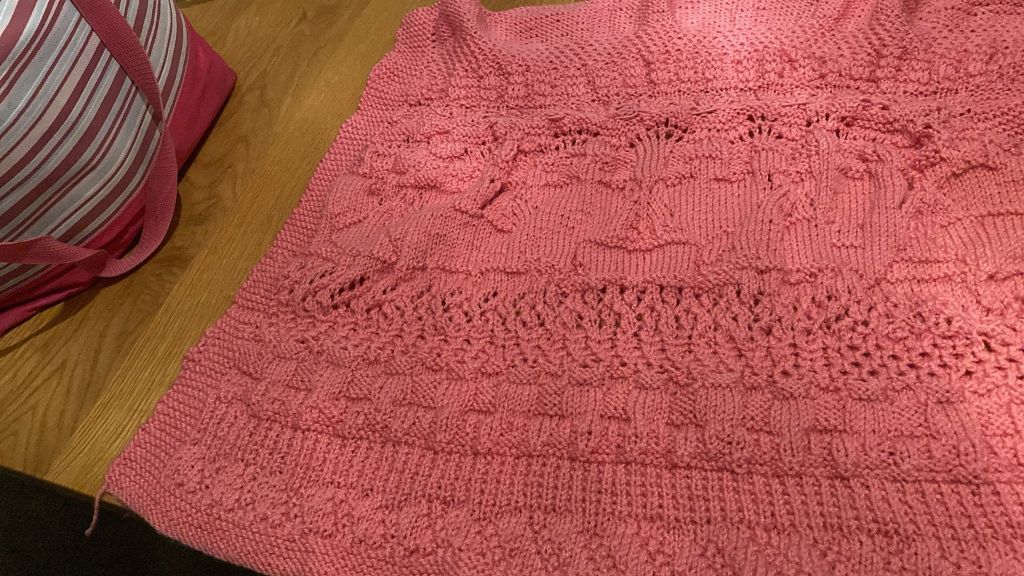
It’s been very strange not to be knitting the blanket and comparing notes every week in our little knit and natter group.

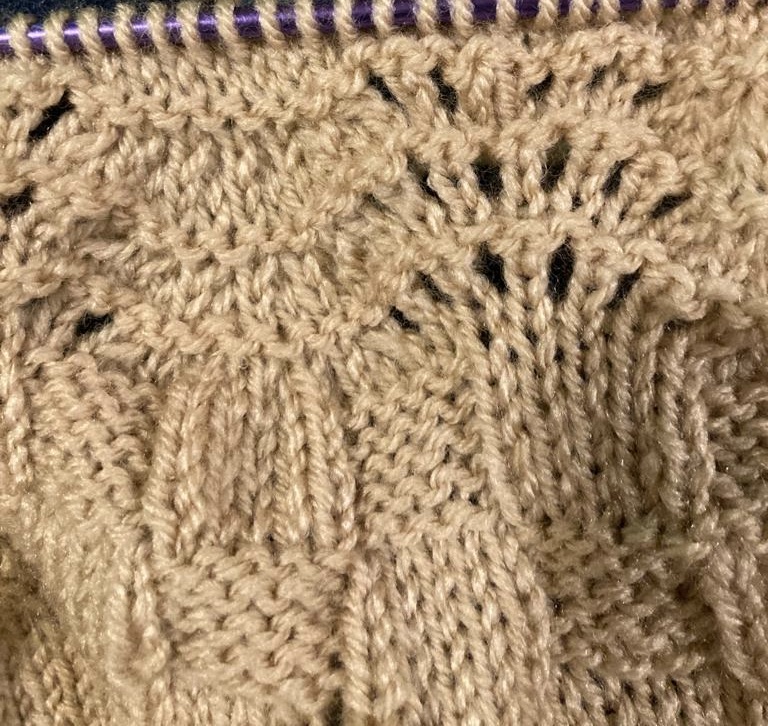
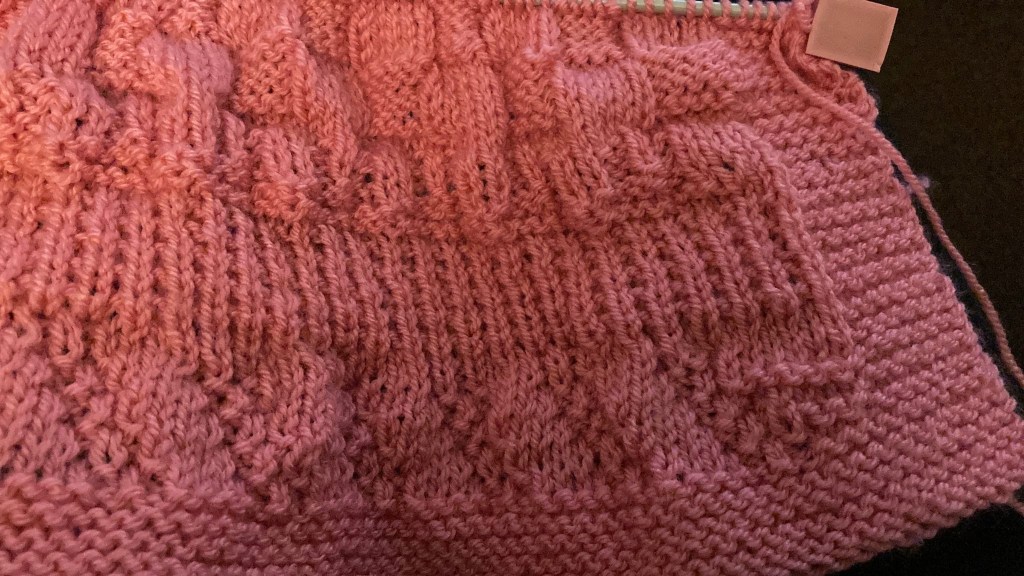
Here’s my finished blanket – I’m going to block it. A labour of love like this deserves the time it takes to finish it properly…and I got a blocking mat for Christmas!

Posted in Uncategorized

Knit-A-Long Baby Blanket: Week 14

Not long now and the blankets will be complete. it’s been fun watching them grow and trying out all the different patterns that Yvonne has sent us. Some have been more challenging than others and last week’s was no exception.

The pattern repeat was over 14 stitches (alternating panels of 7 stitches each, one of which used cable technique to make a gorgeous leaf design. Both panels had increases and decreases, so I used stitch markers between each group of 14 stitches to keep track of the pattern repeat. Here are some of our attempts at the Week 13 design. Once I got the hang of it I really enjoyed it and knitted a few more rows with a pale peachy yellow..

Avril’s fawn coloured blanket is looking great.

And now it’s time for the next one!

Yvonne writes,”Hi guys, I bet you’re all glad that unlucky 13 has been and gone so we will have an easy week this week. It’s a small basket weave so there should be no problems. 
So here we go.

Week 14

Row 1. K3, P3, repeat to last 5 sts K3,P2.
Row 2. K2, P3, (K3, P3,) to end.
Row 3. Repeat row 1.
Row 4. P2, K3, (P3, K3,) to end.
Row 5. P3, K3, repeat to last 5sts P3,K2.
Row 6. As row 4.
Row 7, 8, 9, as rows 1, 2, 3.
Row 10. As row 4.


Pretty easy so relax and enjoy and until next week. Happy knitting guys,

Yvonne

So that’s pretty straightforward as Yvonne says – a basketweave or checkerboard pattern of alternating plain and purl blocks of 3 stitches and 3 rows.

Not long to go now! Keep sending in the photos!

Posted in Uncategorized

Knit-A-Long Baby Blanket: Week 13

This week our KAL designer, Yvonne has given us a beautiful leaf design featuring cables, which you can see at the top of the picture above.

First of all lets look at how we got on with last week’s pattern (Yvonne chose a lavender shade for her prototype blanket

L’s was in pink

A loved hers so much she did extra rows

My colour scheme meant this section was in white on my version.

This week’s pattern looks quite complicated at first, but we’ve had a go and asked Yvonne lots of questions, so there are some extra hints which we hope will help.

Yvonne writes,”Hi guys I hope you all managed last week’s waves and may I suggest that the pattern is read carefully especially this week, as it’s a bit tricky again. I think it looks beautiful and is usually worked on larger scale and done like a basket weave pattern meaning the blocks are alternating but we are only doing 10 rows so no need to worry.”

“The pattern is sometimes called leaf stitch and consists of alternating panels of 7 stitches, one set of panels includes twists and in this version cable needles are used to achieve this. Within the four rows of the pattern each 7 stitch group increases then decreases back to 7.”

Week 13

Abbreviations for this week are:-
YO yarn over
SlP slip 1 st purlwise 
K3 tog  knit 3 together 
Tbl  through back of loop
K2tog knit 2 together 

Remember that you begin with a total 141 stitches (including the 8 stitch border at the edges) – so the pattern is worked over the 125 stitches between those garter stitch borders.

Row 1. K3, *(YO, S1P, K1) 3times, YO, S1P, K2, (K1,YO,K1  into next st, K1, (K1,YO,K1) into next st, K2). Repeat from* 8 times, then (YO, S1P, K1) 3 times, YO, S1P, K3.

Row 2. P3, (K2tog, P1) 3 times, K2tog, *P2, slip next 7 sts purlwise, carrying yarn across front (wrong side), P2, (K2tog, P1) 3 times, K2tog, repeat from* 8 times, to last 3 stitches, P3.  

Row 3. K3, *(YO, S1P, K1) 3 times, YO, S1P, Put next 2sts on cable needle leave at back of work K3 tog, K2 from cable needle, K1, put next 3 sts on cable needle leave at front of work, K2, K3tog tbl off cable needle, repeat from * 8 timesto last 10 stitches, (YO, S1P, K1)  3 times,YO, S1P,  K3.


Row 4. P3 , (K2tog, P1) 3 times, K2tog,  *P7, (K2tog, P1) 3 times, K2tog. Repeat from * 8 times to last  3csts P3.


These 4 rows form pattern so repeat 1-4 again.

 
Row 9. K3, *(YO, S1P, K1) rep 3 times YO, S1P, K7, rep from * 8 times, then (YO, S1P, K1) rep 3 times YO, S1P, to last 3 sts K3.


Row 10 as row 4.

That’s all there is to it 
Hope you manage this pattern ok so until next time happy knitting.
Yvonne

I’m enjoying this one very much. After a few issues with the last one I’m reading the pattern and counting very carefully

 A couple of hints that might help: – look out for the asterisks (*) and also, to keep track of the pattern, use stitch markers at * and after every 14 stitches than make up the pattern repeat

Meanwhile the blanket is growing!

Posted in Uncategorized

Knit-a-Long Baby Blanket: Week 12

Before we look at the pattern Yvonne has set us for this week let’s look at how a couple of the blankets are getting on. This is R’s lovely shades of pink blanket -she added a cream accent this week.

…and my blanket, which used fawn yarn for this one, here in close up

Yvonne had explained how this one, if knitted over a bigger area forms pleats like an accordion. You can see this just starting, even over the 10 rows we knitted,

And now for this week.

Yvonne writes, “Hi guys. Hope you’re all well and enjoying this beautiful blanket.”

” This week is another lacy one but it also resembles waves and I expect with the weather we have had these will be less choppy haha! – Not too difficult I hope. We have had the abbreviations before which are 
YO = yarn over the needle
K2tog = knit 2 together 

Here we go.”

Week 12

Row 1. K
Row 2. P
Row 3. *(k2tog) 3 times, (YO, k1) 6 times (k2tog) 3 times. Repeat from * to end
Row 4. K
Repeat rows 1-4 again then 1 & 2

That’s all there is to it and please remember your garter st border at each end.

Until next week, happy knitting.

Yvonne x

I’ve had a go and it helped to remember that over the course of the pattern you need to work equal numbers of k2 tog, (which decreases a stitch) and YO k1, which increases a stitch, I love these waves!

Keep sending in those photos!

Posted in Uncategorized

Knit-a-Long Baby Blanket: Week 11

Before the next set of KAL instructions, here’s a round up of our efforts with the Week 10 arrowheads pattern. Yvonne’s prototype version is in blue below.

Next, we have L’s salmon pink….

…A’s fawn…

R’s pink….

…and a close up of my white stripe.

We were all relieved that this pattern was easier than the intarsia in the previous double pattern and pleased it turned out so well – it’s a really effective design.

This week, blanket designer, Yvonne, writes, “Well guys, it’s that time again, ready for the next part. Again, it’s all about the counting but setting up the pattern is easy enough. Just take care from row 5. There are no special abbreviations, nitting,just k and p.

So eyes down and here we go.

Week 11

Row 1. Remember your edges and then k5, p5, to end of row.
Row 2. P5, k5, to end of row.
Row 3 & 4 rep rows 1 & 2.
Row 5. K1, p5, k5, end with p4.
Row 6. K4, p5, k5, to last st p1.
Row 7 & 8 rep rows 5 & 6.
Row 9 & 10 rep rows 1 & 2.

This pattern, if done on a bigger scale, looks like a concertina but unfortunately 10 rows just starts it off.

Have fun and see you all next week.

Happy knitting 
Yvonne

Some of us have already completed this pattern, and R is first to send a photo of hers. It looks great!

How are you getting on with your blanket? Keep sending the photos.

Posted in Uncategorized

Knit-a-Long Baby Blanket: Week 10

After last week’s double helping of knitting pattern I did suggest that Yvonne had a week off so we could all catch up. She’s happy to carry on, so you’ll find her next pattern later on in this post.

It’s been quite challenging to do the week 8-9 section. How did you find it? I think it was the combination of intarsia for the words KNIT and CHAT combined with a the central cup and saucer design in plain/purl that stumped us. There are a few things you might want to try that may help. You could use stitch markers to show the position of the 3 sections (KNIT, teacup and CHAT). I find it easier to work from a chart so I tried transferring the teacup design to graph paper – it didn’t look quite the same as Yvonne’s (my saucer is shallower) but I got through it.

Also, if you are getting in a tangle with separate balls of wool for the intarsia colour work you could use one yarn and use plain/purl to work all the designs. Here’s how some of the blankets are looking after the jumbo weeks 8-9 section.

L worked hers in one colour using plain/purl for the words.

R’s pink and white showed up well.

A’s and mine are in pastels so the colour contrast is more subtle.

And now for the next instalment. Yvonne writes, “Here we go – it’s that time of week again when you are all waiting for the next pattern. This one is a bit easier. Initting,t’s called vertical arrow panel and is a bit lacy.

Week 10

Abbreviations are:

Yf yarn forward or round needle 
Sl 2tog slip 2 stitches together off one needle to the other
P2sso pass the 2 slip stitches over

Remember 8 border sts at each end.
Row 1. K9, (Yf, k4, Sl 2tog, k1, p2sso, k4, Yf, k13), rep 4 times then Yf, k4, Sl 2tog, k1, p2sso, k4, Yf, k9
Row 2. And all even rows p.
Row 3. K10, (Yf, k3, Sl 2tog, k1, p2sso, k3, Yf, k15), rep 4 times then Yf, k3, Sl 2tog, k1, p2sso, k3, Yf, k10.
Row 5. K11, (Yf, k2, Sl 2tog, k1, p2sso, k2, Yf, k17), rep 4 times then Yf, k2, Sl 2tog, k1, p2sso, k2, Yf, k11.
Row 7. K12, (Yf, k1, Sl 2tog, k1, p2sso, k1, Yf, k19), rep 4 times then Yf, k1, Sl 2tog, k1, p2sso, k1, Yf, k12.
Row 9. K13, (Yf, Sl 2tog, k1, p2sso, Yf, k21) rep 4 times then Yf, sl 2tog, k1, p2sso, k13.
Row 10. P


That’s all there is to it. Happy knitting guys and until next week have fun.
Yvonne 

Isn’t Yvonne doing a great job designing this?

Posted in Uncategorized

Knit-a-Long Baby Blanket: Week 8-9

This week\s pattern is the most complicated yet, featuring colour work – an intarsia design, featuring the words “KNIT” and “CHAT” with a cup and saucer in between – a reference to our knit and natter group!

First of all, let’s take a look at what everyone’s blankets are looking like. Pauline has joined the KAL – here’s her blanket so far.

Here’s A’s blanket in fawn,

R continues her pink and white one.

And here’s L’s salmon pink.

Here’s a close up of the lacy pattern we did last week, on my blanket.

Yvonne’s next design is 20 rows – that’s 2 weeks worth – week’s 8 and 9. It includes charts for the colour work.

Yvonne writes, “Hi guys – here we go again with a double whammy this week and we agreed to do both weeks in one as it’s really all one pattern. This week we have a bit of intarsia so you will need another colour or a few it’s up to you. Personally I love colour so I used a different colour for each part as there are some large parts which are difficult to carry the spare yarn across the back without puckering it. I will write out the rows to set the pattern then follow the charts (A on purl row first, B on knit row first) at the end of the written instructions.

So here we go and if we have previous rows correct we should have 125 sts in the middle to work on not forgetting the 8 sts of border at either end. Ok

Week 8-9

Row 1. K50, P25, K50 
Row 2. P48,  K31, P48
Row 3. K47, P3, K1, P2, K18, P2, K1, P3, K to end.
Now we start the intarsia at the beginning and end of the row in between the edges.
Row 4. P46 as follows:- 1 main (m), 1 contrast (c), 7m, 1c, 2m, 1c, 6m, 2c, 4m, 1c, 7m, 1c, 12m then centre panel of K3, P2, K2, P18, K2, P2, K3, P8, then intarsia again, P37 as follows:- 6c, 2m, 1c, 4m, 1c, 1m, 1c, 11m, 1c, 2m, 1c, 7m.
Row 5. K row as follows:- 7m, 1c, 2m, 1c, 11m, 1c, 1m, 1c, 4m, 1c, 7m, 1c, 6m, centre panel, P3, k3 p2, k18, p2, k3, p3, intarsia 11m, 1c, 7m, 1c, 4m, 2c, 6m, 1c, 3m, 1c, 6m, 1c, k to end.
Row 6. Follow chart A at the end for the sides and this is the centre panel worked over 45sts, p5, k3, p3, k2, p18, k2, k4, p3, k4. Intarsia from chart B.
Row 7. Follow chart B then centre panel k4, p3, k5, p2, k18, p2, k5, p3, k3 follow chart A.
Row 8. Centre panel p3, k3, p6, k2, p18, k3, p5, k2, p4.
Row 9. K3, p1, k5, p1, k2, p2, k18, p2, k7, p1, k3.
Row 10. P2, k1, p8, k2, p18, k2, p2, k1, p5, k1, p3.
Row 11. K8, p1, k3, p2, k18, p2, k11.
Row 12. P11, k2, p18, k2, p4, k1, p7.
Row 13. K7, p1, k4, p22, k11.
Row 14. P17, k1, p5, k1, p9, k1, p3, k1, p7.
Row 15. K7, p1, k2, p1, k8, p2, k4, p2, k18.
Row 16. P20, k2, p4, k2, p7, k2, p8.
Row 17. K16, p1, k4, p2, k22.
Row 18. P24, k1, p2, k1, p17.
Row 19. K21, p2, k22.
Row 20. P20, k2, p23.

Chart A

image0.jpeg

Chart B

image1.jpeg

It’s challenging so do your best! Don’t forget to send pics of your blankets.

Posted in Uncategorized

Knit-A-Long Baby Blanket: Week 7

It’s Week 7 of the Knit-a-Long!

First of all let’s have a look at how everyone got on with last week’s honeycomb pattern. Wnelcome to blog follower Liz who is knitting her blanket in yellow, aqua and white.

Here’s R’s pink and white…

…and L’s salmon pink

They all look great!

Here’s mine.

This week Yvonne has brought us a lacy pattern – it should look like the yellow stripe in the pic at the top of the post.

Yvonne writes, “Hi guys, it’s that time of week again and ready for the next part. I hope you all enjoyed last week’s instalment and didn’t find it too hard. This week we are changing the tempo and having a bit of lace and no cable needles in sight but we still have to count very carefully. Not that much to it but we do have long rows, it’s done over 4 sts and in 4 rows repeat so have fun.”

Week 7

The abbreviations for this week are:
Yf yarn forward which means put yarn round the needle.
Sl slip one so you slip the next st onto the other needle.
K2tog knit 2 together which I think is self explanatory.
PSSO pass slip st over again I think it explains itself.

Here we go.

Row 1. K2, (yf, sl, k2tog, psso, yf, k1) repeat what’s in brackets as far as you can remembering the 8 garter st at beginning and end.
Row 2. P.
Row 3. K1, k2tog, yf, k1, (yf, sl, k2tog, psso, yf, k1) repeat to end.
Row 4. P.
These 4 rows form pattern so repeat rows 1-4 again then the first 2 and that’s all there is to it.

Just remember to count carefully and also the borders and I will speak to you next week. Happy knitting guys.
Yvonne

How are you getting on with your blanket? Do keep sending in your photos.

Posted in Uncategorized

Knit-A-Long Baby Blanket: Week 6

The KAL blanket is growing! Before I share the next instalment of Yvonne’s design, here are what some of the other group members are looking like. If you’ll remember, last week’s pattern was for a 5×5 check effect.

Here’s mine so far

…and L’s salmon pink…

…along with R’s pink and white

This week, Yvonne introduces a honeycomb pattern.

She writes,”Hi guys. Hope you are all well and managed last week’s pattern without too much trouble!

This week’s pattern consists of a 4 row repeat and uses a cable needle, it’s a little tricky but remember it’s all in the counting.

Week 6

We will be using abbreviations so here is the explanation for this pattern 
TW2R Twist 2 right which means put next st on cable needle and hold at back of work, knit 1, then knit 1 from cable needle.
TW2L Twist 2 left which means put next st on cable needle and hold at front of work, knit 1 then knit 1 from cable needle.

Ok here we go.
Row 1, (TW2R, TW2L) repeat to last st k1.
Row 2 and all even rows purl.
Row 3, (TW2L, TW2R) repeat to last st k1.

These 4 rows form pattern so repeat rows 1 – 4 again and then rows 1 & 2 again.

That’s all there is to it, good luck and happy knitting.
See you next week.

Yvonne.

I love a bit of cable so I’m looking forward to getting on with this one. To see what it should look like, look at the photo of Yvonne’s blanket at the beginning of the post – it’s the purple stripe at the top.

Keep on knitting and sending photos of your blanket so far!

Posted in knitting

Knit-A-Long Baby Blanket: Week 4

Welcome to Week 4 of the KAL – that means that when you’ve done this week’s section you are a quarter of the way through!

First of all let’s look at what those of us taking part have been up to.

Here’s mine. My alternating colour/white combo meant week 3 was in white yarn.

Here is L’s lovely pink one……

…and A’s cosy soft fawn.

Now for the Week 4 instructions. This week we are back to casually counting stitches like Week 2. Over to you Yvonne…..

Week 4 Instructions

Yvonne writes, “Well guys it’s that time of the week again and time for the next 10 rows. I’m sorry to say that it’s a little bit harder. Also please remember that the first and last 8 stitches are in garter stitch throughout. So here we go.”

Row. 1, knit.
Row. 2, p6, k1, to end finishing with a p6.
Row. 3, k5, (p3, k4) to end doing last st as k before border.
Row. 4, p4, (k5, p2) to last 4 sts p to end.
Row. 5, k4, (p5, k2) to last 4 sts k to end.
Row. 6, p4, (k2, p1, k2, p2) to last 4 sts p to end.
Row. 7, k4, (p2, k1, p2, k2) to last 4 sts k to end.
Row. 8, p5, (k1, p1, k1, p4) to last 5 sts p to end.
Row 9, k to end.
Row 10, p to end.

“This is my variation of a row of hearts as I have put lots into the blanket. Good luck everyone and happy knitting until next week.”

I’d love to hear about your progress on the KAL… with photos if possible. How did your Week 3 go? What colour(s) are you using?

Good luck with Week 4. The next instalment will be posted next week.