Posted in Uncategorized

Newly Hooked.

I’ve been continuing to teach crochet this year at Amble Pin Cushion, developing new courses and honing my skills as a tutor.

It was workshop day last Thursday, teaching 10 participants over 2 sessions. I teach a maximum of 6 people per session. It’s about the right number for the room I use but I also want to ensure that everyone gets the tuition they need,, and avoid spreading myself too thinly. I limit the sessions to 2 hours at a time.. Teaching can be quite intensive and I don’t want to run out of steam!

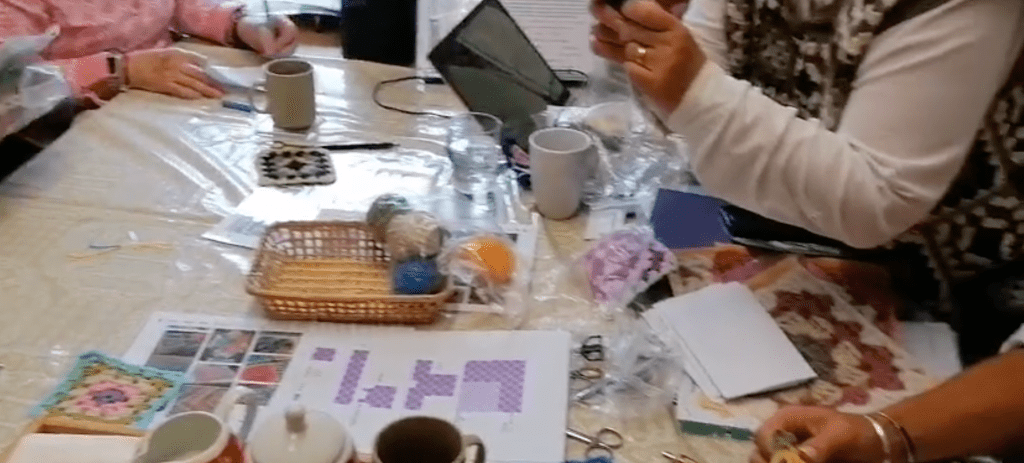
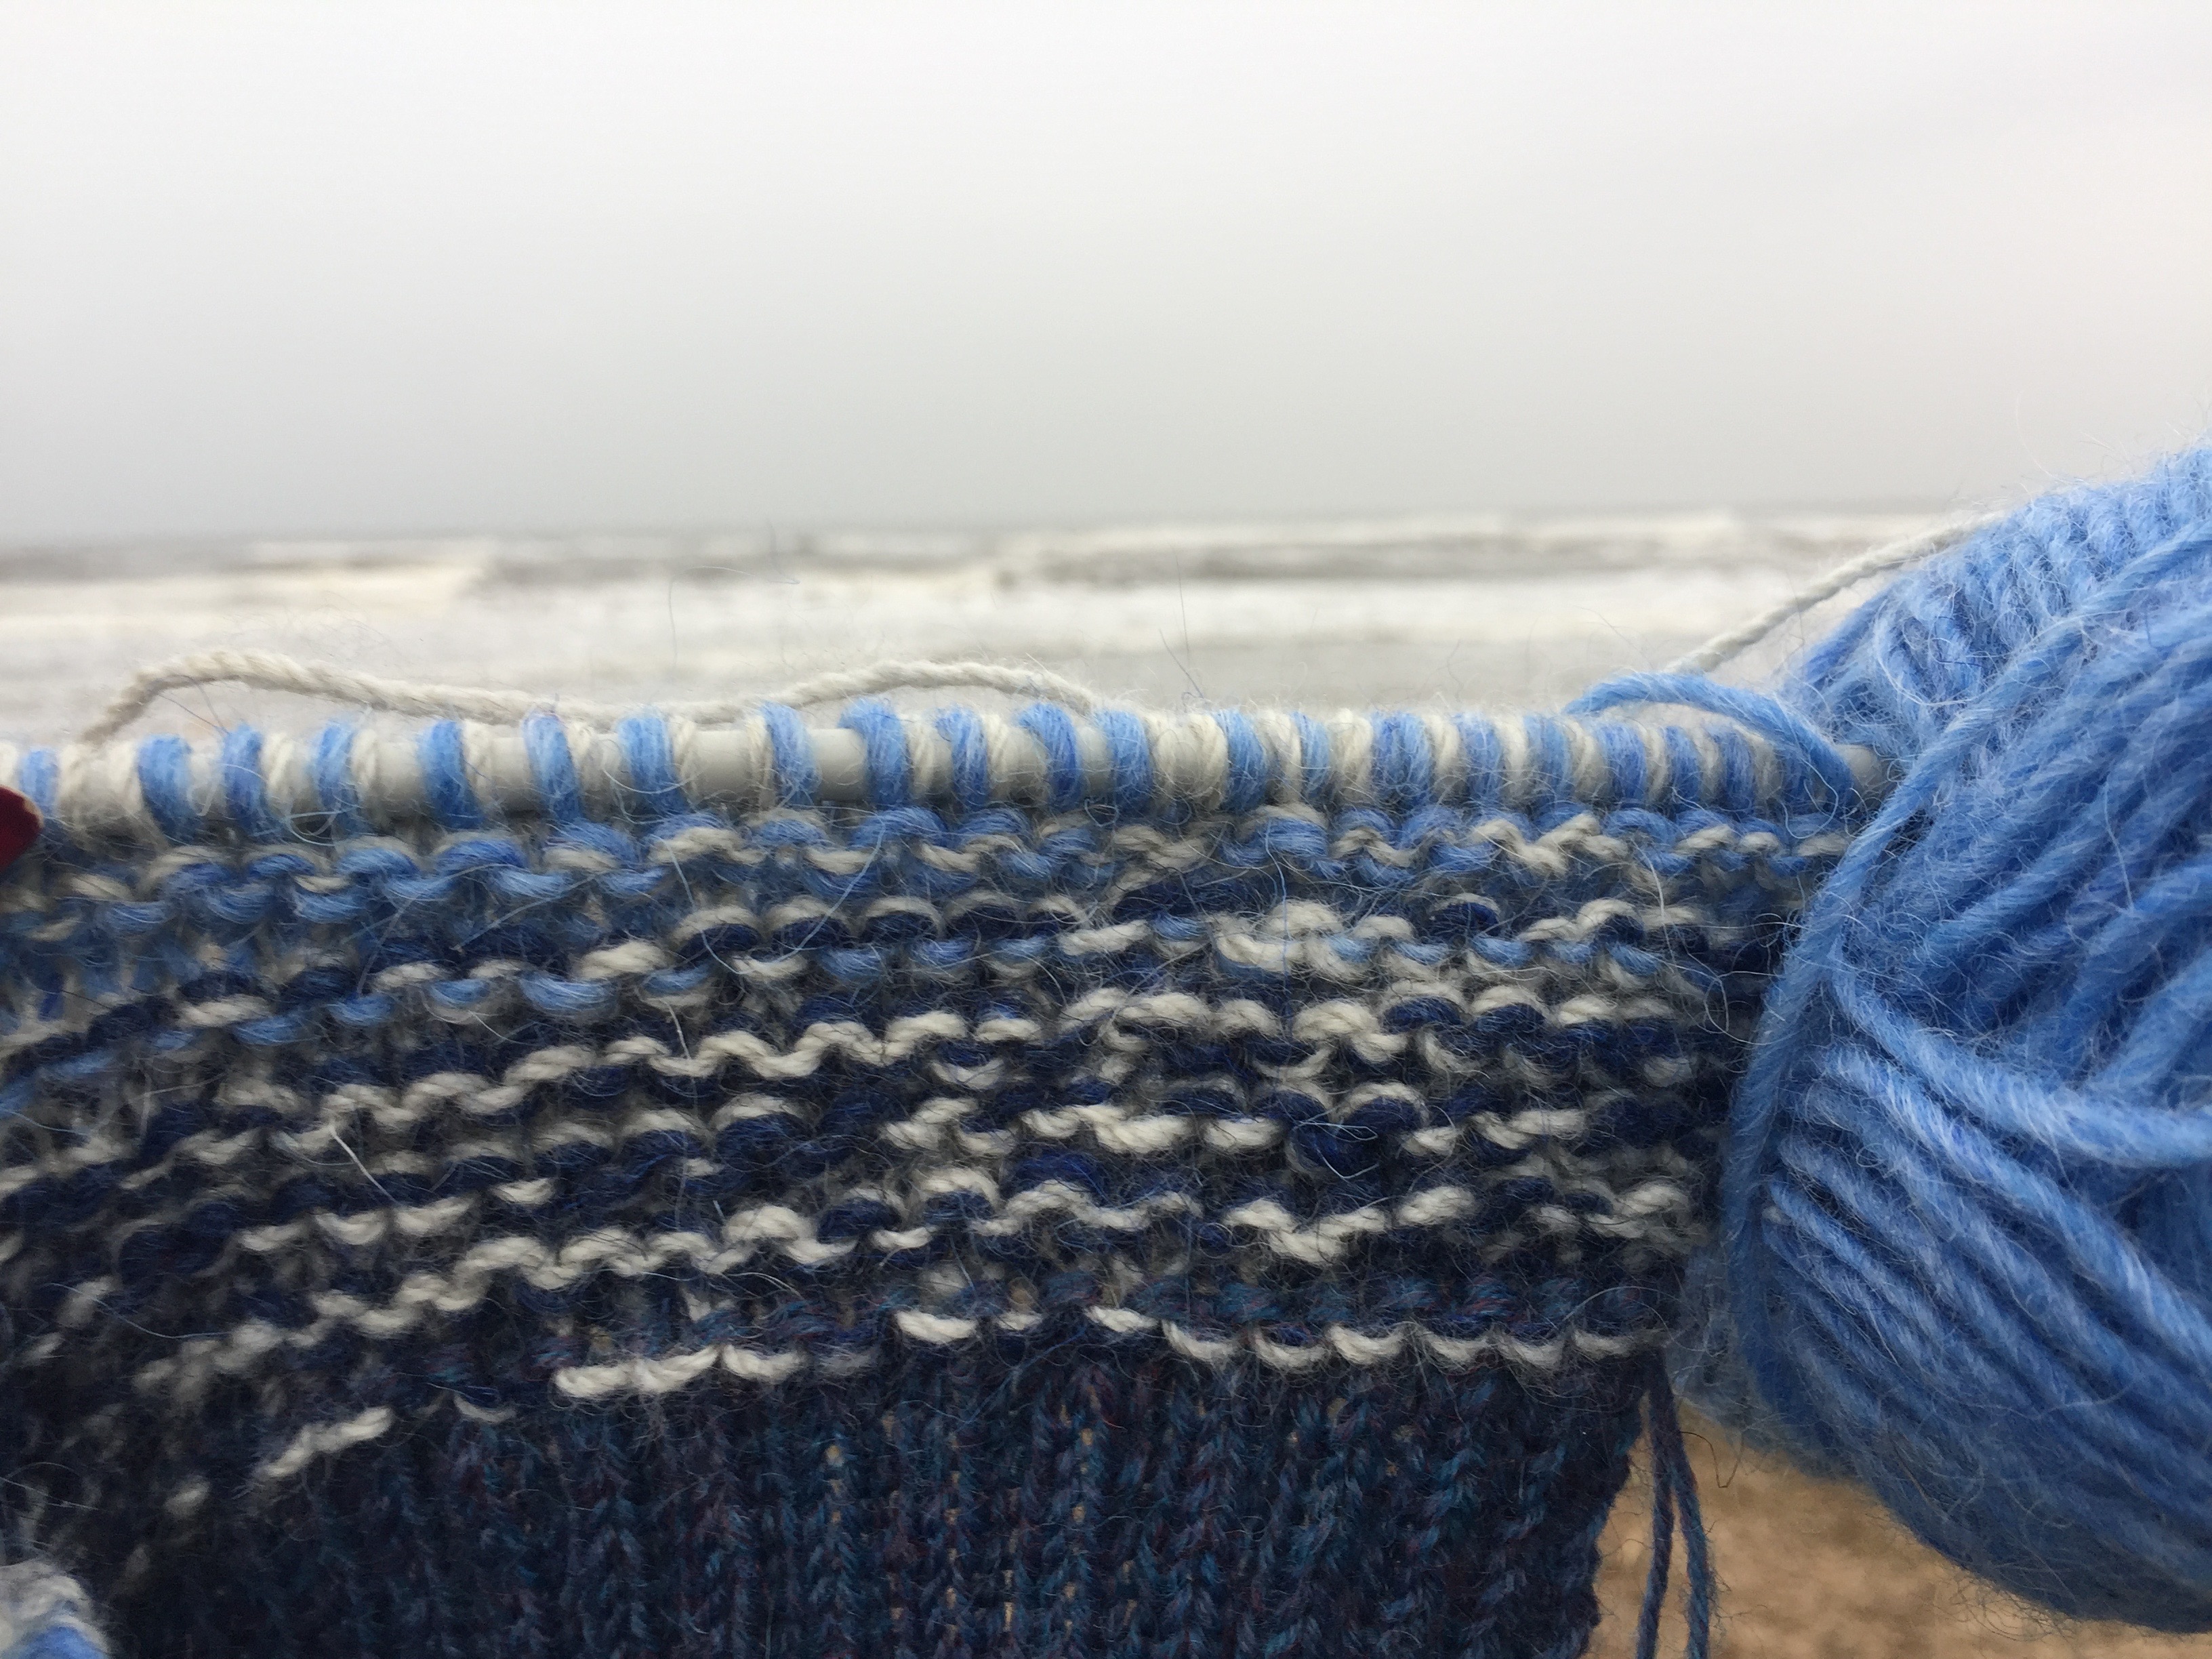
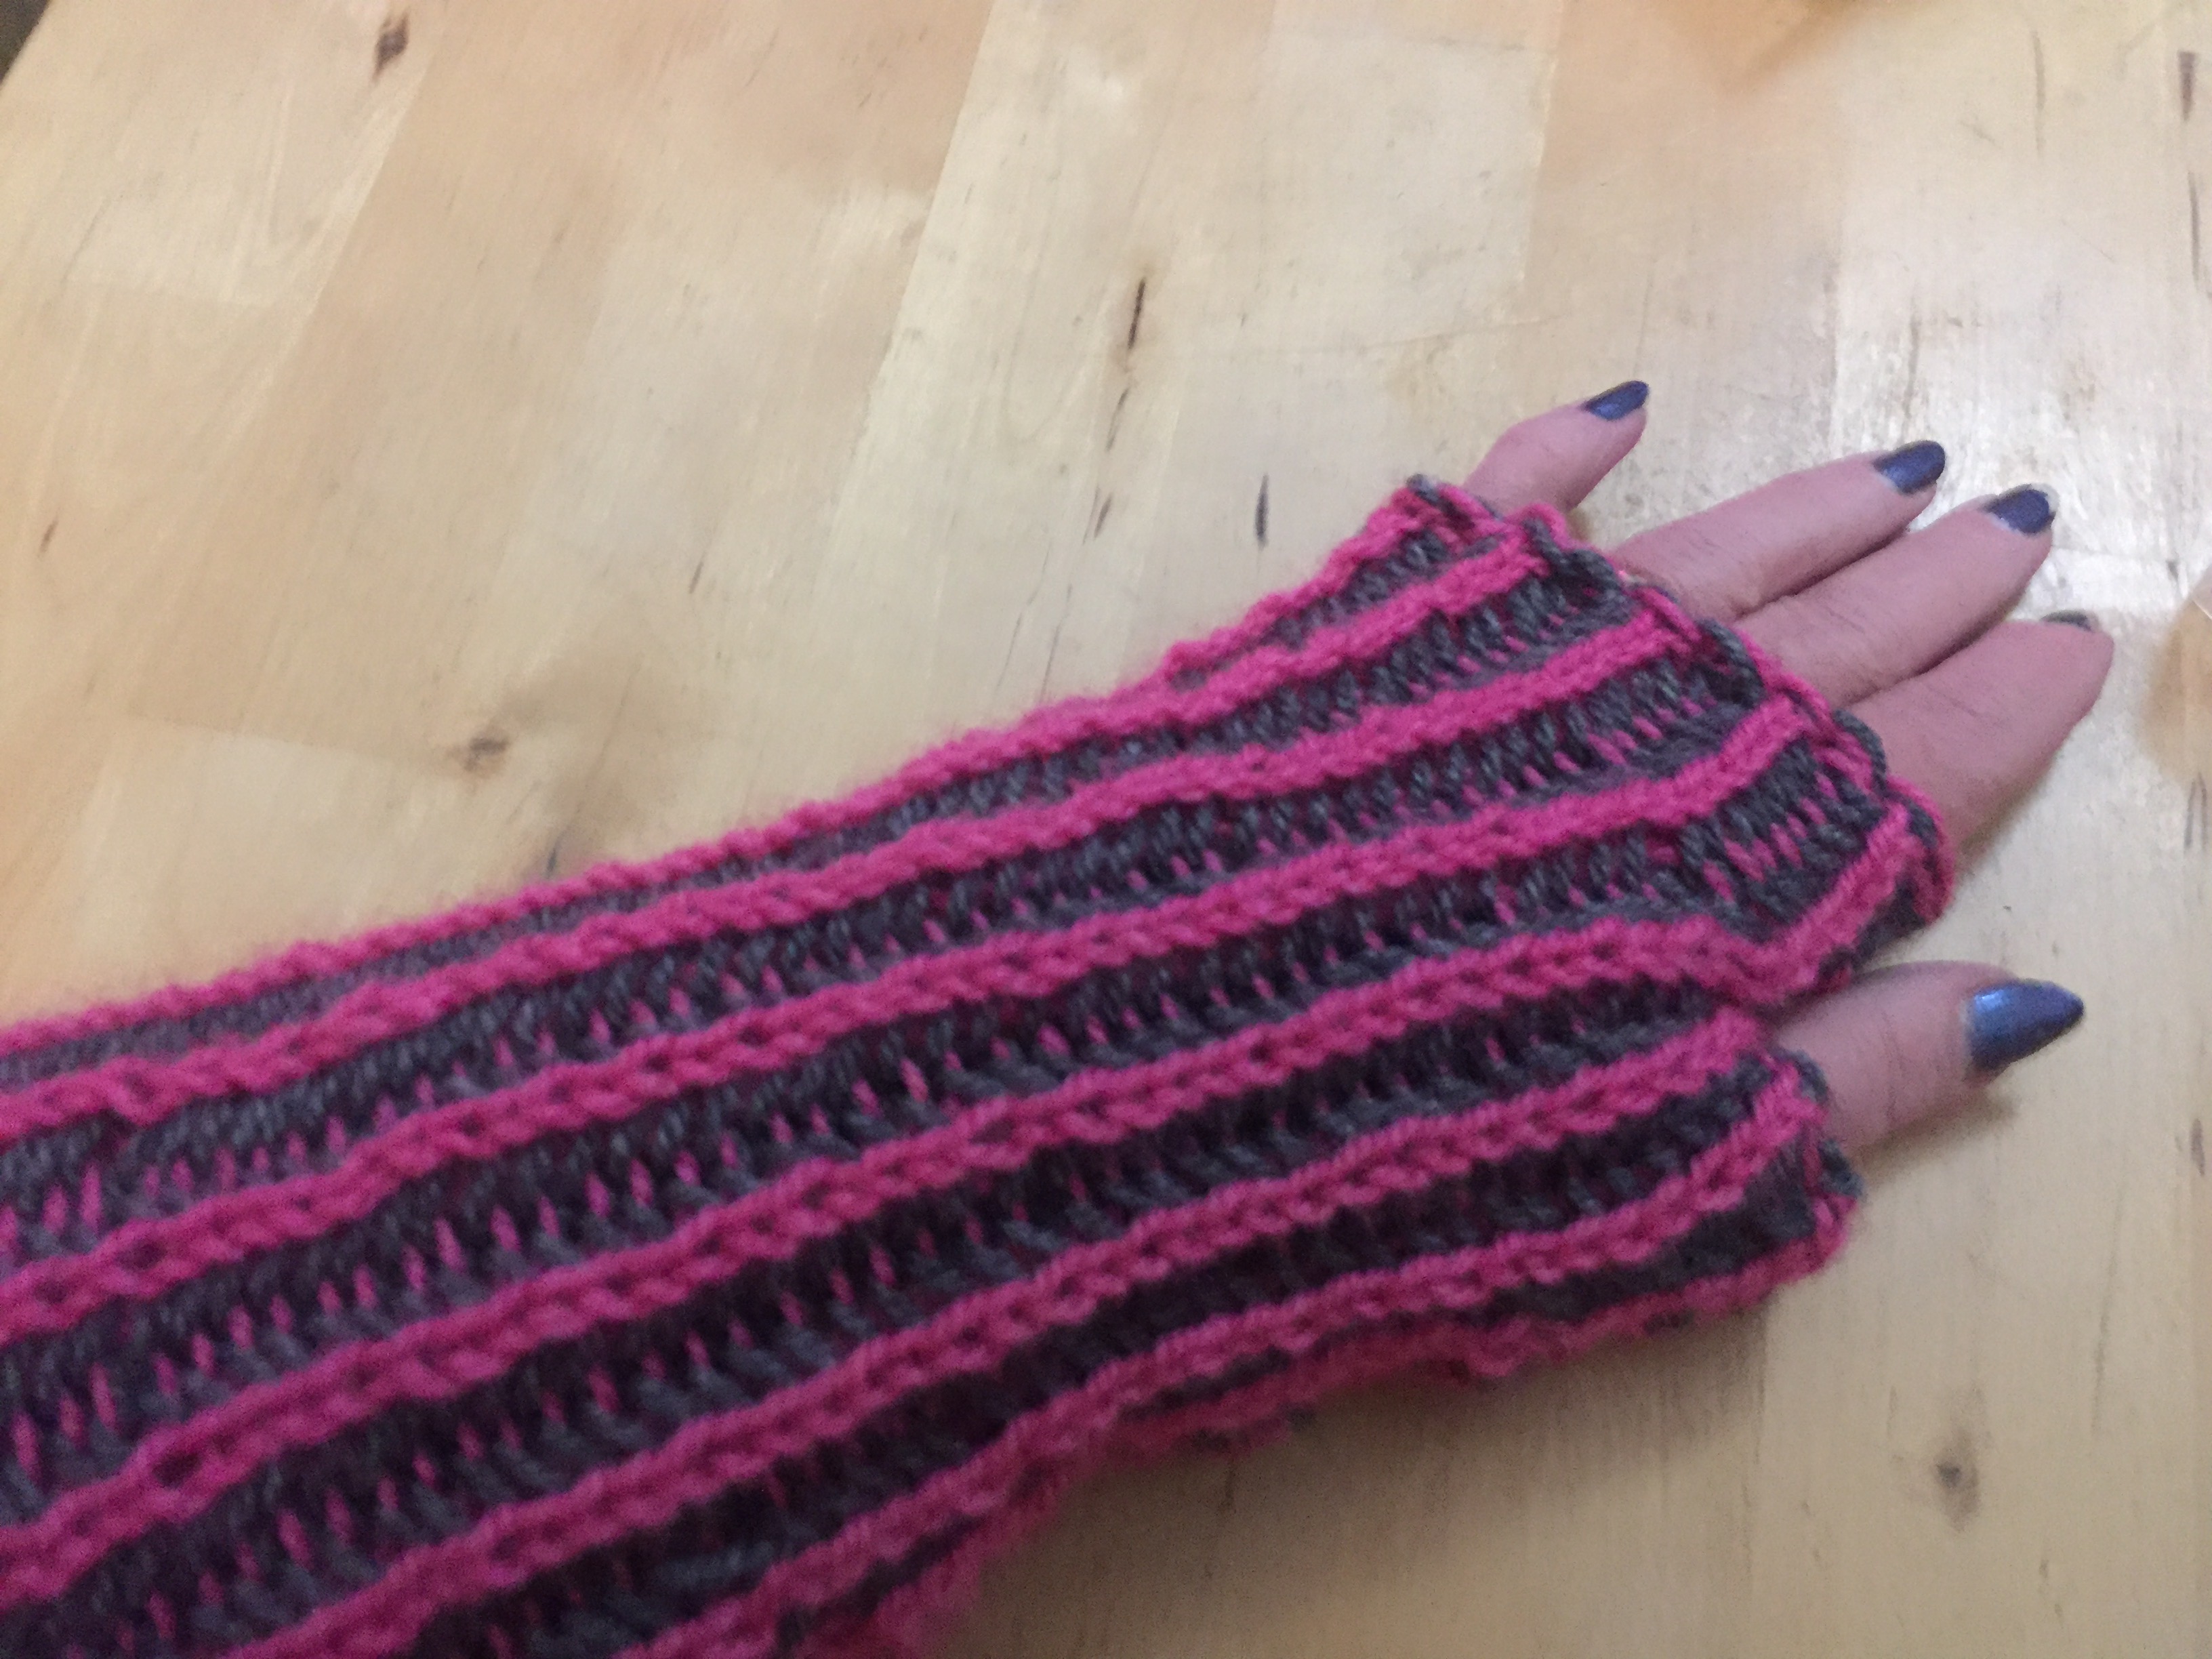
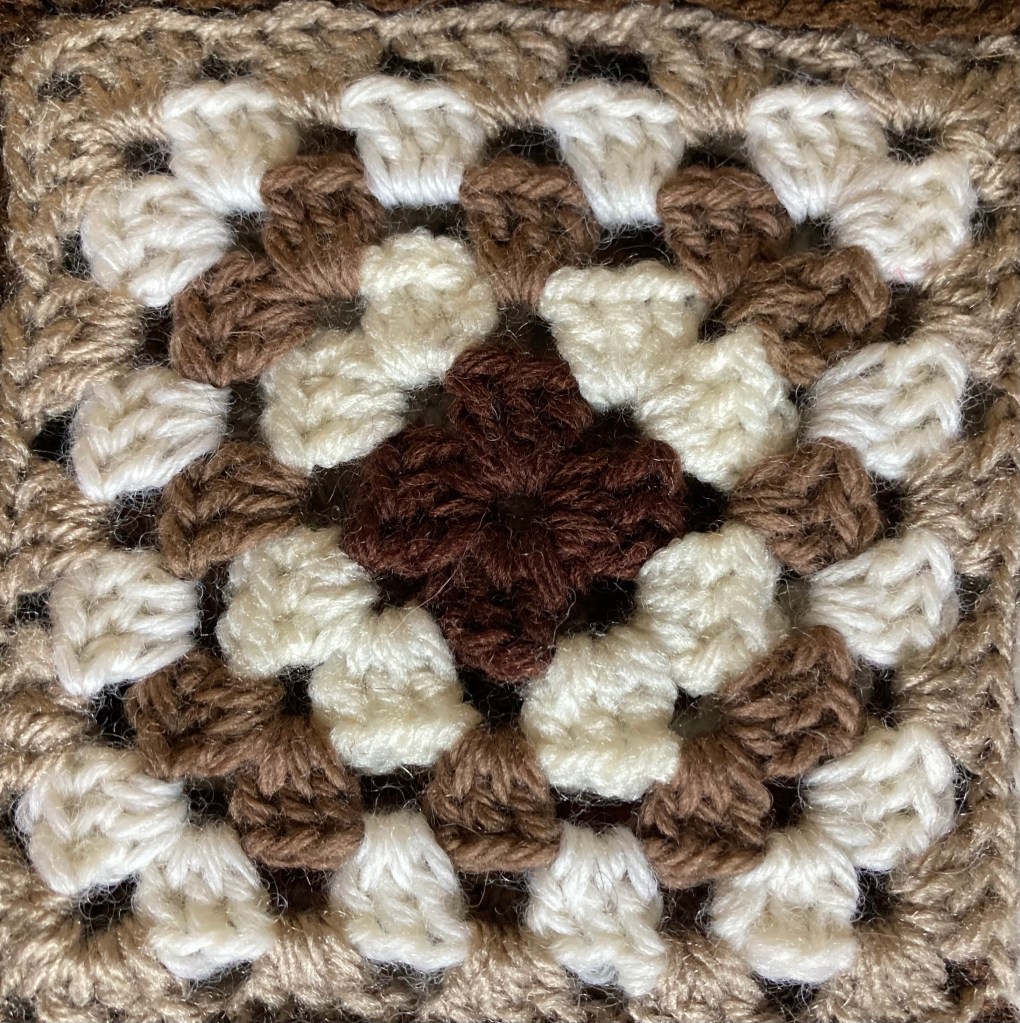
We were making the classic granny square, so called (I think) because our grandmothers and those before them were the queens of recycling and ‘make-do and mend”. Nothing was wasted out of a need to be frugal. These crocheted squares were the perfect way to use up scraps of yarn left over from other projects or unravelled old and unwearable jumpers. The squares could then be joined up to make colourful blankets and other useful items. Granny square garments are now gaining popularity as much for their looks as their sustainability.

I did enjoy Thursday – both groups were an absolute pleasure to meet and to teach…. and from far and wide too, with one crocheter from Australia (now living locally) and another who has local connections but was visiting from the USA , where she now lives.

There was a range of abilities too, from complete beginners, those needing a bit of a “refresher course” and one experienced crocheter who wanted do her homework to prepare for an imminent big Granny Square project.

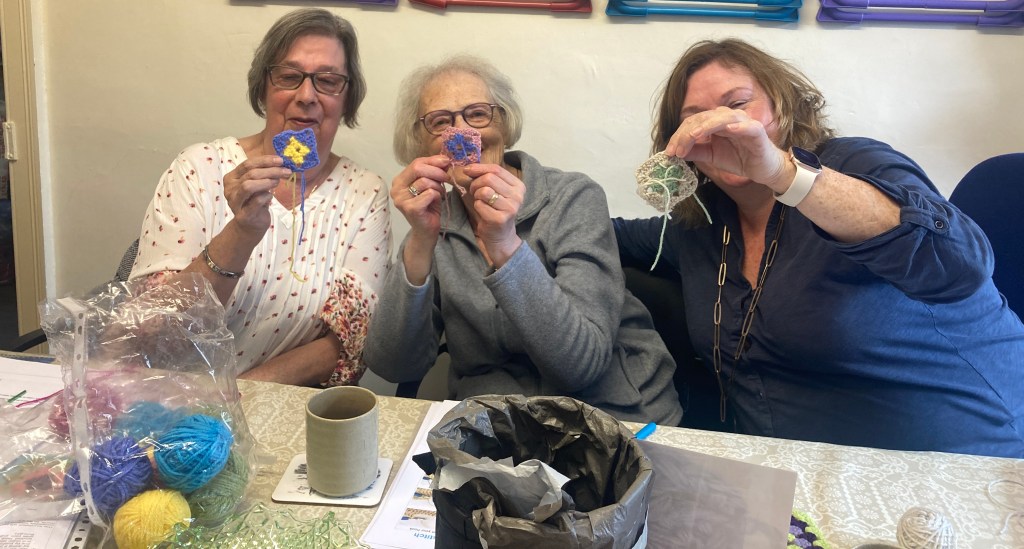
I was really proud of the progress they all made in just 2 hours. They went away with full instructions to complete their granny square and make more, how to join them together and some helpful tips and tricks, along with a yarn pack to practice at home. I wonder if they’ll get hooked on crochet!

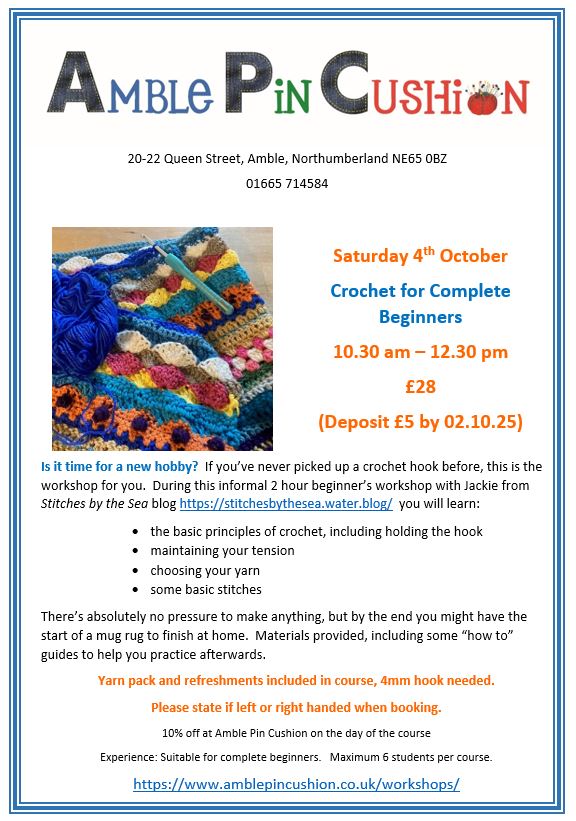
One of my new workshops this year is “Crochet for Absolute Beginners” This came about following a conversation with another crochet tutor. We agreed that describing a workshop as “suitable for beginners” covers a pretty broad range of abilities, from true beginners with zero experience to those that are pretty good at the craft, but are either not very confident or they haven’t picked up a crochet hook in some time. I began crocheting when I was about 8 years old, taught by my grandmother and when you’ve been doing it that long you take some of the skills involved for granted. It’s all too easy to assume that others will have some basic knowledge.

That’s why this workshop was developed: for people who have never picked up a crochet hook – nothing is assumed! It really is back to basics and though participants may get as far as making a bookmark, there is no pressure to complete anything in the session.

As well as some basic stitches we cover the principles of holding the wool and hook, to maintain tension and control the hook efficiently. I feel very strongly that there is no set way of holding your work, wool and hook as long as you can stick to those basic principles. After all, everyone’s hands are different: left or right- handed, large or small, with long or short fingers, maybe some joint stiffness or other impairment. I try to work with my students to find the best hold for them. I’ve also recently begun to develop some new hand outs for left-handed participants – I tried them out for the first time last week in the Granny Square workshops and they seemed to work well.

I have run the Absolute Beginners workshop a few times now and it’s going really well, but there’s always room for improvement. I ask everyone to complete a very short anonymous evaluation at the end of each session. It’s good to get feedback so I can improve what I do and get ideas for future workshops. A left-handed participant on one of the first Absolute Beginners sessions inspired me to develop the LH specific handouts I used for last week’s Granny Squares.

I think it’s important to have fun too. Enjoyment is important for its own sake, but it turns out that it also helps people relax and stops their crochet becoming too tight!

One particularly enjoyable session included a husband and wife. He had bought her a crochet kit as a gift and he suggested that it would help her learn to use if she did a workshop and she agreed, but only on the condition that he came along to. They both did well, but he was exceptional. producing some really beautiful skilled crochet work Then, he confessed. After they booked on, he had been watching You Tube tutorial videos on the quiet and practicing in secret! No wonder he’d got so good!

Do you have any funny crochet-related stories to share. I’d love to hear them

STOP PRESS

I’ve just added an extra Absolute Beginners Session to run on Saturday 4th October from 10.30 to 12.30pm. (The one on Thursday 25th is now full, but please check for cancellation).

Posted in Uncategorized

New Year Resolutions: Looking Back and Looking Forward

The turn of the year is an opportunity to review those resolutions from a year ago and make new ones. Who could have predicted what 2020 would become?

At the beginning of the year my blog was only a couple of months old. I was creating content every day and that was mostly knitting related. I’d started it as part of my plan to learn a new skill every year. I set some knitting and crafting New Year resolutions last January

  1. Make a Santa hat. I completed this last January, though I had fewer occasions to use it with no choir or ukelele gigs this Christmas. I never knitted a Bah Humbug version for K (who I described at the time as my personal Grinch). Maybe this year?

2. Knit a Christmas Jumper. I cast this on in April when the Pandemic had taken hold and it became my lockdown project. I bought the yarn online and remember quarantining the parcel for 72 hours before I opened it. I stopped knitting altogether at times but finally completed it in late August. I’ve loved wearing it this Christmas.

3. Keep on stash-busting. I had set out to use scraps of blue and grey yarn to make a cape/poncho but it didn’t workout. I pulled it out and redesigned it as a jacket which I finally finished a couple of days ago! This has made a smaller impression on the blue and grey parts of the stash than I’d hoped. I need to think about a project that will use another part of the stash.

The other craft materials I’ve accumulated got used too. Quilting fabric was made into masks and I used seaglass to make mosaic coasters and Christmas baubles. I made pheasant feather baubles too, and driftwood candle-shades, wax melts….

I still have piles of material in the craft room, so the stash-busting is ongoing.

4. Finish as many UFOs (Unfinished Objects) as I can . I completed a piece of tapestry during lockdown, which suited my state of mind at the time. Now it’s finished I’m not sure what to do with it as I don’t like it enough to frame or make into a cushion. I also finished a cobwebby scarf, a needlefelted unicorn from a kit among other things. There are still more projects to finish but I’m getting there.

5. Tidy up the craft room. This is ongoing and very much linked to 3 and 4 but at least I don’t have to share it with Son’s drum kit, which has been sold. he’s more of a guitarist these days.

6. Get out more – with my knitting. I had resolved to spend more time sitting in a car with a nice view while K walked the dog, but as lockdown began and there were no essential journeys allowed, driving to the beach stopped – later it was hard to get anywhere near as more and more tourists arrived in the area. I did get out more on my scooter for local dog walks and that reconnected me with nature, particularly wildflowers, and I started regular Wildflower of the Week posts on the blog. As Summer turned into Autumn the blackberries and sloes ripened and I got into preserving and making fruit gin liqueurs.

7. Improve my photography. I began using lenses that clip on to my mobile phone, including a macro lens for close ups of flowers. I also use tripods and remote shutter controls so my pictures are sharper. Still lots of room for improvement though!

8. Learn brioche. This was achieved when I made hand warmers, both 2 and one-coloured versions. I love the soft squishy feel of brioche stitch.

Of course I did other stuff this year. I have learnt a new skill : spinning yarn since I got an e-spinner for my birthday – with more equipment for Christmas I think this will take up a lot of crafting time in 2021, especially with all the gorgeous alpaca fibre I’ve been given.

So here’s my list of crafty intentions for 2021 – they deliberately include more of the same ongoing items, and some new ones.

  1. Make a Bah Humbug hat for K (like a Santa hat but in black).
  2. Continue stash-busting, including another big project, to be decided.
  3. Finish more unfinished projects
  4. Continue to sort and tidy the craft room
  5. Continue spinning, including a jumper for myself
  6. Get out more to knit if and when I can
  7. Keep improving the photography
  8. Learn how to dye yarn and fibre (this could be my new skill for 2021)
  9. Use natural fibres and upcycle/resuse/recycle wherever possible

I think that’s enough to be going on with!

Finally, a very Happy New Year to everyone who reads this. We got through 2020 and what it threw at us so we are well equipped to deal with anything this year sends our way. I remain hopeful that things will improve with the rapid rollout of vaccines. Here’s to a safer, calmer 2021.

Have you made any New Year resolutions?

Posted in Uncategorized

Sea Glass Spheres

Being on the beach a lot, walking Buddy the Labrador, provides lots of beachcombing opportunities and lots of craft materials for me, especially sea glass and driftwood. This is only a small selection of the sea glass K has gathered on his dog walks.

The action of the sea and sand has two effects on glass. The surface becomes abraded giving it a frosted appearance, then the corners and edges are smoothed away. Eventually a piece of glass will be transformed into a rounded translucent pebble and these, especially those in interesting colours, are the most sought after. Much of the sea glass in our collection is still quite angular, So I’ve been thinking of more ways to use it, especially since I made some mosaic coasters earlier this year. I had an assortment of polystyrene balls, so I wondered how they would work covered in a sea glass mosaic to make Christmas tree baubles.

I started with the loop to hold the hanging thread. I cut a piece of wire about 12 cm long and bent it round a pen to form a loop.

I threaded the ends through a glass bead and pushed them into the ball. I kept the ball in position on a toothpick pushed into a piece of polystyrene packaging, then began to glue the pieces of seagrass in place. I tried PVA glue first of all, but it doesn’t dry quick enough and the glass started to slide off. I needed a quick drying alternative.

I ended up deploying my trusty glue gun. I’d avoided it at first as I thought the hot glue might melt the polystyrene but it was fine. I continued hot glueing the glass pieces to the ball, occasionally cutting a piece to fit with the tile cutters.

It was soon covered with glass sections. I then mixed up some grout and filled the gaps, pushing it into the spaces with a finger. I allowed this to dry slightly then wiped over the glass with a damp sponge to remove the excess.

Then it was simply a case of adding a hanging thread. You can spray with polyurethane varnish to protect the grouting and give the glass a sheen, or even shine it up with a tiny drop of vegetable oil.

I think this would work even better using a clear plastic base. I’ve see these in craft shops, with a hanging loop incorporated. This would make the whole bauble translucent.

Overall I’m happy with it. It might be a little bit early to think about Christmas decorations, but I can live with that!

Have you started thinking about Christmas decorations or presents yet?

Posted in Uncategorized

A Montage of Mosaics

I had a brilliant day yesterday! I went on a course at the Amble Pin Cushion to learn what is a new skill for me: mosaics.

Our trainer, Hazel, is a self-confessed mosaic addict. “if it stays still long enough, I’ll mosaic it” she says. Hazel was first inspired by the ancient mosaics she saw while on holiday in Cyprus. She found the souvenir copies on sale to tourists less inspiring and decided to have a go herself. She began by making door plaques and house numbers for family and friends and now makes all sorts of pieces and kits for sale, as well as teaching, giving talks and demonstrations.

The morning session involved making coasters using pre-cut mosaic tile squares in two sizes. We had a huge colour selection to choose from, including glittery and iridescent tiles so deciding which ones to use was probably the hardest task of the day!. We drew round plain coasters and arranged the tiles on the paper outline until we were happy with our design, making sure to incorporate gaps to allow for the grouting. We then transferred the tiles to the coaster base, glueing them in position. We used a PVA glue, not too fast drying, to allow any adjustments to tile position. We left the grouting until the end of the day to allow the glue to dry.

I managed two coasters before we broke for lunch (which was included in the price of the full day course – some participants attended for half a day only).

My coasters before grouting.

After lunch we worked on “intermediate” projects, involving more complex shapes and cutting the tiles. It took a little while to get the cutting technique right but before long I was getting the shapes I wanted. We used safety glasses for this stage – the tile fragments can fly in all directions if you don’t hold them securely- they can be quite sharp too so care is needed. I worked on a photo frame in shades of blue and white

We finished the day by mixing up some grout and using it to fill in the spaces and create a neat edge. Hazel describes the perfect grout consistency as being like butter icing. We used our fingers to apply the grout, pushing it into all the spaces and running a finger along the edges of each piece of work to get a neat edge. The grouting dries quite quickly so the next stage was to use a piece of wet sponge to wipe away the excess grout, wetting it frequently and dabbing it away to reveal the mosaic, not forgetting to clean the cork backing of the coasters.

Completed Coasters

Grouting really makes the colours pop. We used plain white, but you can use acrylic paint to tint the mix. I’m really pleased with the result. As time was running out I brought some grout powder home and completed my photo frame today, removing the glass from the frame first and ensuring that there was no grout left in the corners to stop the glass going back in later. There was enough mixture left to fill in a couple of tiny gaps I noticed in one of the coasters too.

I’m really happy with what I’ve made and have lots of ideas other projects that I can’t wait to try.

Have you learnt any new crafts or other skills recently?