Welcome to my blog. I live, knit, crochet, spin and craft near the Northumbrian Coast (but not too near – the waves won't be splashing my yarn!).There's a story in every stitch, every grain of sand, every blade of grass. I thought I'd blog about it…
I mentioned in a recent post that I’d been crocheting lots of granny squares to prepare for teaching my very first crochet workshop. I spent a while getting prepared.
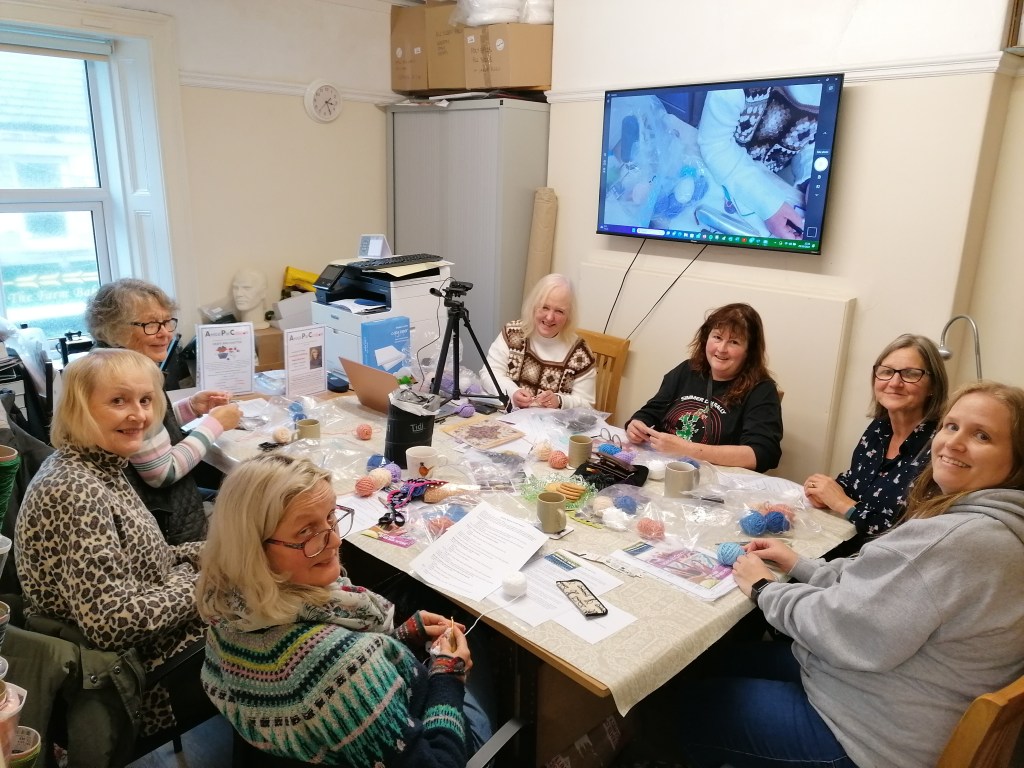
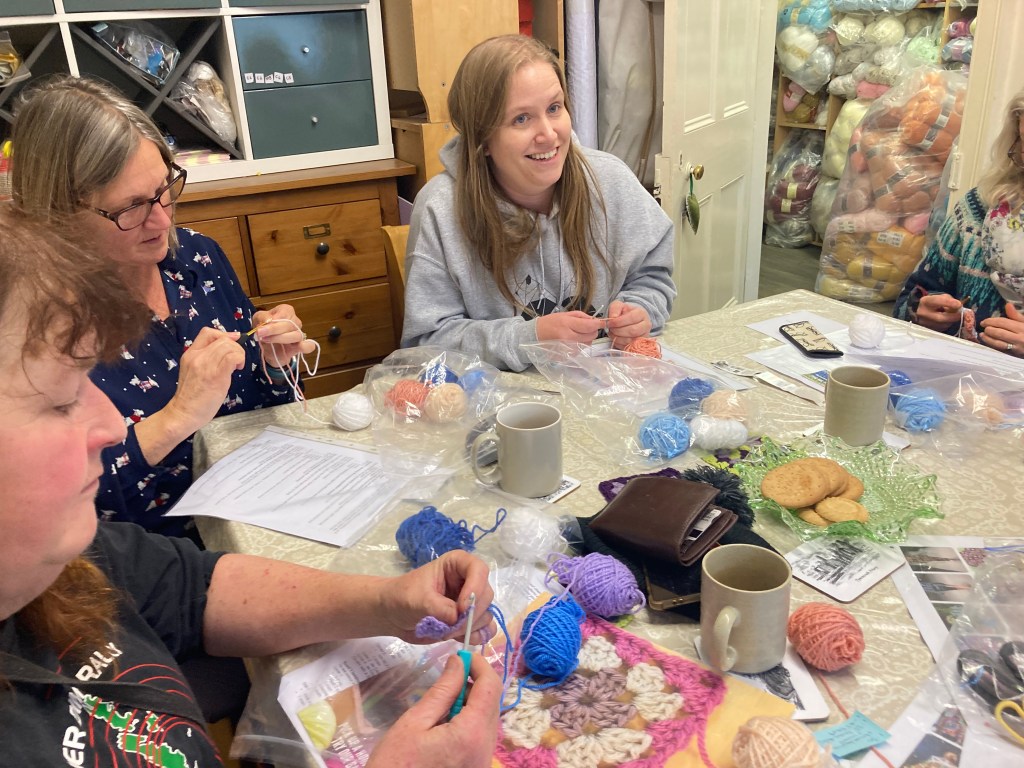
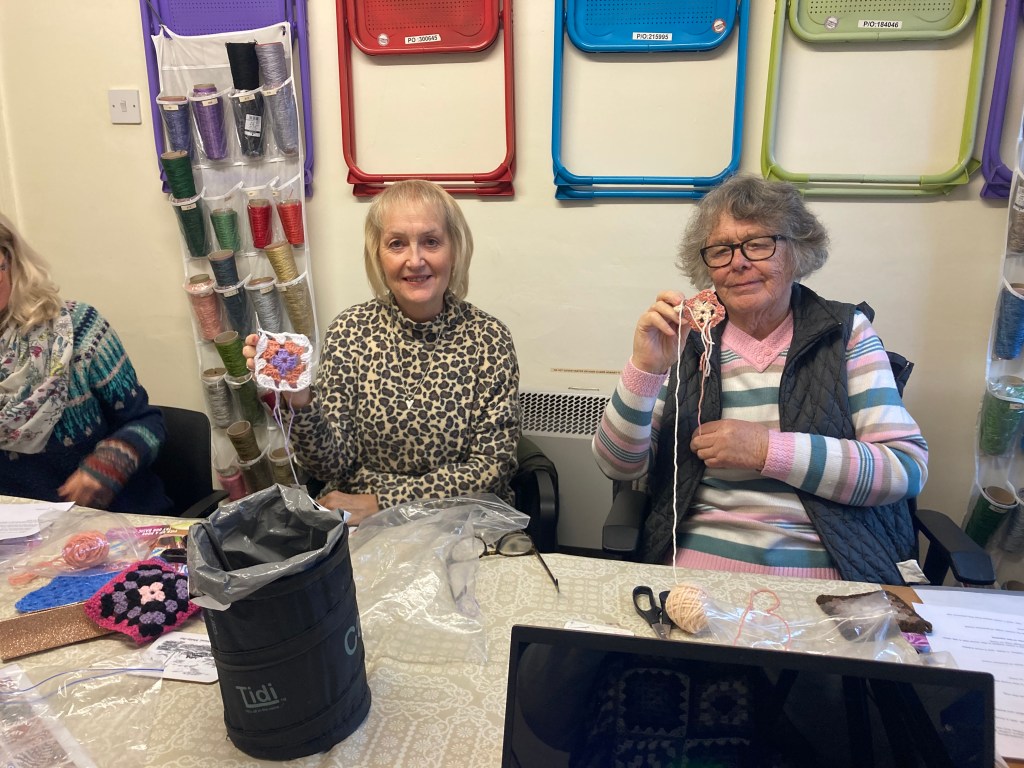
Last week I was joined at Amble Pin Cushion by 6 lovely ladies – my students for the afternoon. They all worked really hard and the two hour beginners class flew by – we could have made it longer really!
By the end they had made real progress on their granny squares and I encouraged them to keep going and practice at home.
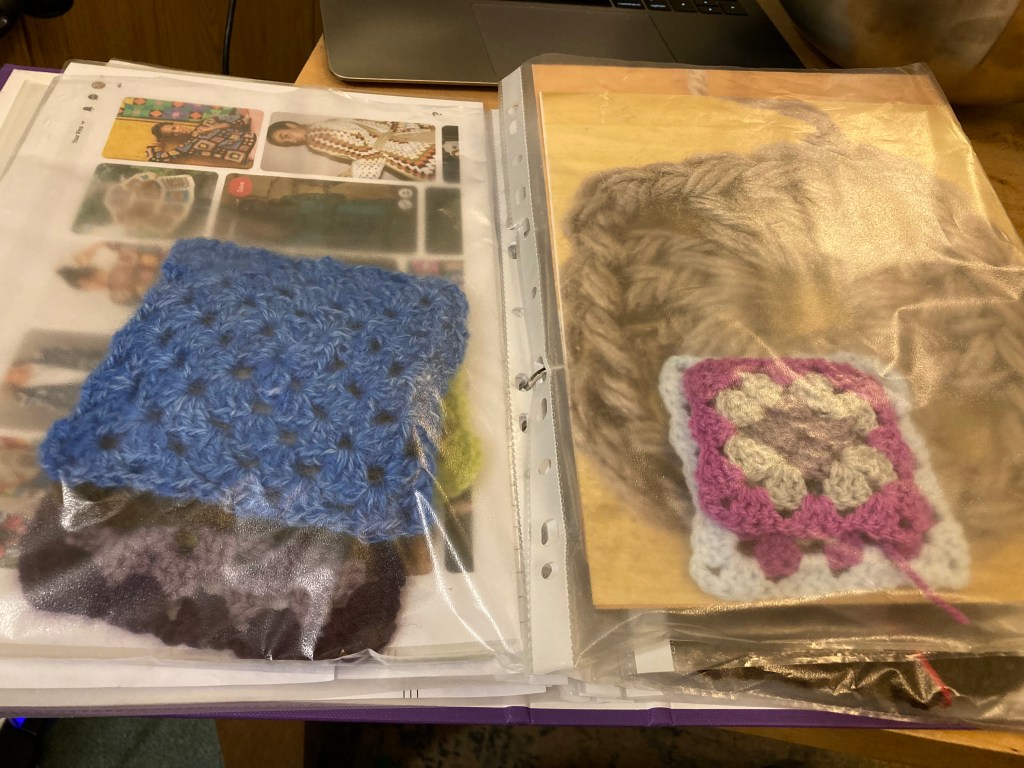
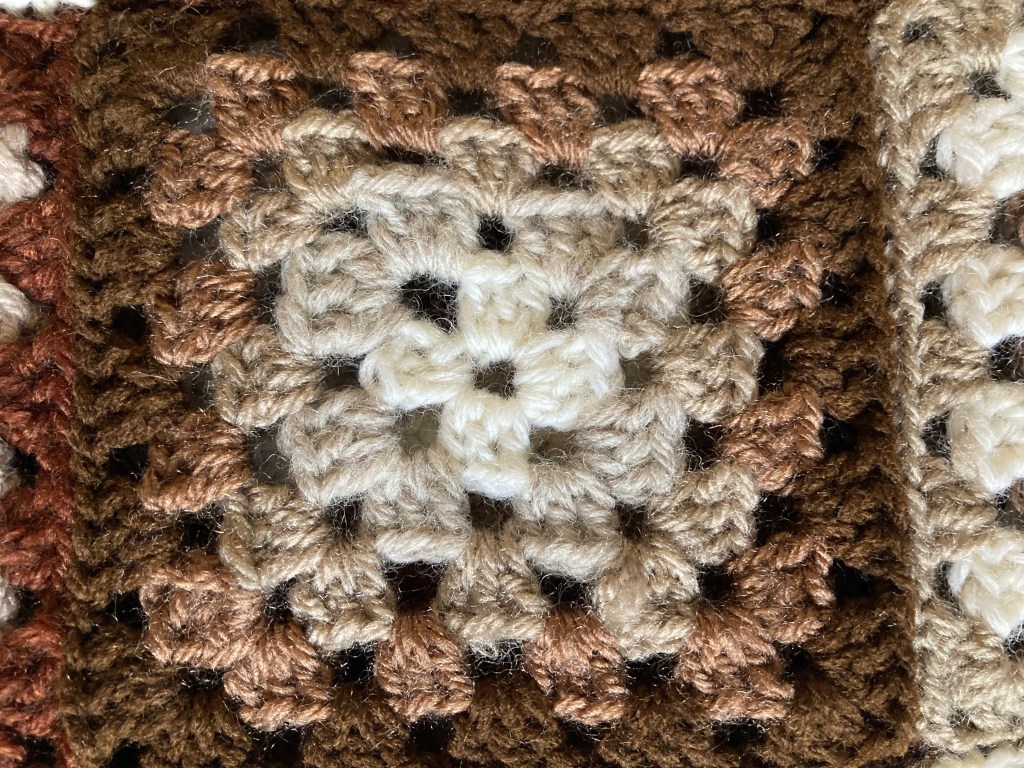
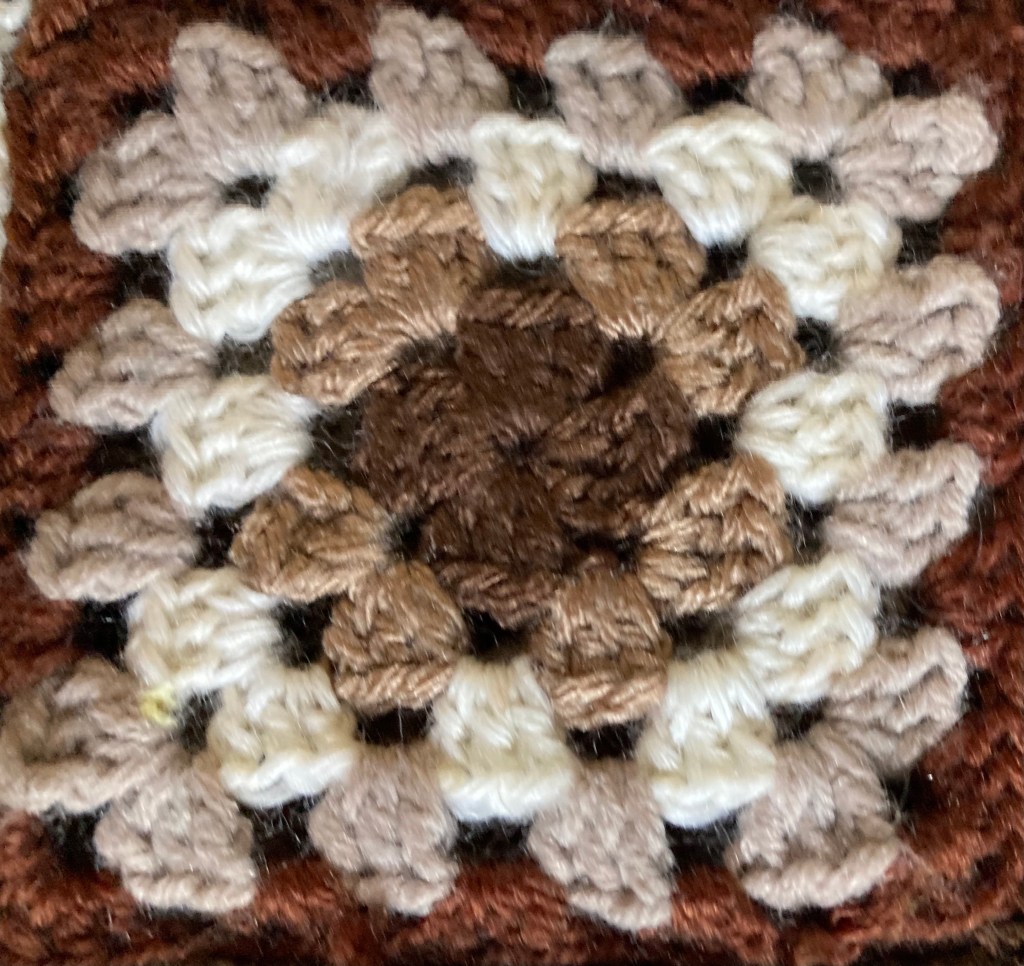
Today I got an email from one of the participants with a photo attached – she’s been working away and wanted to show me her completed square. She’s made a great job of it.
I always said when I was asked to teach these workshops that I would see how this first one went before I committed to more, but I loved doing it and the students seemed to enjoy it too. I’ve agreed to continue and I’m now planning my next one for the end of November.
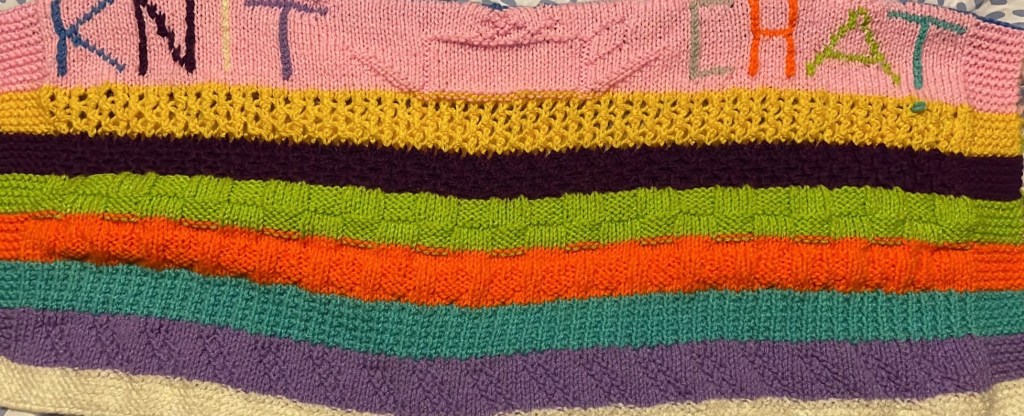
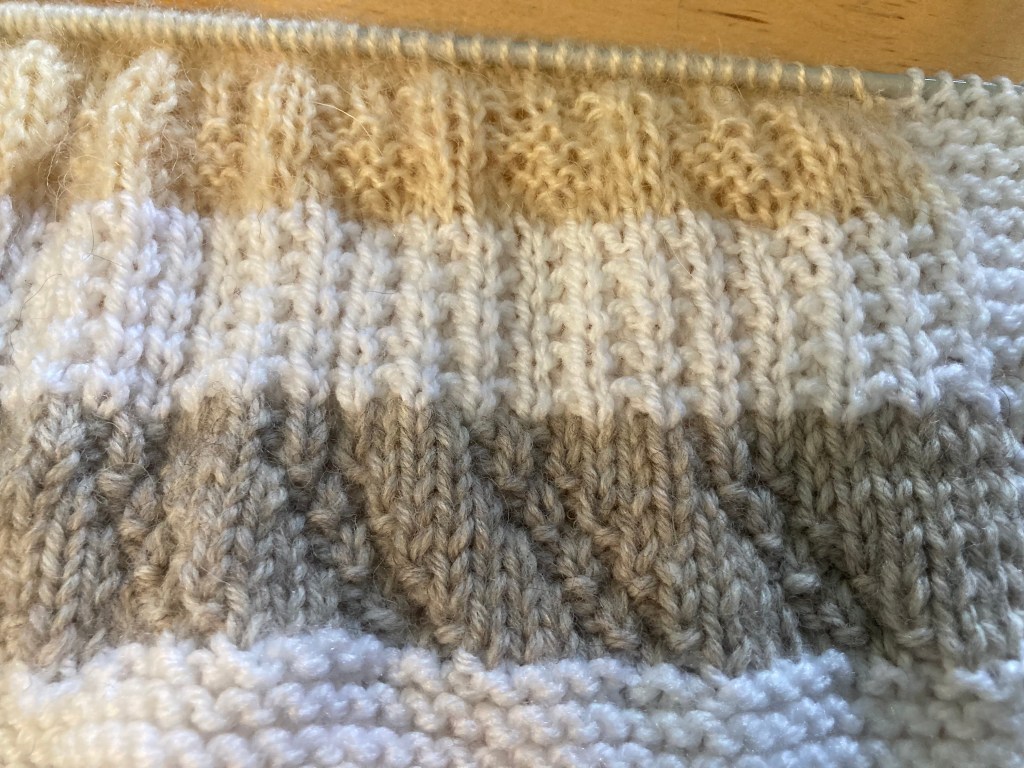
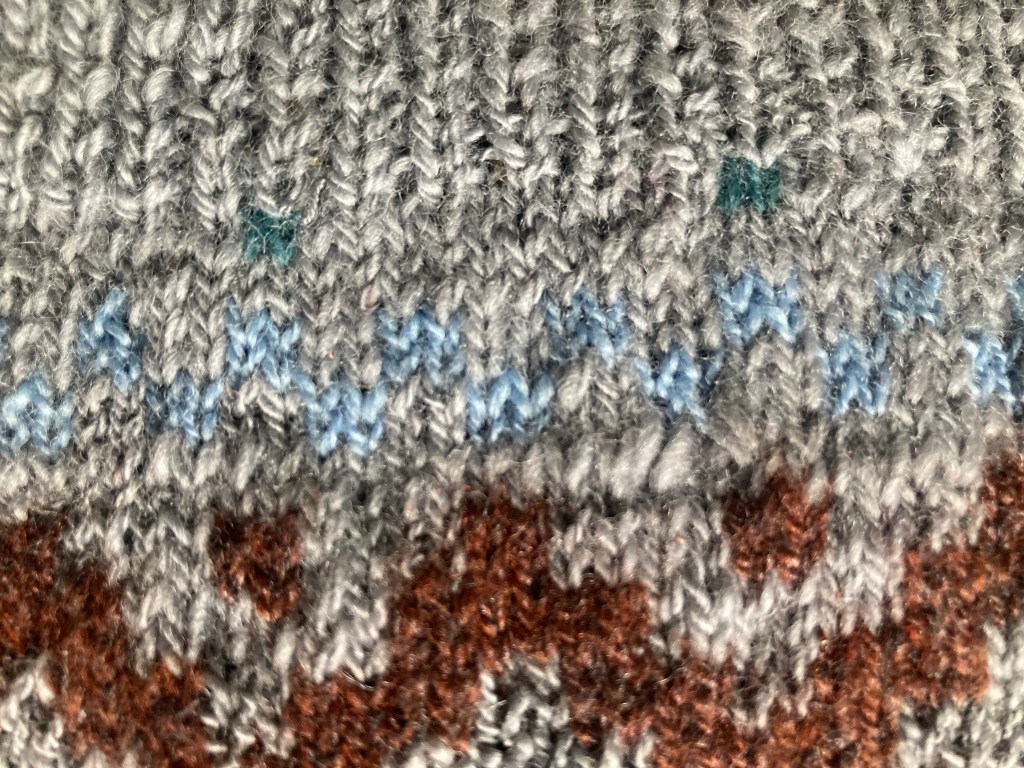
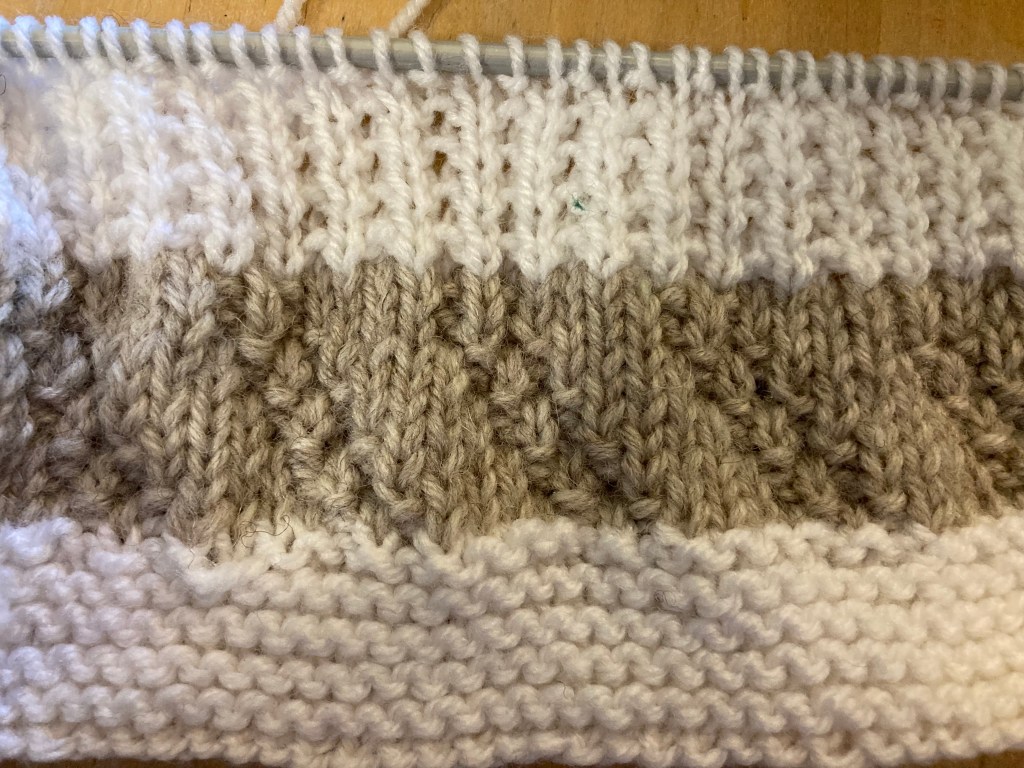
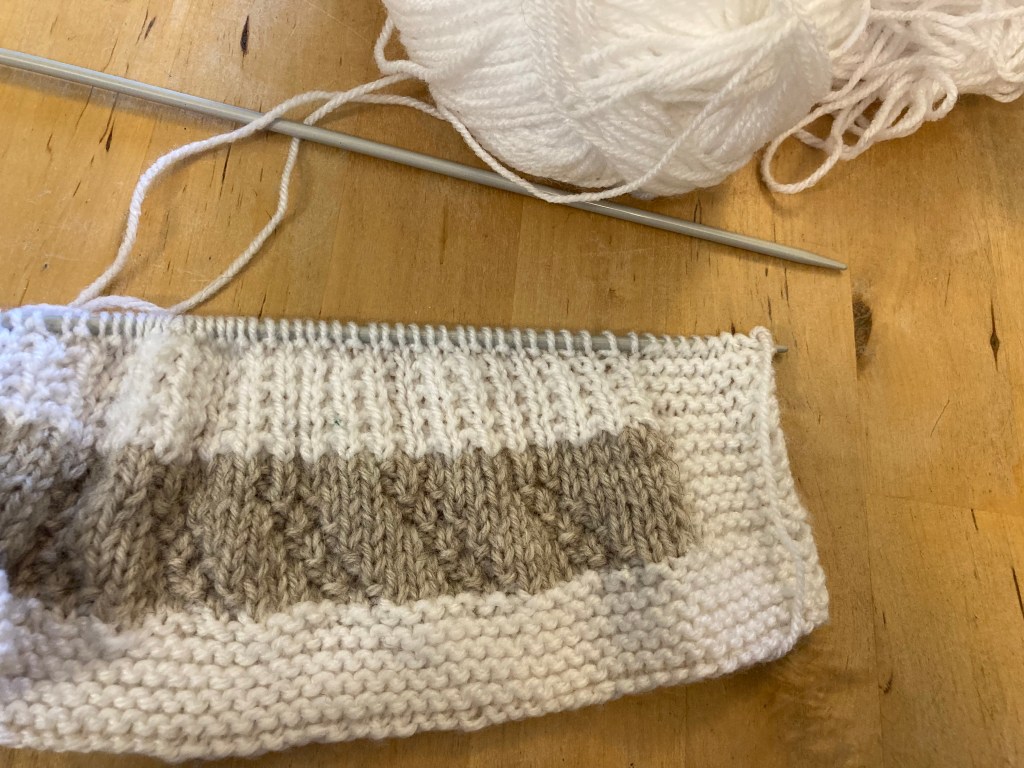
This week\s pattern is the most complicated yet, featuring colour work – an intarsia design, featuring the words “KNIT” and “CHAT” with a cup and saucer in between – a reference to our knit and natter group!
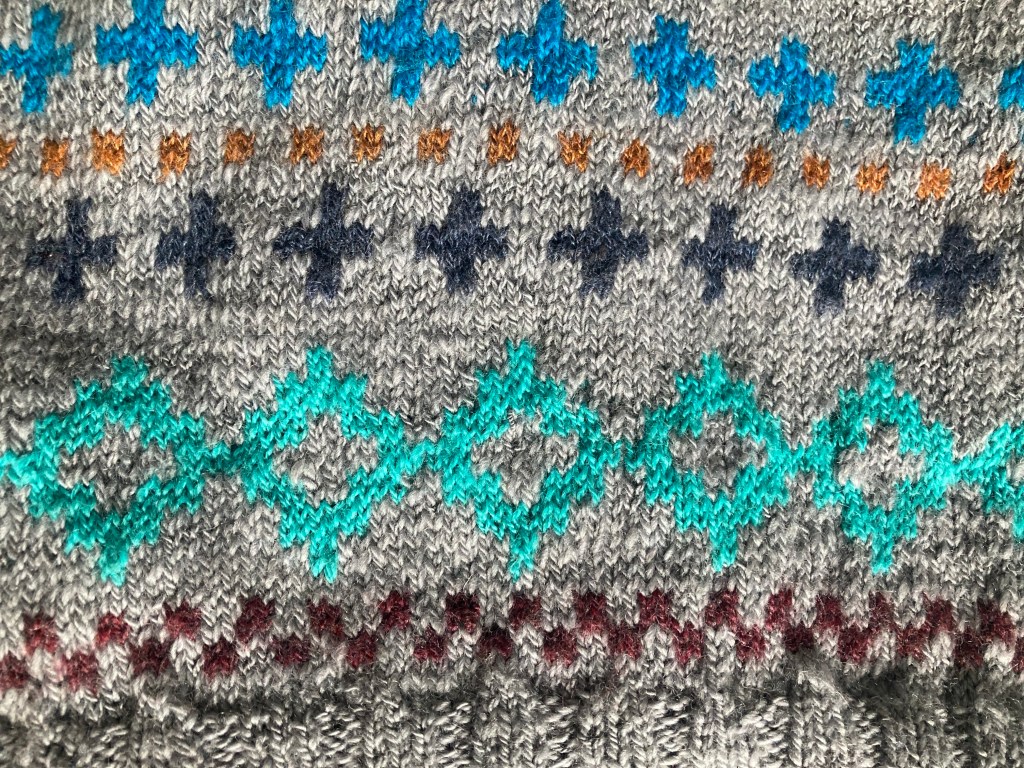
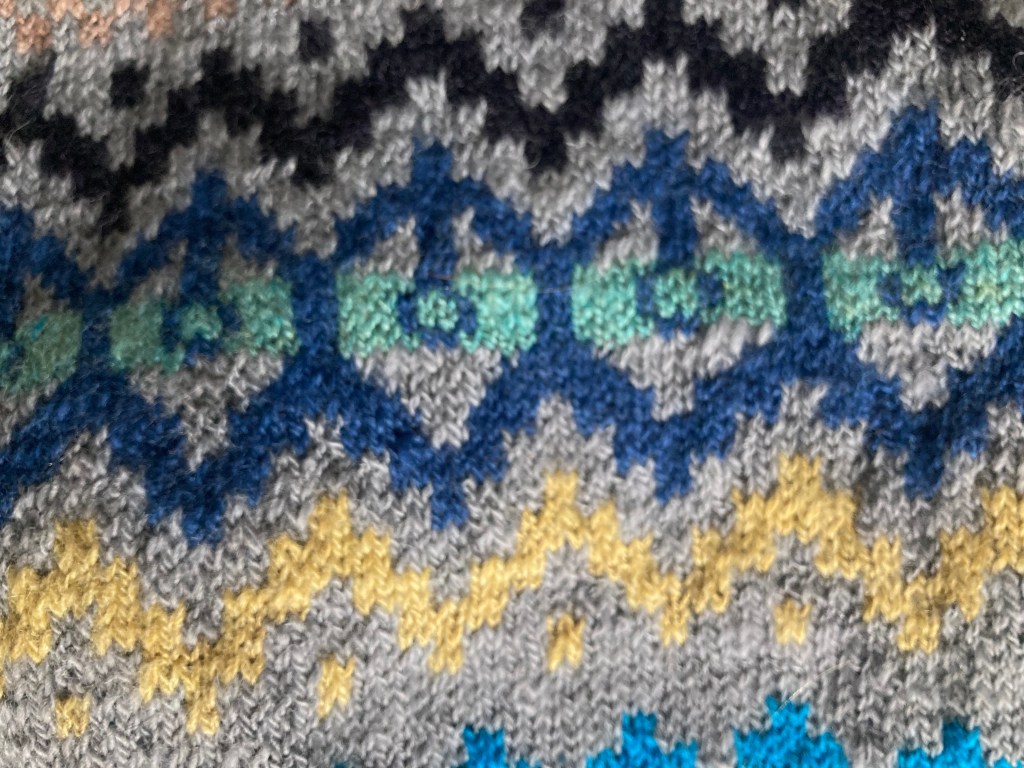
First of all, let’s take a look at what everyone’s blankets are looking like. Pauline has joined the KAL – here’s her blanket so far.
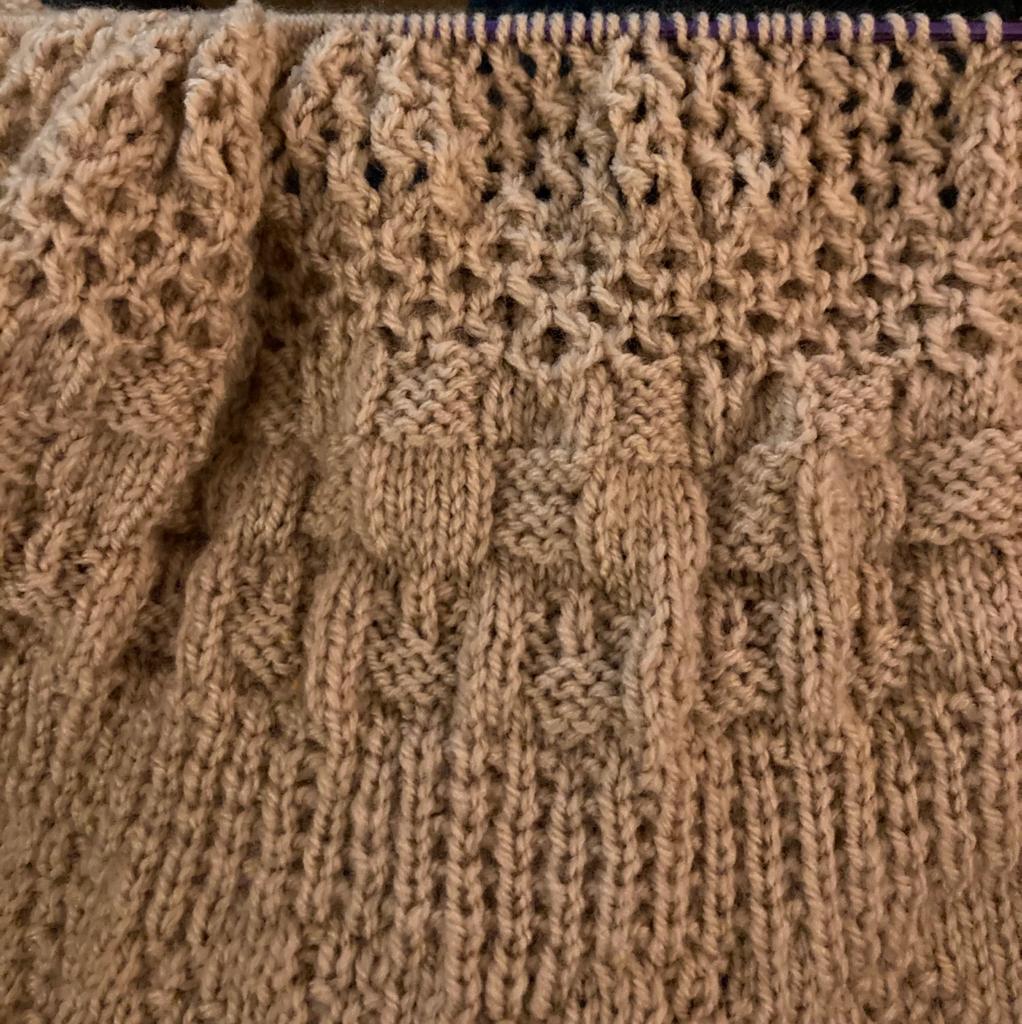
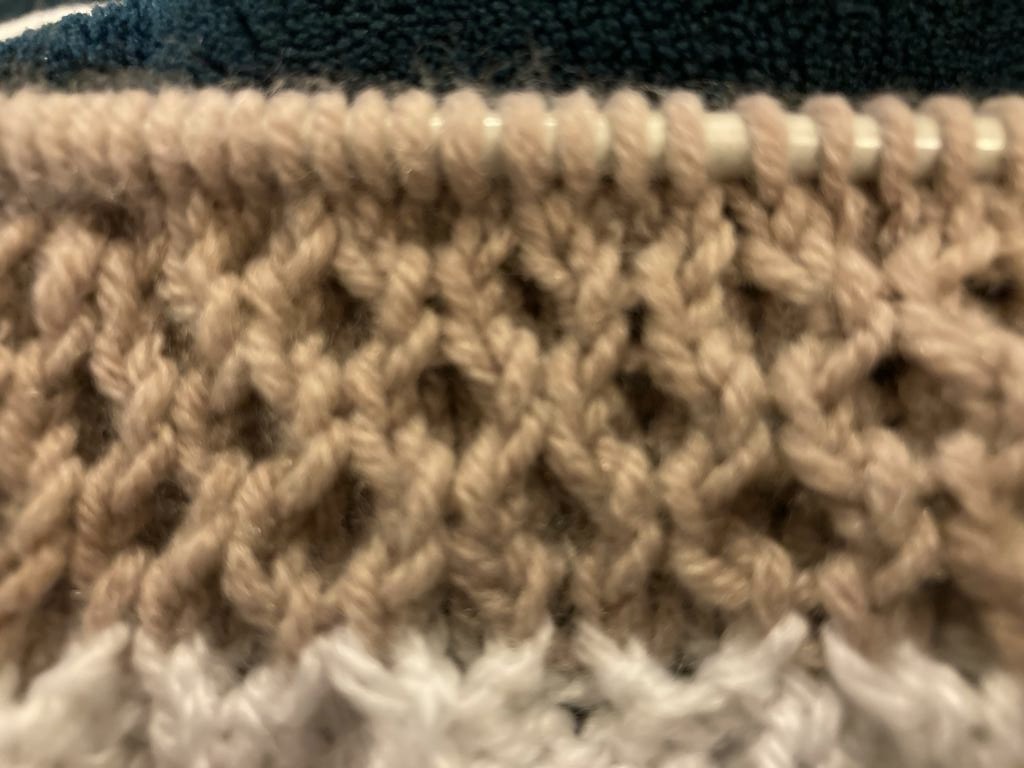
Here’s A’s blanket in fawn,
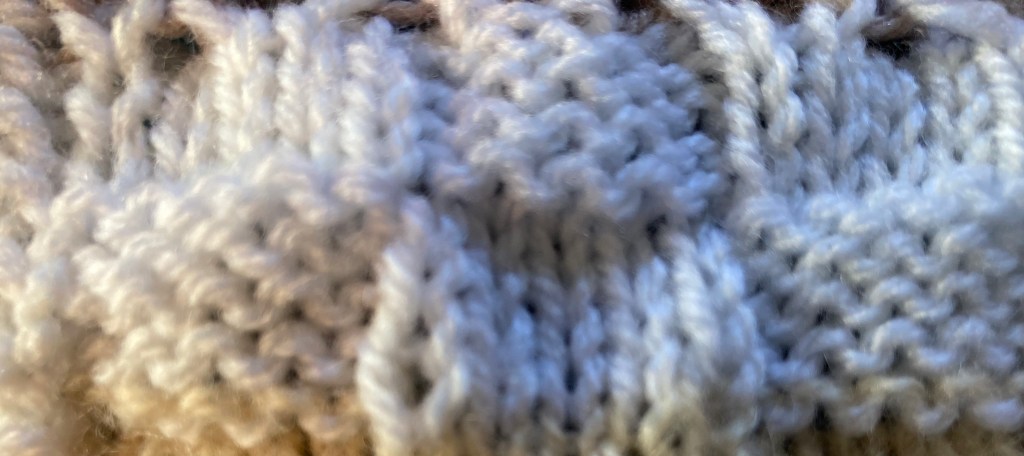
R continues her pink and white one.
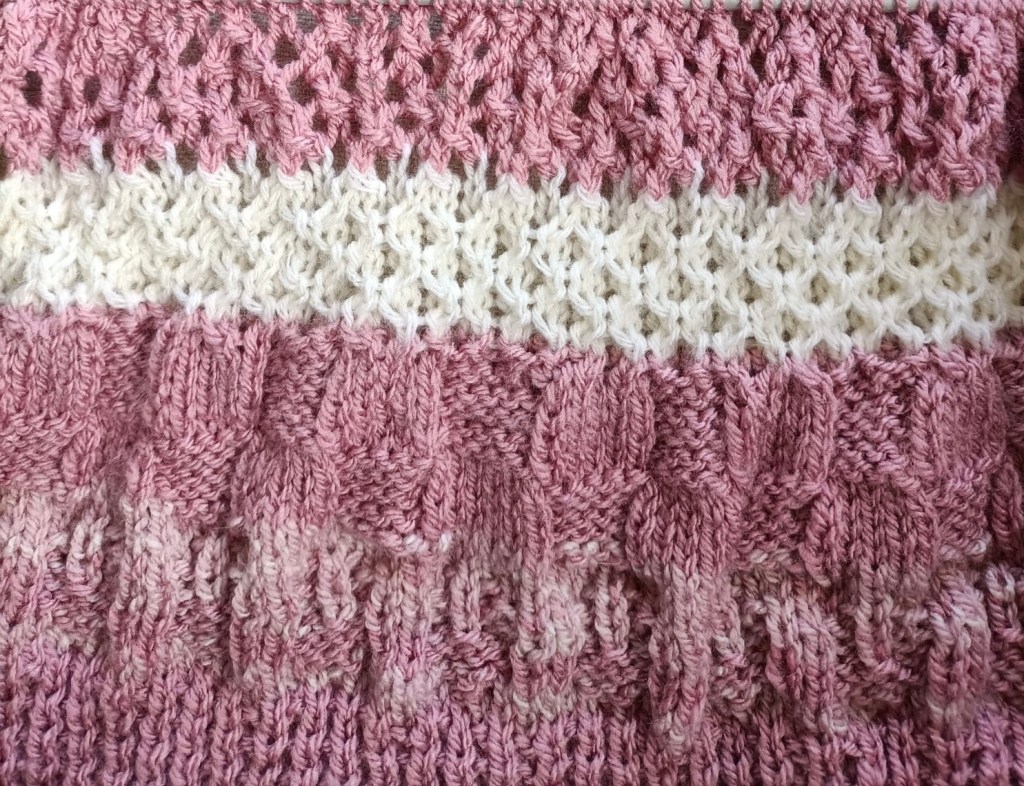
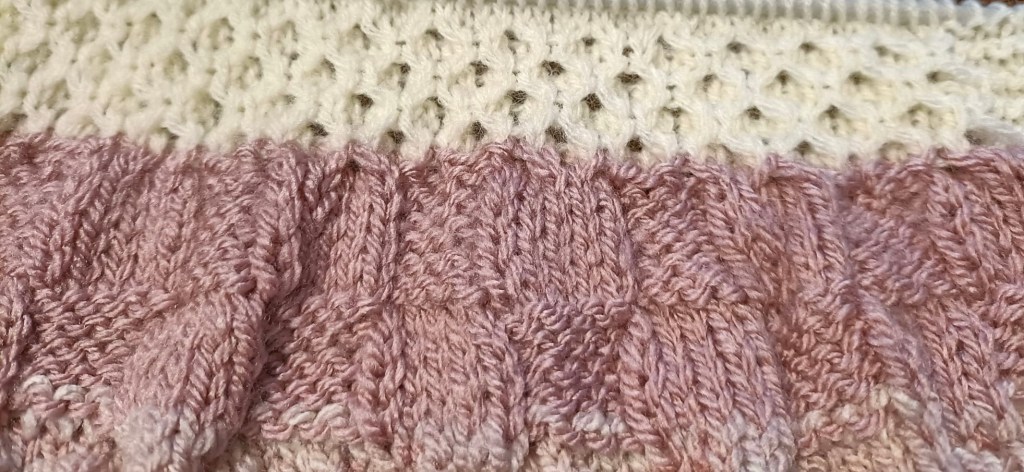
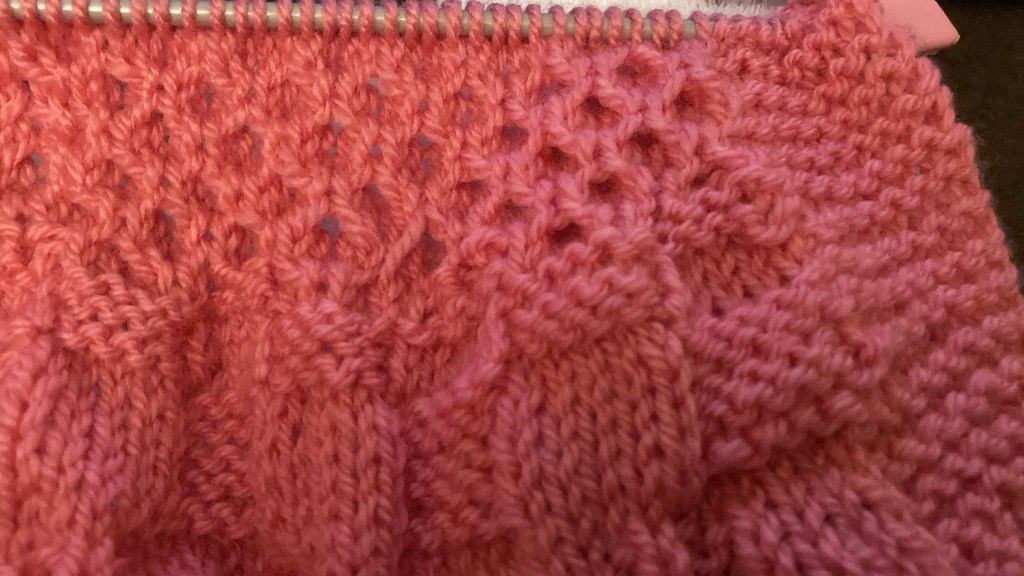
And here’s L’s salmon pink.
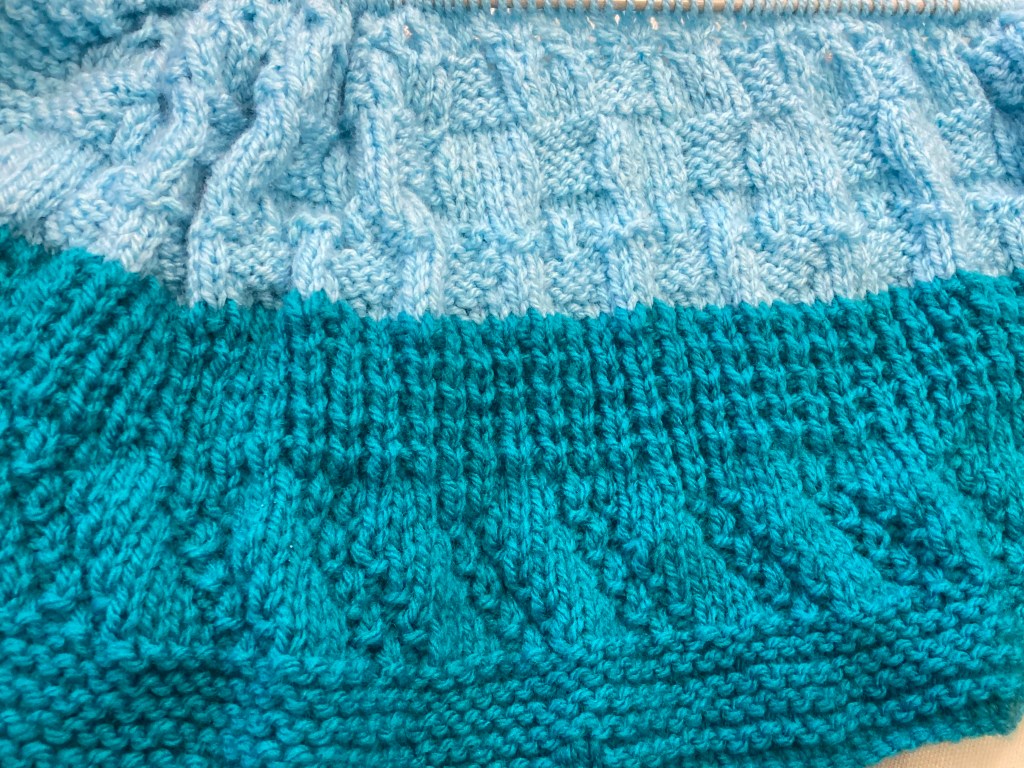
Here’s a close up of the lacy pattern we did last week, on my blanket.
Yvonne’s next design is 20 rows – that’s 2 weeks worth – week’s 8 and 9. It includes charts for the colour work.
Yvonne writes, “Hi guys – here we go again with a double whammy this week and we agreed to do both weeks in one as it’s really all one pattern. This week we have a bit of intarsia so you will need another colour or a few it’s up to you. Personally I love colour so I used a different colour for each part as there are some large parts which are difficult to carry the spare yarn across the back without puckering it. I will write out the rows to set the pattern then follow the charts (A on purl row first, B on knit row first) at the end of the written instructions.
So here we go and if we have previous rows correct we should have 125 sts in the middle to work on not forgetting the 8 sts of border at either end. Ok
Week 8-9
Row 1. K50, P25, K50 Row 2. P48, K31, P48 Row 3. K47, P3, K1, P2, K18, P2, K1, P3, K to end. Now we start the intarsia at the beginning and end of the row in between the edges. Row 4. P46 as follows:- 1 main (m), 1 contrast (c), 7m, 1c, 2m, 1c, 6m, 2c, 4m, 1c, 7m, 1c, 12m then centre panel of K3, P2, K2, P18, K2, P2, K3, P8, then intarsia again, P37 as follows:- 6c, 2m, 1c, 4m, 1c, 1m, 1c, 11m, 1c, 2m, 1c, 7m. Row 5. K row as follows:- 7m, 1c, 2m, 1c, 11m, 1c, 1m, 1c, 4m, 1c, 7m, 1c, 6m, centre panel, P3, k3 p2, k18, p2, k3, p3, intarsia 11m, 1c, 7m, 1c, 4m, 2c, 6m, 1c, 3m, 1c, 6m, 1c, k to end. Row 6. Follow chart A at the end for the sides and this is the centre panel worked over 45sts, p5, k3, p3, k2, p18, k2, k4, p3, k4. Intarsia from chart B. Row 7. Follow chart B then centre panel k4, p3, k5, p2, k18, p2, k5, p3, k3 follow chart A. Row 8. Centre panel p3, k3, p6, k2, p18, k3, p5, k2, p4. Row 9. K3, p1, k5, p1, k2, p2, k18, p2, k7, p1, k3. Row 10. P2, k1, p8, k2, p18, k2, p2, k1, p5, k1, p3. Row 11. K8, p1, k3, p2, k18, p2, k11. Row 12. P11, k2, p18, k2, p4, k1, p7. Row 13. K7, p1, k4, p22, k11. Row 14. P17, k1, p5, k1, p9, k1, p3, k1, p7. Row 15. K7, p1, k2, p1, k8, p2, k4, p2, k18. Row 16. P20, k2, p4, k2, p7, k2, p8. Row 17. K16, p1, k4, p2, k22. Row 18. P24, k1, p2, k1, p17. Row 19. K21, p2, k22. Row 20. P20, k2, p23.
Chart A
Chart B
It’s challenging so do your best! Don’t forget to send pics of your blankets.
First of all let’s have a look at how everyone got on with last week’s honeycomb pattern. Wnelcome to blog follower Liz who is knitting her blanket in yellow, aqua and white.
Here’s R’s pink and white…
…and L’s salmon pink
They all look great!
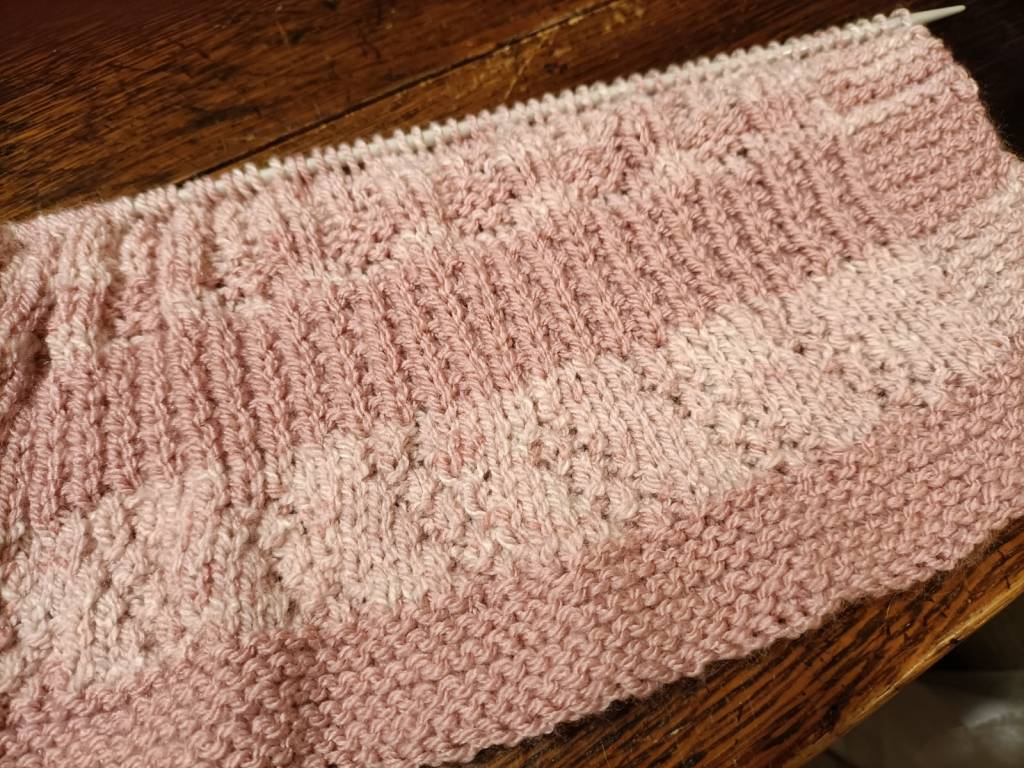
Here’s mine.
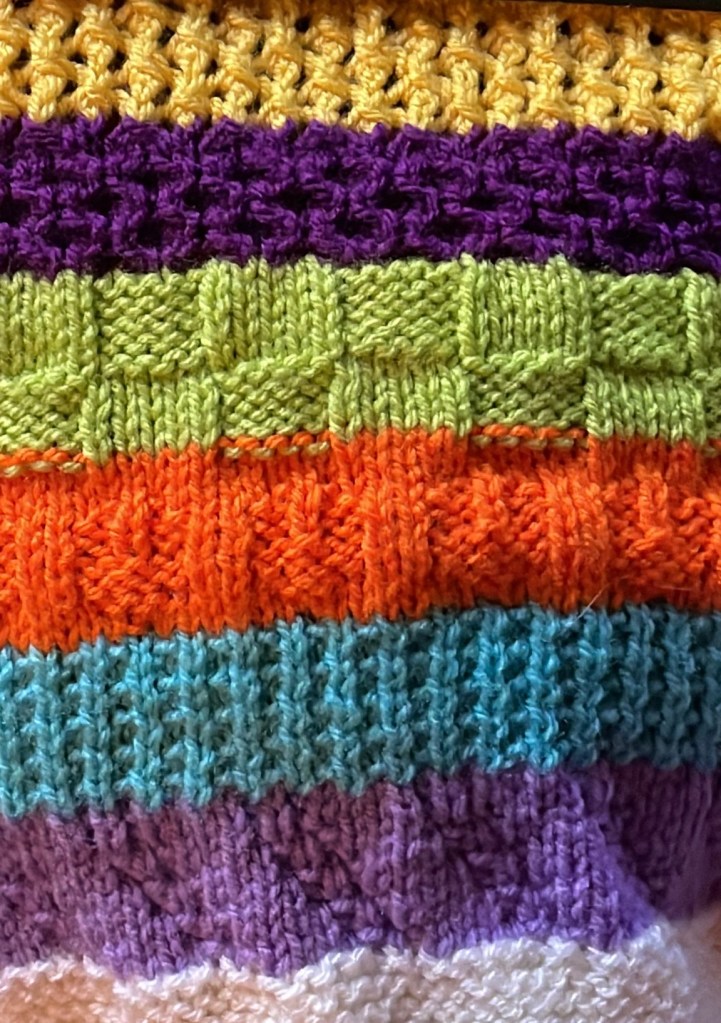
This week Yvonne has brought us a lacy pattern – it should look like the yellow stripe in the pic at the top of the post.
Yvonne writes, “Hi guys, it’s that time of week again and ready for the next part. I hope you all enjoyed last week’s instalment and didn’t find it too hard. This week we are changing the tempo and having a bit of lace and no cable needles in sight but we still have to count very carefully. Not that much to it but we do have long rows, it’s done over 4 sts and in 4 rows repeat so have fun.”
Week 7
The abbreviations for this week are: Yf yarn forward which means put yarn round the needle. Sl slip one so you slip the next st onto the other needle. K2tog knit 2 together which I think is self explanatory. PSSO pass slip st over again I think it explains itself.
Here we go.
Row 1. K2, (yf, sl, k2tog, psso, yf, k1) repeat what’s in brackets as far as you can remembering the 8 garter st at beginning and end. Row 2. P. Row 3. K1, k2tog, yf, k1, (yf, sl, k2tog, psso, yf, k1) repeat to end. Row 4. P. These 4 rows form pattern so repeat rows 1-4 again then the first 2 and that’s all there is to it.
Just remember to count carefully and also the borders and I will speak to you next week. Happy knitting guys. Yvonne
How are you getting on with your blanket? Do keep sending in your photos.
The KAL blanket is growing! Before I share the next instalment of Yvonne’s design, here are what some of the other group members are looking like. If you’ll remember, last week’s pattern was for a 5×5 check effect.
Here’s mine so far
…and L’s salmon pink…
…along with R’s pink and white
This week, Yvonne introduces a honeycomb pattern.
She writes,”Hi guys. Hope you are all well and managed last week’s pattern without too much trouble!
This week’s pattern consists of a 4 row repeat and uses a cable needle, it’s a little tricky but remember it’s all in the counting.
Week 6
We will be using abbreviations so here is the explanation for this pattern TW2R Twist 2 right which means put next st on cable needle and hold at back of work, knit 1, then knit 1 from cable needle. TW2L Twist 2 left which means put next st on cable needle and hold at front of work, knit 1 then knit 1 from cable needle.
Ok here we go. Row 1, (TW2R, TW2L) repeat to last st k1. Row 2 and all even rows purl. Row 3, (TW2L, TW2R) repeat to last st k1.
These 4 rows form pattern so repeat rows 1 – 4 again and then rows 1 & 2 again.
That’s all there is to it, good luck and happy knitting. See you next week.
Yvonne.
I love a bit of cable so I’m looking forward to getting on with this one. To see what it should look like, look at the photo of Yvonne’s blanket at the beginning of the post – it’s the purple stripe at the top.
Keep on knitting and sending photos of your blanket so far!
I’ve taught a fair few people to crochet over the years, friends and members of the various craft groups I attend. I was recently asked if I would run something at The Amble Pincushion as their usual crochet tutor has retired. I’ve agreed to teach a 2-hour session on making classic granny squares, something suitable for beginners. If it works out I may do more.
Granny squares seemed a good choice. The catwalks and clothing shops have featured loads of garments that include crochet squares this year. I’ve even just seen a picture of a jumper made of crochet-printed fleece on the Nicola Knits Blog– simulated granny squares!
To get ready, I’ve been preparing yarn packs and handouts. I’ve even made a promotional video.
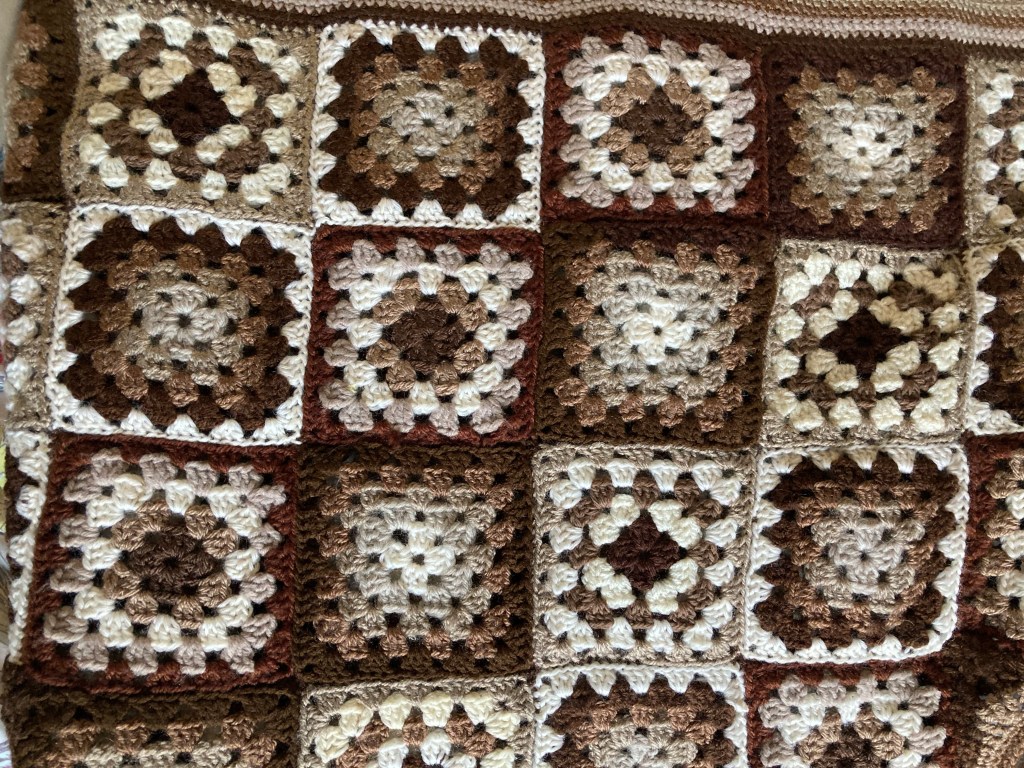
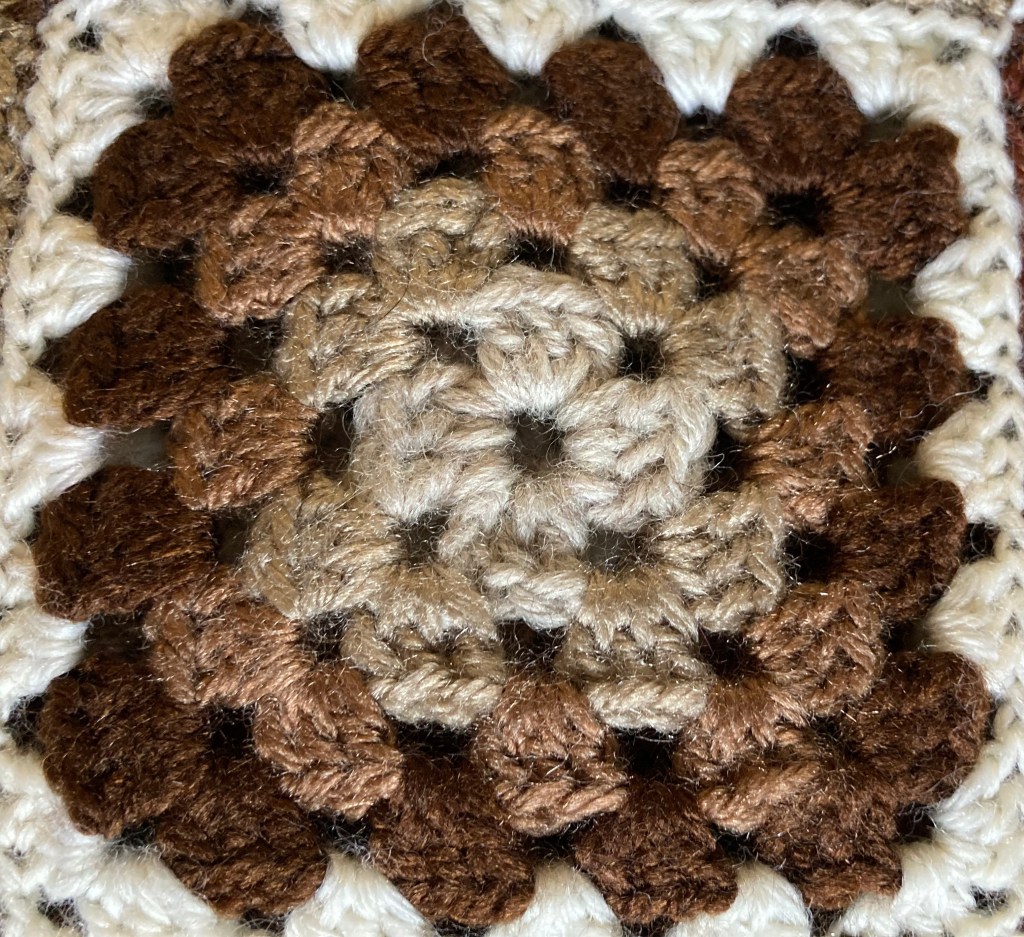
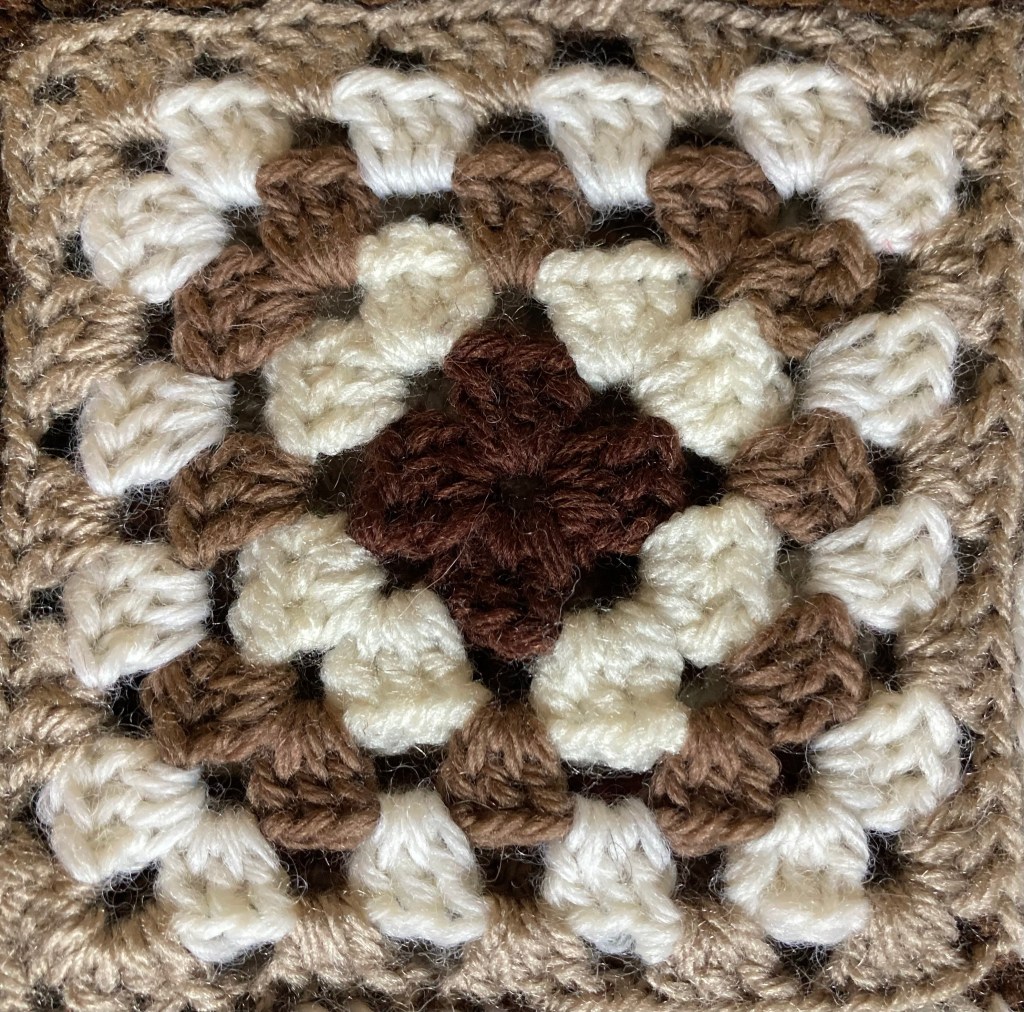
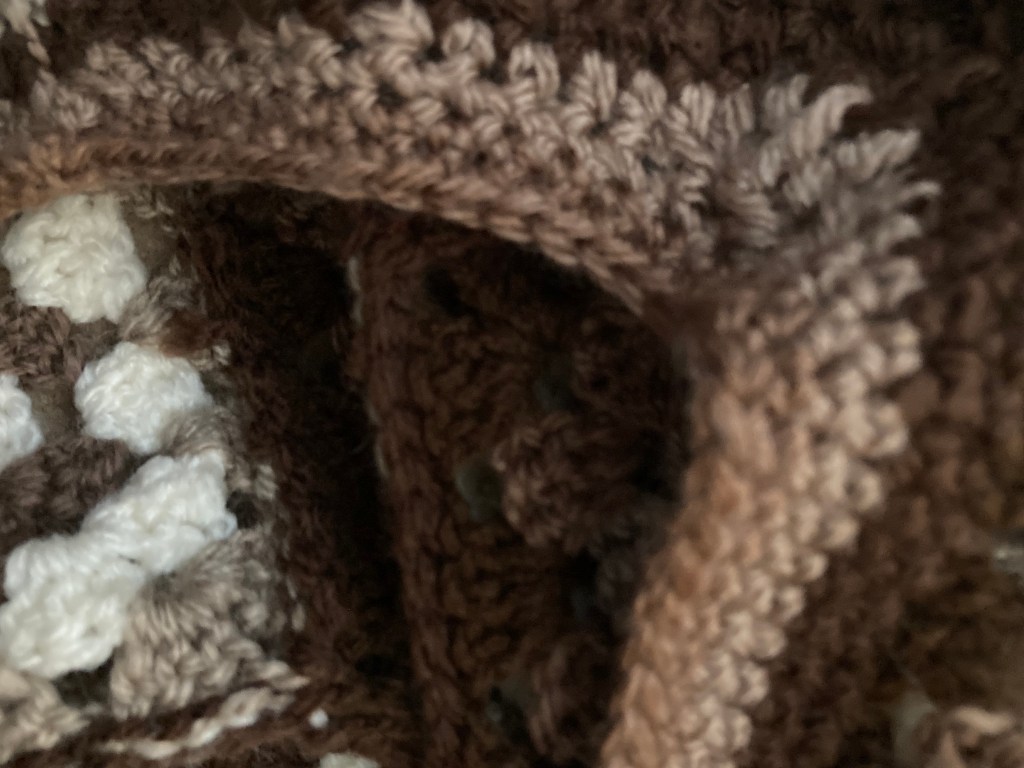
I’ve also been making lots of granny squares, most of which I made up into a sleeveless pullover. I used shades of brown, beige and white, crocheted them together and added a double crochet edging.
I used four different colour schemes for the squares and joined them sequentially.
The only thing I would have done differently is join the squares together as I went along – it did take ages to join them up. I used the crochet method which gives a really neat join.
I edged the neck, armholes and waist with a band of several rows of double crochet, placing some decreases at the underarm to improve the fit.
If I wear this for my course I’m hoping it gives my students confidence that I know what I’m talking about. Maybe I should call it my credibility top!
I just heard today that the course is fully booked, which is great news!
Have you been on a craft workshop recently? What did you enjoy most about it?
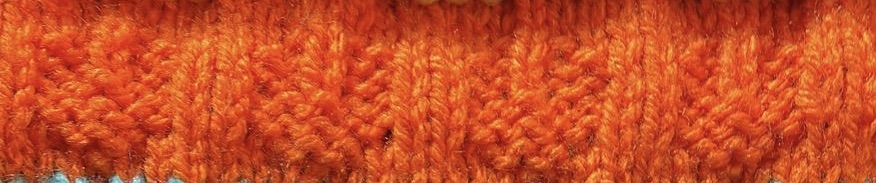
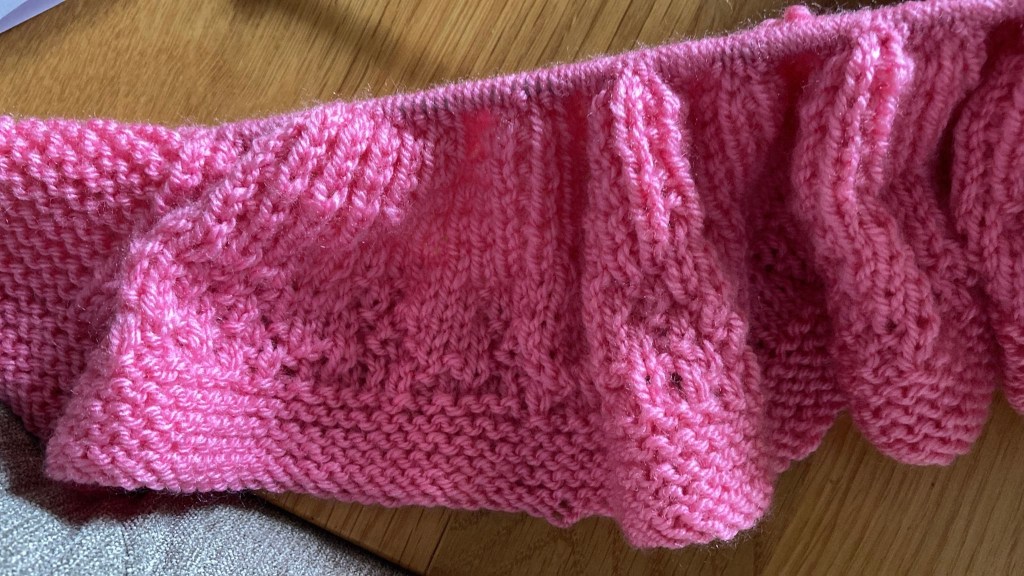
Last week’s pattern was a line of hearts – Yvonne’s prototype blanket included this in bright orange.
R’s pink/pink and white blanket is pictured below…..
…along with L’s vivid salmon pink…..
..and my striped blanket – I used a soft peach yarn.
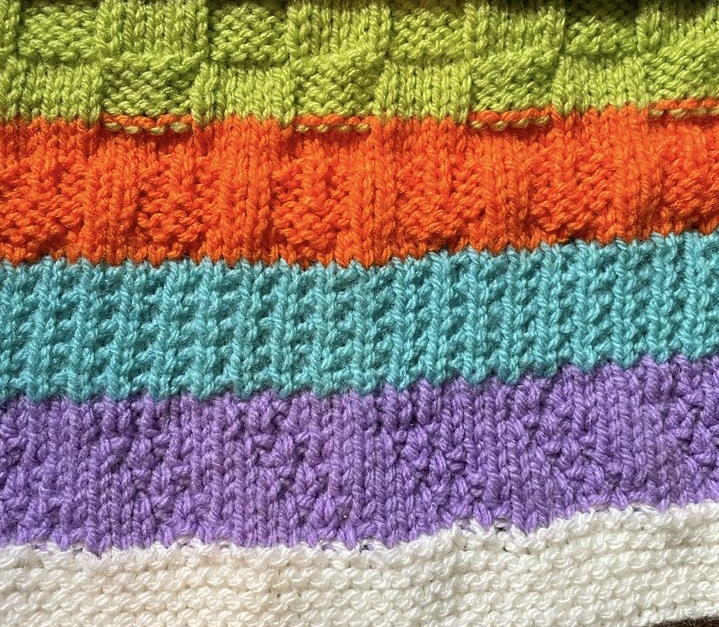
This week we are knitting 10 rows in a square check design (pictured in lime green at the top of the page).
Yvonne writes,
“Hi guys. It’s that time again and I don’t know where the weeks go! I hope last week wasn’t too mind blowing and that you can all count really well now as it comes in very handy. This week is quite easy going so here we go, please remember the edging on both sides.”
Week 5
Row. 1, P5, K5, to last 5 sts, P5. Row. 2, K5, P5, to last 5 sts, K5. Row. 3 & 4 repeat rows 1 & 2 Row. 5, repeat row 1 again. Row. 6, 7, 8, 9 work as row 1 & row 2. Row. 10, repeat row 1 and that’s all there is to it!
“Hope you are all enjoying this little pattern and this blanket but after this week we are all going to learn some new skills I hope. As always I’m here to answer any questions or problems so happy knitting.”
Yvonne
It looks like things are going to get a bit more tricky next time!
Carry on enjoying the KAL and sending me your photos!
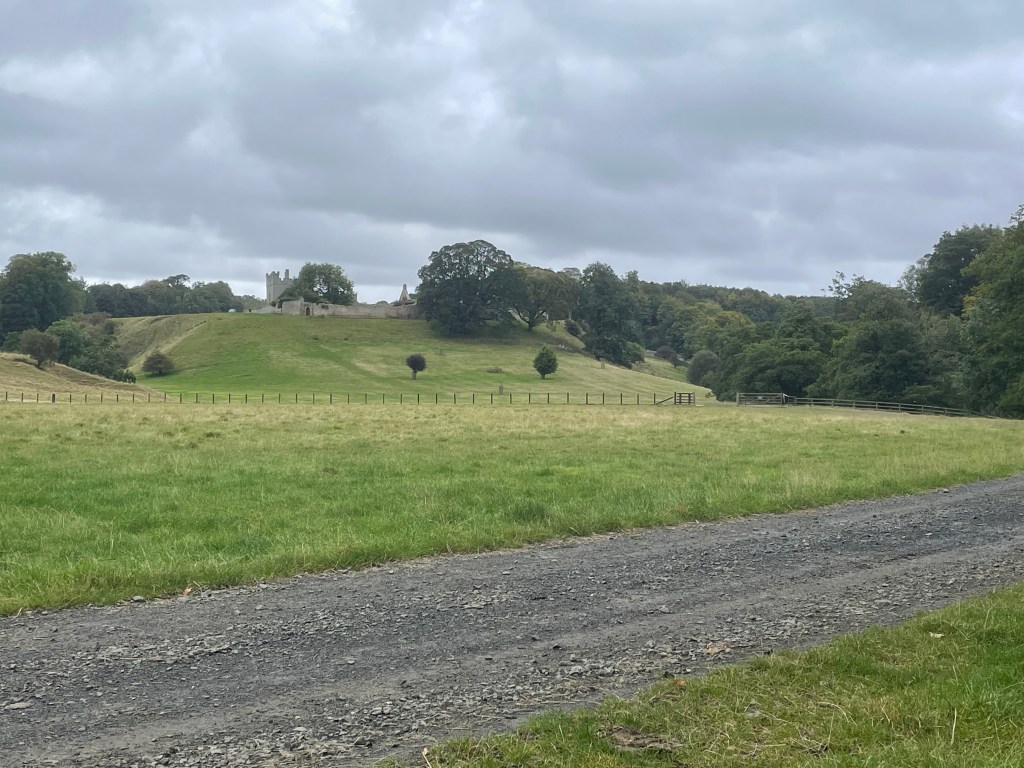
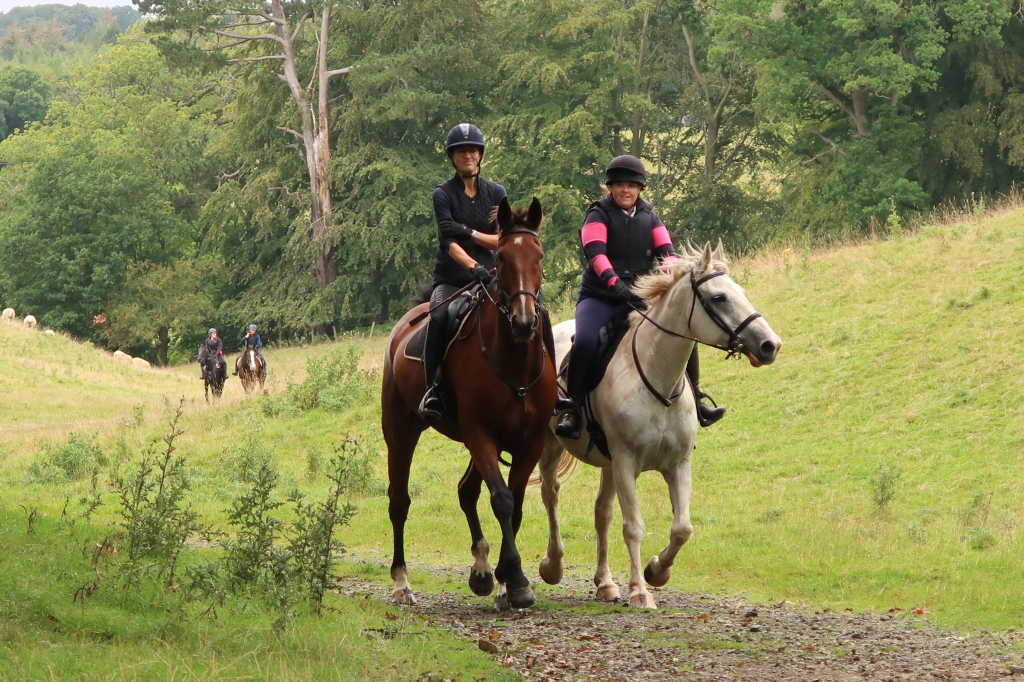
We spent a nice day In Hulne Park a couple of weeks back. The Park is the private estate of the Duke of Northumberland. I suppose you could say it is the back garden of Alnwick Castle! We had volunteered to help with a pleasure ride held in the park with the Duke’s permission. Well over 100 horses and ponies and their riders were able to enjoy spending time in this beautifully landscaped park which is over 3000 acres in size . They followed a marked route across fields and moorland, through woods and along the banks of the River Aln. Not only is the scenery stunning, but there is no traffic to speak of, apart from the occasional farm vehicle. That is quite a luxury for many riders who can’t access safe places to ride without crossing or riding along the highway.
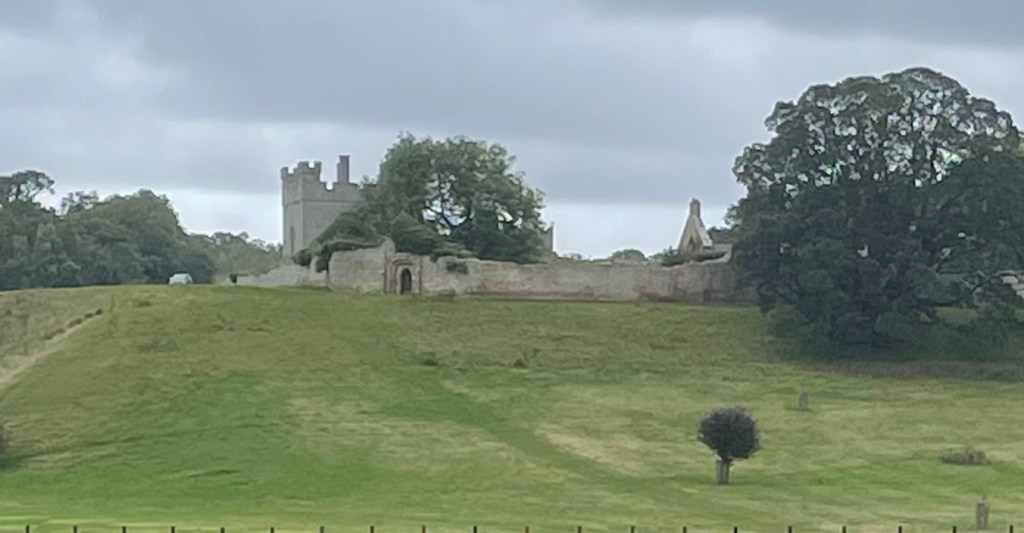
The park is also the location of several ancient monuments, including Hulne Priory. Originally the home of Carmelite monks in the 13th Century, the Priory is now in ruins, though much remains of what is still an imposing and atmospheric building , perched on a hill within the park.
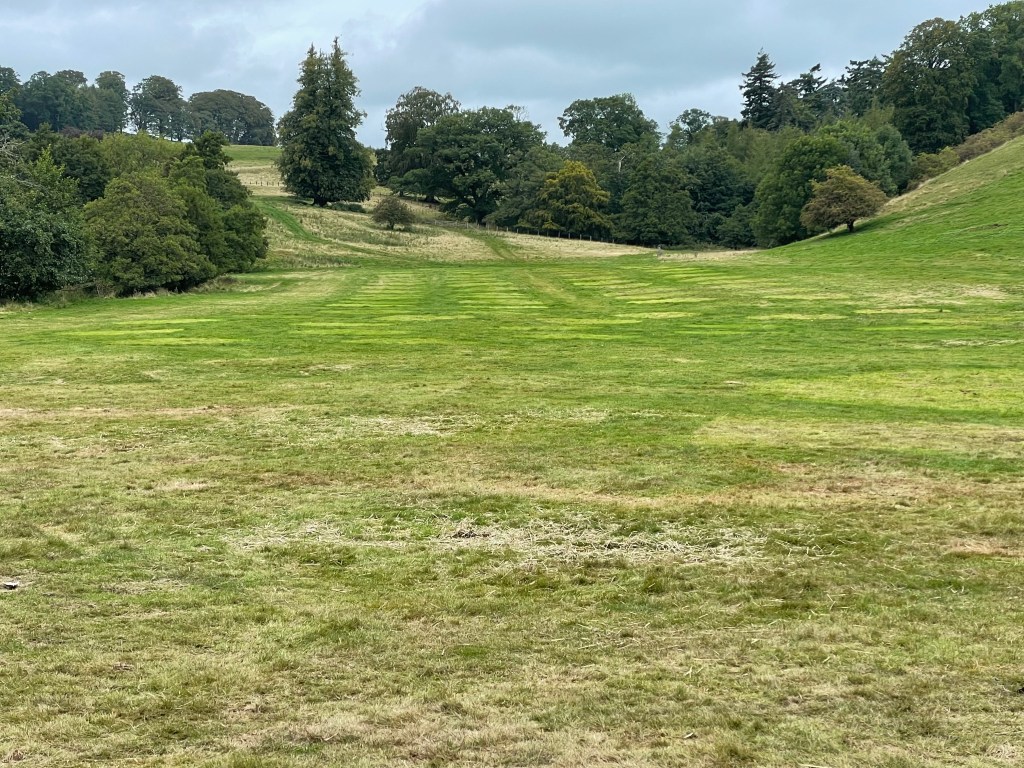
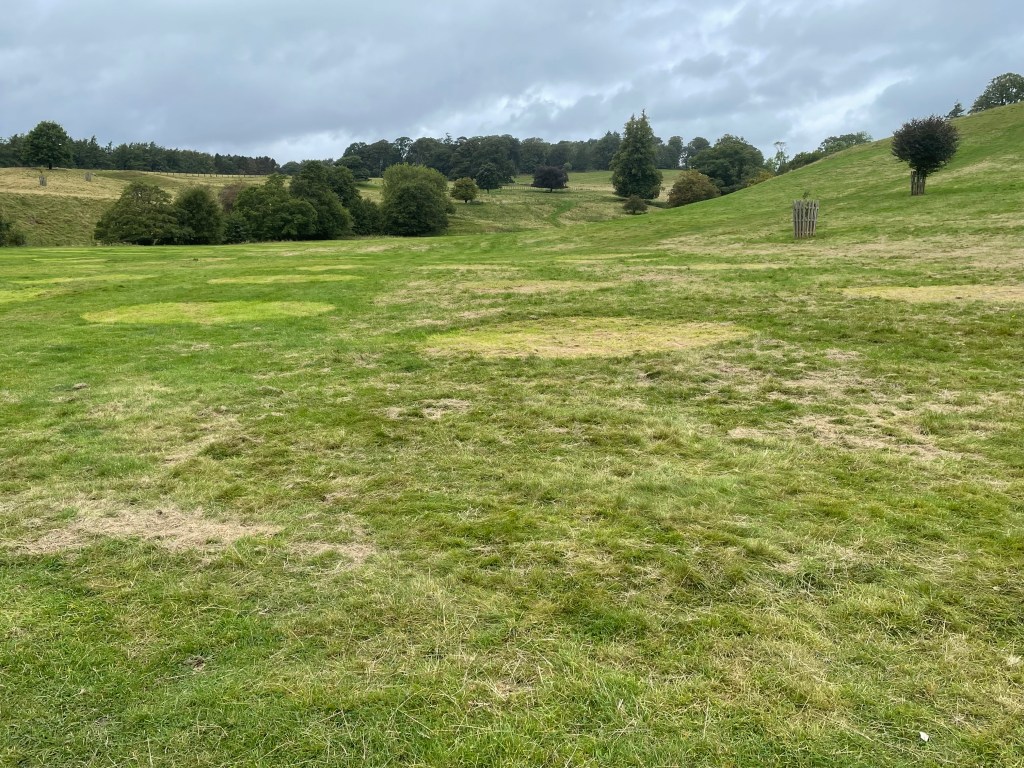
Our riders were curious about the pale circles and rectangles in the grass near the abbey.
The site had not however been visited by aliens! This was the location of a celebrity wedding the previous weekend and the grass had not yet recovered. DJ Calvin Harris had married BBC Radio 1 presenter Vic Hope in a lavish Glastonbury-themed wedding. Huge marquees had been erected by the Priory and a large village of luxurious tents and tepees had been set up nearby to accommodate wedding guests overnight.
Security had been strict but local residents were made aware that something very special was happening when they witnessed (and heard) a massive firework display on the night of the wedding. The local and tabloid press reported several celebrities at the local train station as they left the area the following day. Aerial photos of the site have also been published, presumably drone footage.
It must have taken an army of staff to set up and staff the event….and another army to clear up afterwards. No trace of what had happened could be seen apart from those tell-tale patches on the grass. In a few more days these will have turned green again.
Hulne Park is open to walkers 11am until 4pm daily, though it is advisable to check the website before visiting as it does close occasionally for special events, such as this wedding. No cyclists or dogs are allowed. This is to safeguard livestock and game.
Welcome to Week 4 of the KAL – that means that when you’ve done this week’s section you are a quarter of the way through!
First of all let’s look at what those of us taking part have been up to.
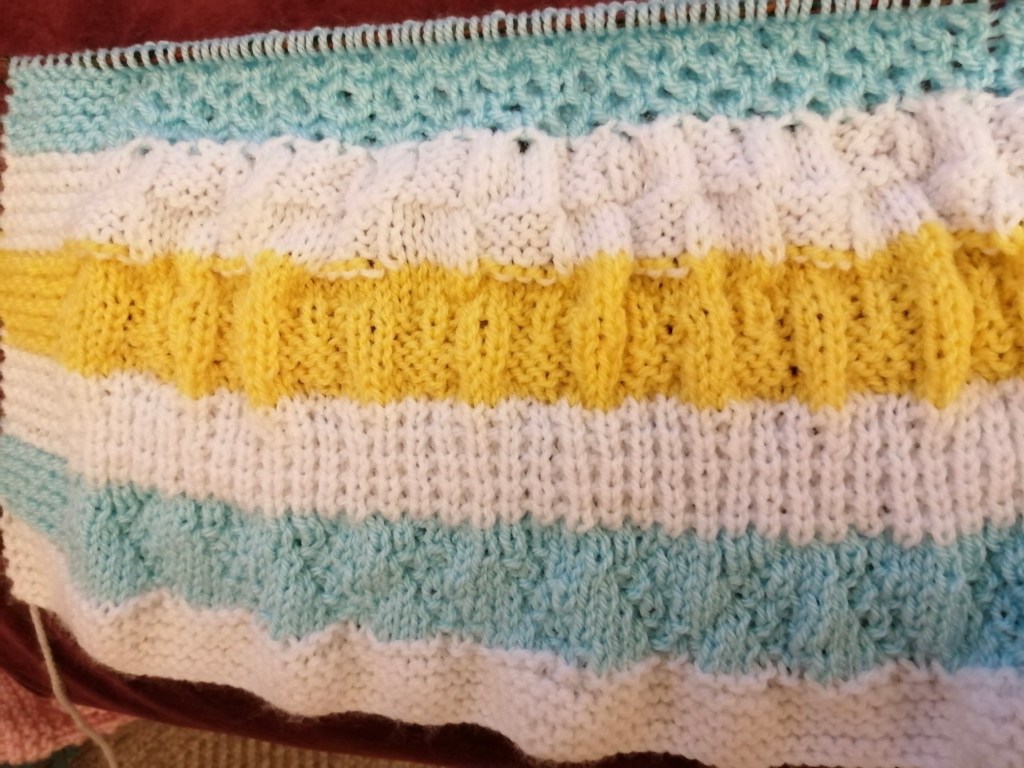
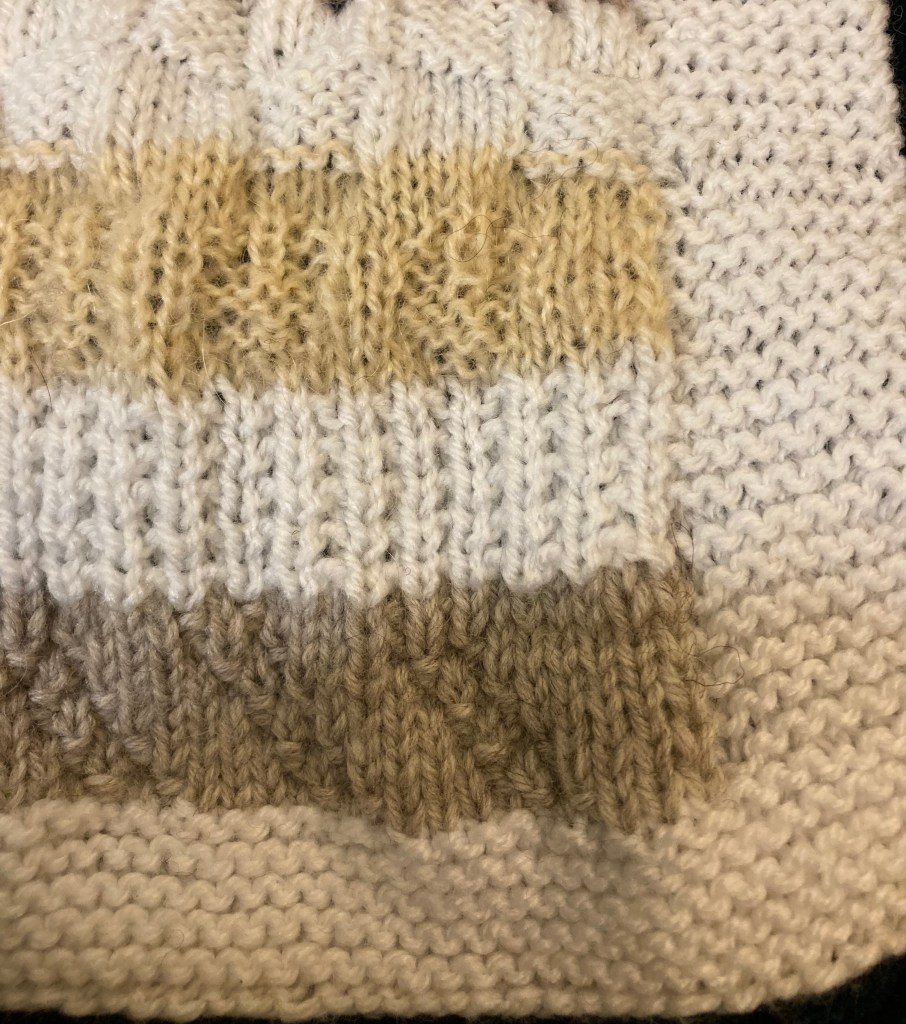
Here’s mine. My alternating colour/white combo meant week 3 was in white yarn.
Here is L’s lovely pink one……
…and A’s cosy soft fawn.
Now for the Week 4 instructions. This week we are back to casually counting stitches like Week 2. Over to you Yvonne…..
Week 4 Instructions
Yvonne writes, “Well guys it’s that time of the week again and time for the next 10 rows. I’m sorry to say that it’s a little bit harder. Also please remember that the first and last 8 stitches are in garter stitch throughout. So here we go.”
Row. 1, knit. Row. 2, p6, k1, to end finishing with a p6. Row. 3, k5, (p3, k4) to end doing last st as k before border. Row. 4, p4, (k5, p2) to last 4 sts p to end. Row. 5, k4, (p5, k2) to last 4 sts k to end. Row. 6, p4, (k2, p1, k2, p2) to last 4 sts p to end. Row. 7, k4, (p2, k1, p2, k2) to last 4 sts k to end. Row. 8, p5, (k1, p1, k1, p4) to last 5 sts p to end. Row 9, k to end. Row 10, p to end.
“This is my variation of a row of hearts as I have put lots into the blanket. Good luck everyone and happy knitting until next week.”
I’d love to hear about your progress on the KAL… with photos if possible. How did your Week 3 go? What colour(s) are you using?
Good luck with Week 4. The next instalment will be posted next week.
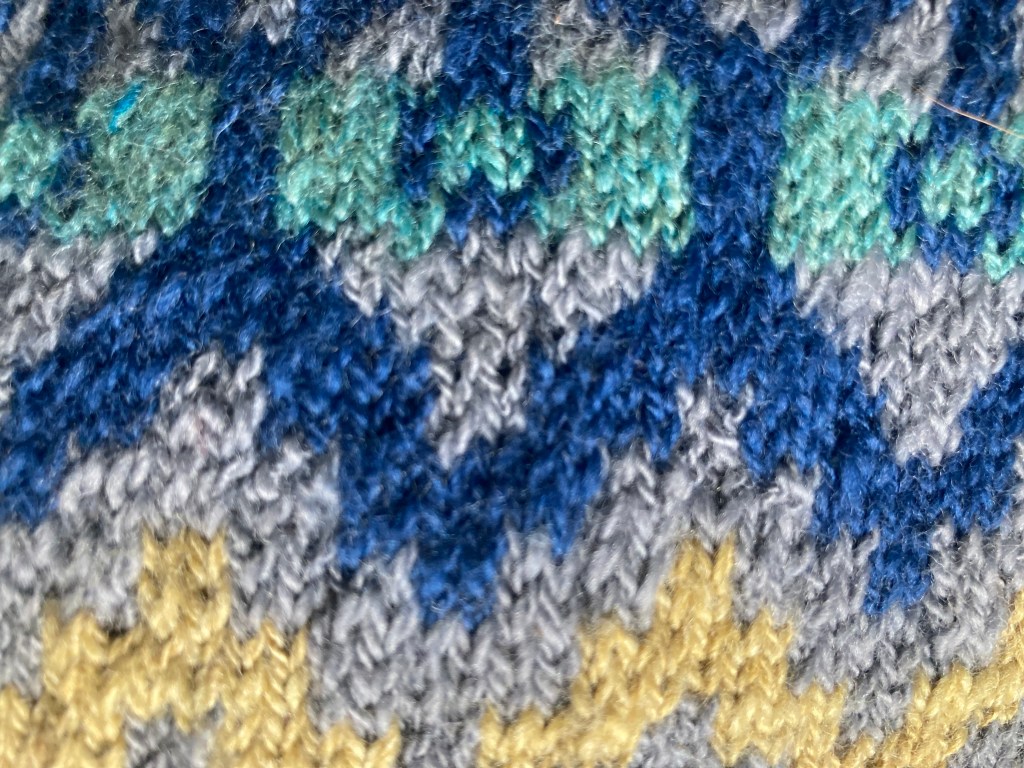
One of my favourite Christmas presents was the 12 days of Christmas pack from Hilltop Cloud. It comprised 12 packs of prepared fibre (merino and silk) in a range of gorgeous hand dyed shades, each inspired by a Welsh folk tale. The set was beautifully packaged and it was such fun to open each pack and listen to the stories on the Hilltop Cloud website.
I was then left with the rather pleasant dilemma of what to do with the fibre as. It would have made a lovely shawl, though I’m not really a shawl person. 11 of the 12 colours are only 20g each (the other was a 100g braid which is on it’s way to becoming socks), so it had to be a colourwork project. I also had some small quantities of merino in shades of blue and turquoise that I bought ages ago – I spun all of the fibre quite fine, around 20 wpi (3-4ply thickness) then bought some neutral grey merino tops for the background colour and spun that to the same thickness.
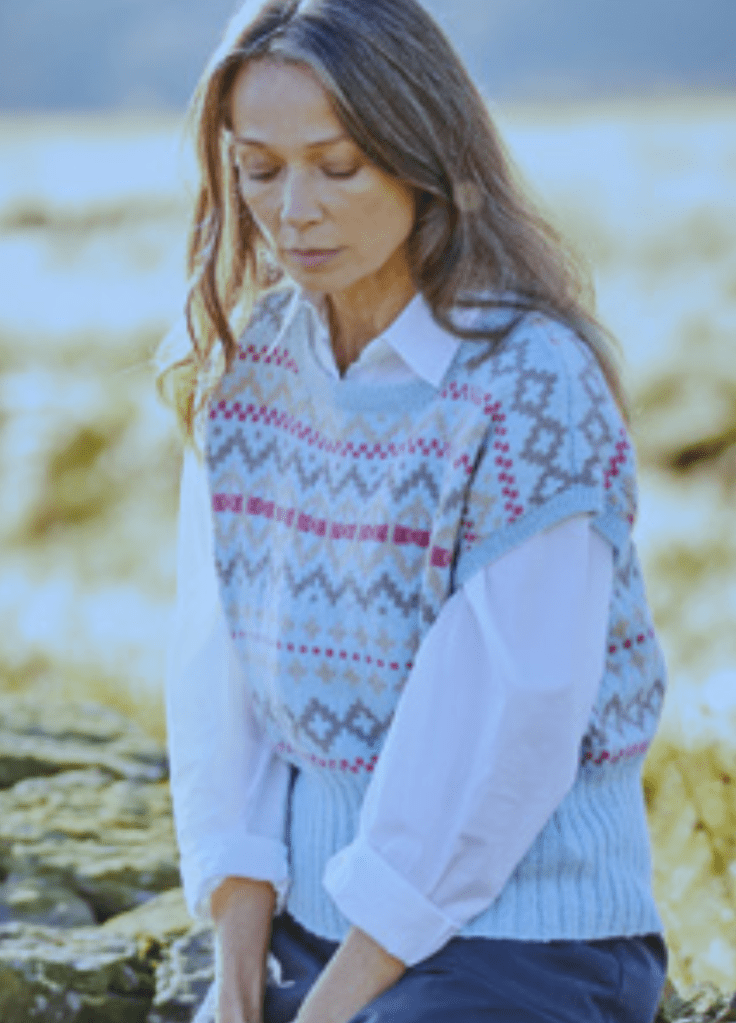
I used Sirdar pattern 10128 – a sleeveless pullover with a round neck and wide shoulders/drop sleeves. and used all the colours of handspun yarn instead of the suggested four in the pattern.
It was fun to knit – the design kept me engaged, not just following the pattern chart but also ensuring the strands of yarn floated at the back weren’t pulled too tight.
The only problem is that K commented that Wallace (of Wallace and Gromit fame) is partial to the knitted pullover
Can’t get that out of my head now!
What’s your favourite way of using small quantities of precious yarn?
It’s KAL time! As you’ll have realised if you are taking part, this is a MYSTERY KAL. This means that Yvonne, who designed our baby blanket is not showing us what the finished item will look like, only revealing it gradually, week-by-week as each section of the pattern is released. Before I post her next set of instructions, here’s where we are up to before Week 3’s knitting starts. This is L’s pink blanket so far……
…and R’s which combines a pink border with a pink and white yarn for the Week 2 pattern. The colours go beautifully.
Here is mine, which has a white border.
The Week 2 pattern was not without its challenges. One wrong stitch threw the rest of the row out and I had to start this bit again. Yvonne has been a little more lenient with us this week!
Week 3 Instructions
Yvonne writes, “Hi All. Week 3 already. I can’t believe it! Hope everyone managed to sort out the mishaps from last week but we are having an easier one this week.”
So here we go, remembering that the first and last 8 sts are in garter stitch.
Row 1, K to end. Row 2, P1, K1, repeat to end.
These 2 rows form this week’s pattern so repeat rows 1 and 2 until 10 rows have been done in total.
“Until next week, happy knitting.”
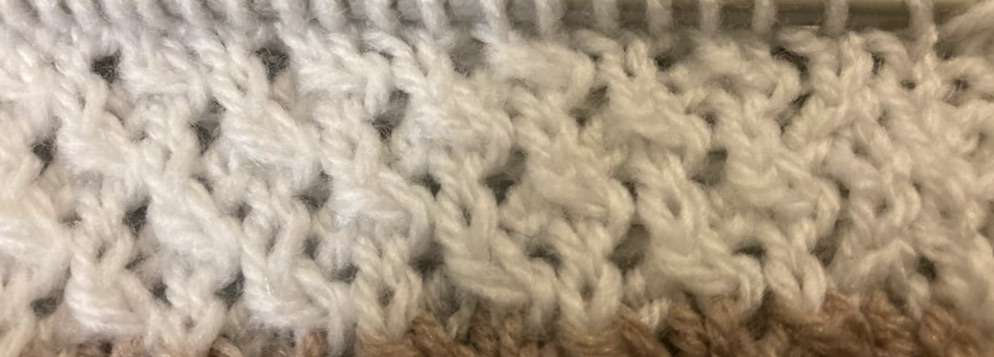
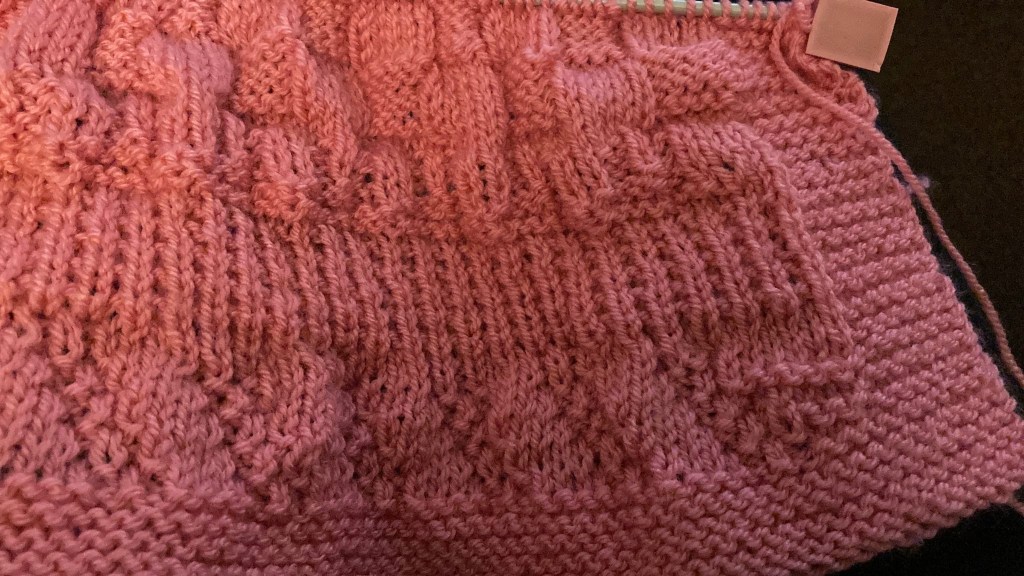
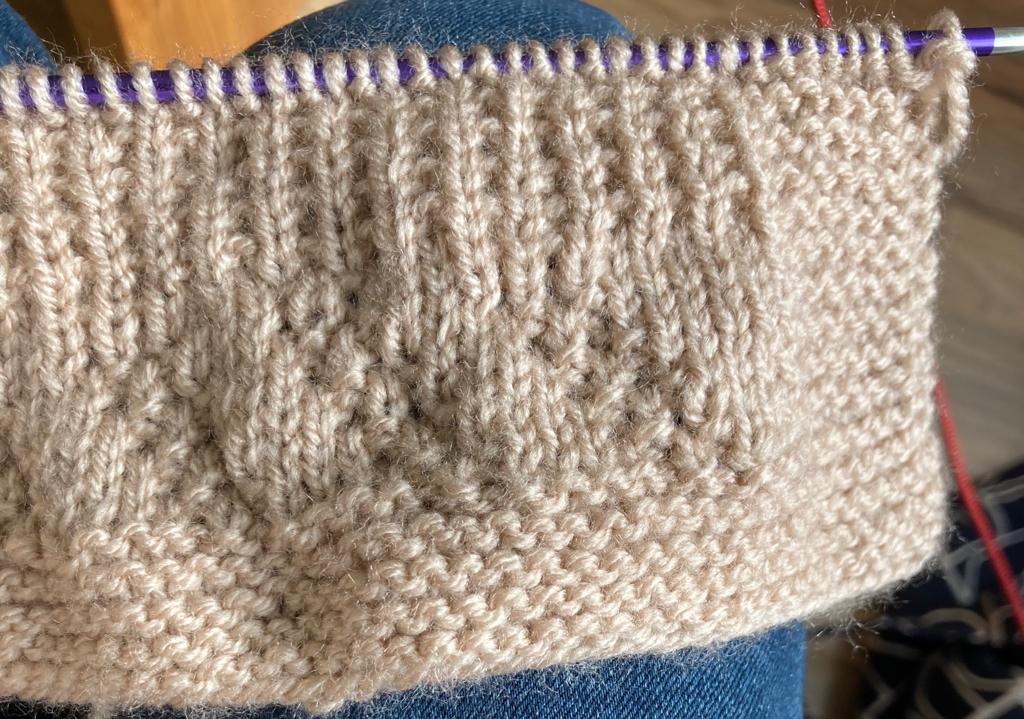
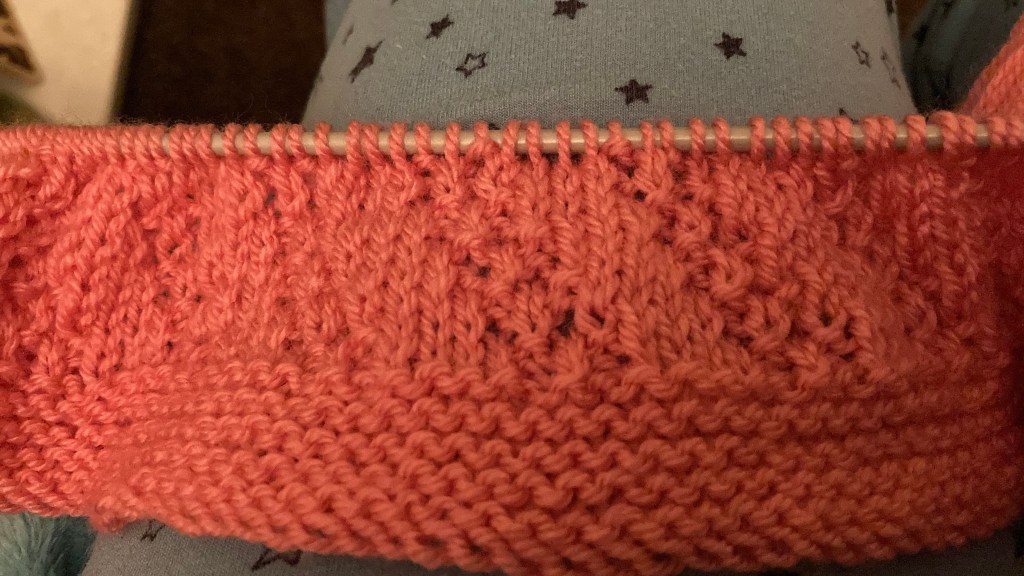
This is mine in close up. I hope it shows clearly enough what Week 3’s design looks like. As I’ve mentioned previously, mine has a white garter stitch border. I’ve decided to alternate white and coloured sections for the body of the blanket. What colour next week I wonder?
I’d love to hear about your progress on the KAL… with photos if possible. Did you run into any problems with Week 2? Are you using a contrasting border? One colour or stripes?
Good luck with Week 3. The next instalment will be posted next week.