Welcome to my blog. I live, knit, crochet, spin and craft near the Northumbrian Coast (but not too near – the waves won't be splashing my yarn!).There's a story in every stitch, every grain of sand, every blade of grass. I thought I'd blog about it…
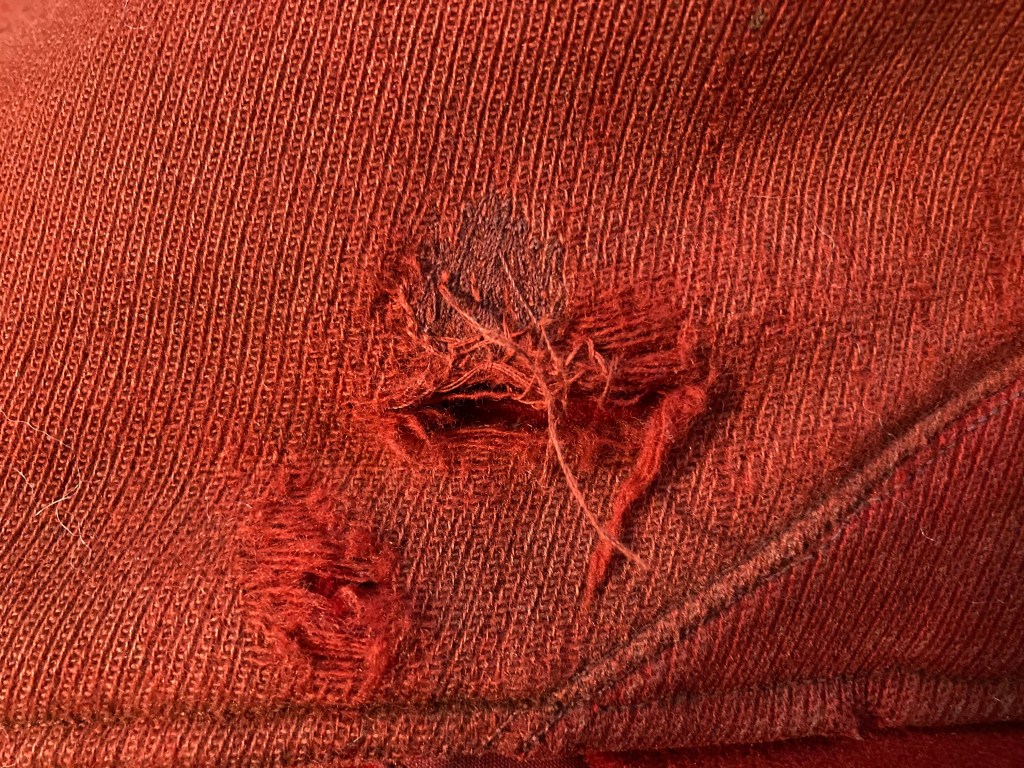
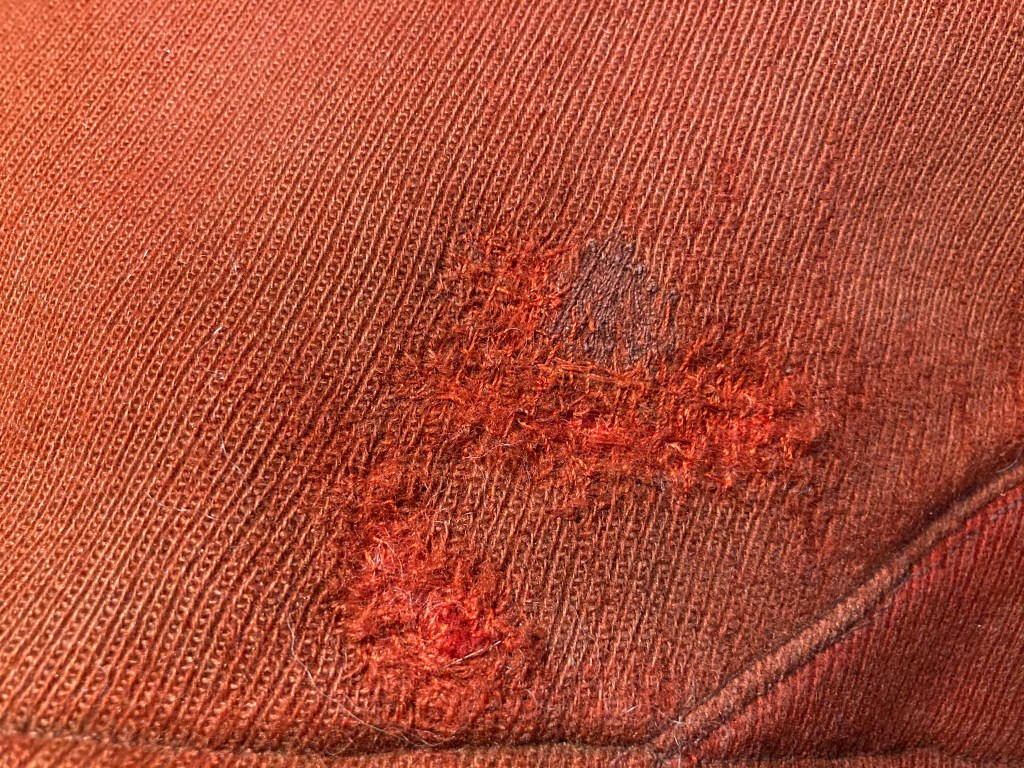
There was no communal crafting with daughter yesterday as she had something else on so I completed a task I was given a little while ago. I had been asked to rescue a very old jacket which had a large hole (and a few smaller ones) near the hem.
I could see why this was something to attempt to save rather than get rid of. It was beautifully made. The button flap details on the vent at the back particularly caught my eye.
Even the buttons on the cuffs were fully functional, complete with buttonholes. Cuff buttons are more usually just decorative.
The smaller holes were fairly straightforward to darn but this hole was more complicated and too big to darn..
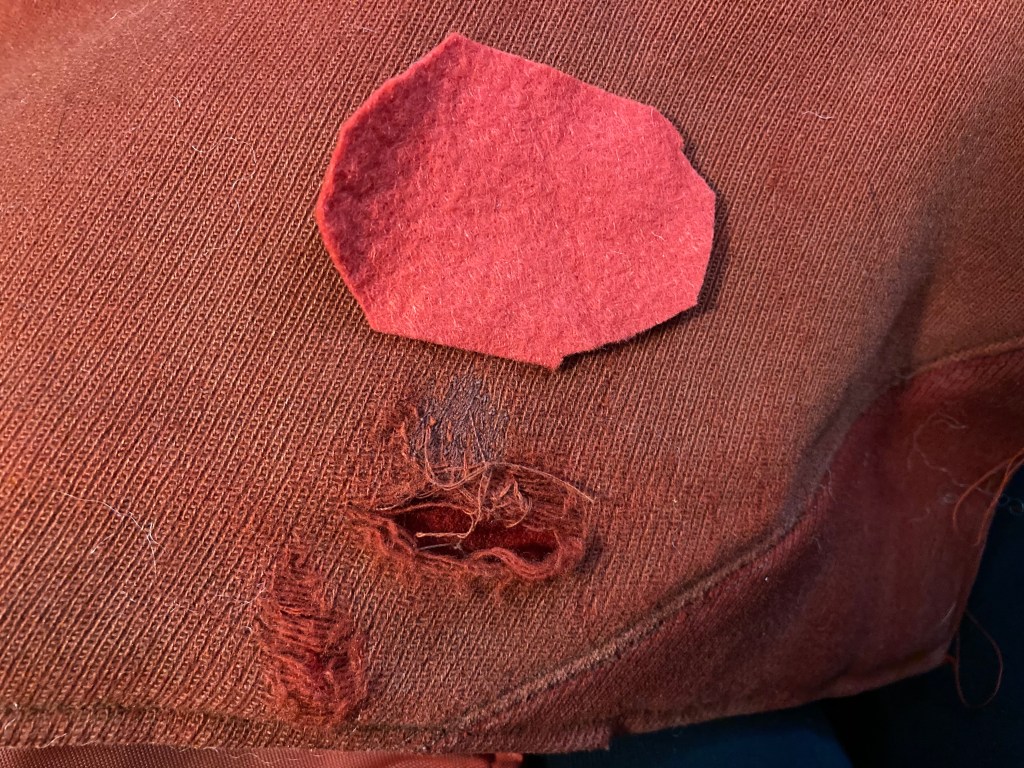
I could see there was a previous machine darn above the hole and this looked like a professionally done job, but it must have involved unpicking the lining, which I wanted to avoid. I needed to stabilise the fabric so I cut a piece of red felt to size and pushed it through the hole, adjusting it until it lay flat between the lining and outer fabric.
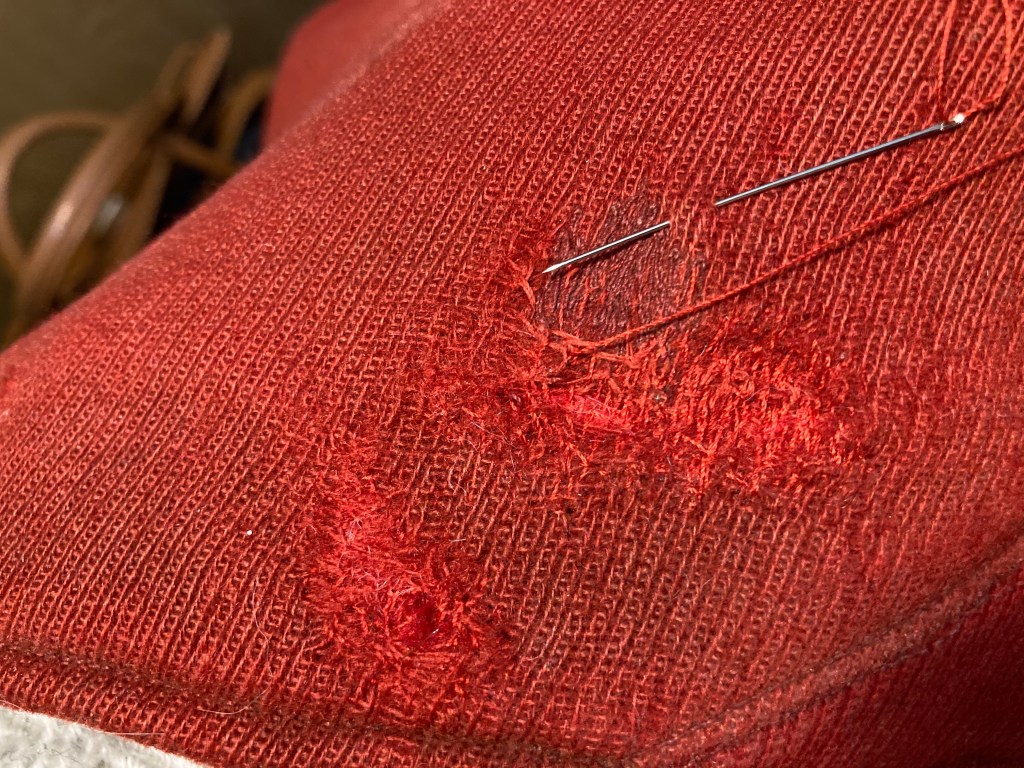
I pinned this in place and secured it with small stitches round the edge, then darned over the patch.
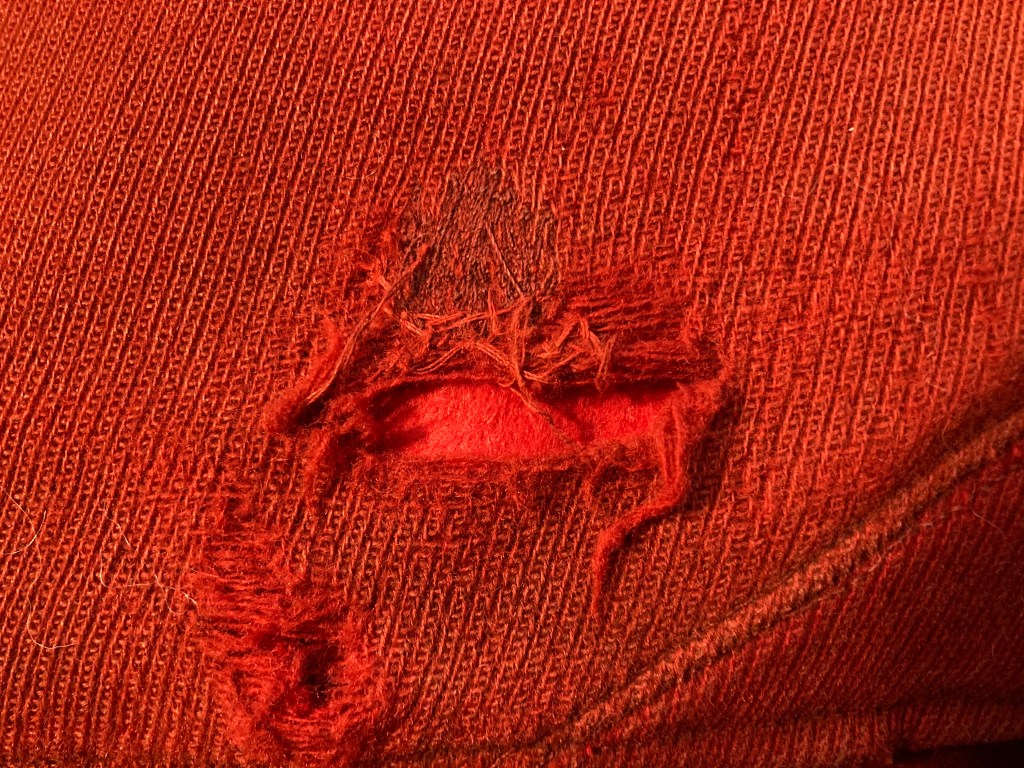
It may not be perfect, but it’s a great improvement on what was there before and if nothing else will stop the hole from getting bigger!
Doing a restoration job like this had me pretending that I was on Repair Shop. If you’ve never seen it this is a lovely British TV show, where members of the public bring much loved heirlooms, which have fallen into a sorry state of disrepair, to be restored by expert craftspeople. Whether these treasured items are ceramics, leather, furniture, clocks, paintings or old toys, the painstaking work of the experts is always astounding and the reaction of the owners on seeing their property returned to its former glory is touching to watch. It’s a definite must-see!
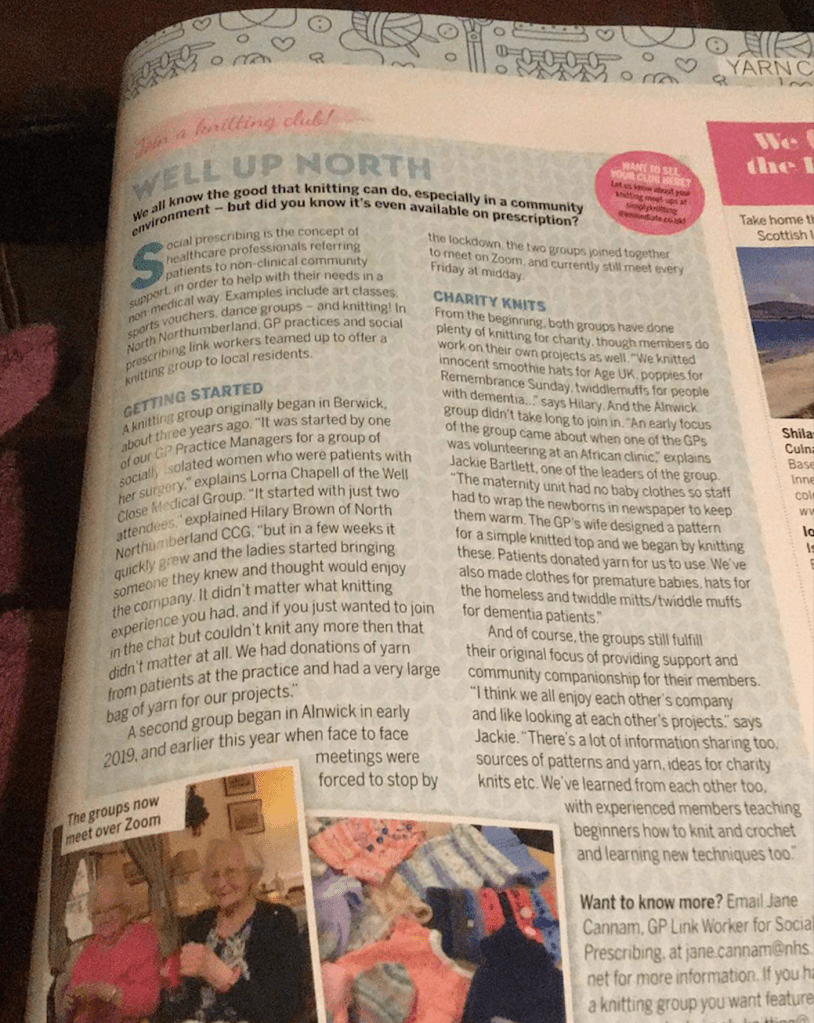
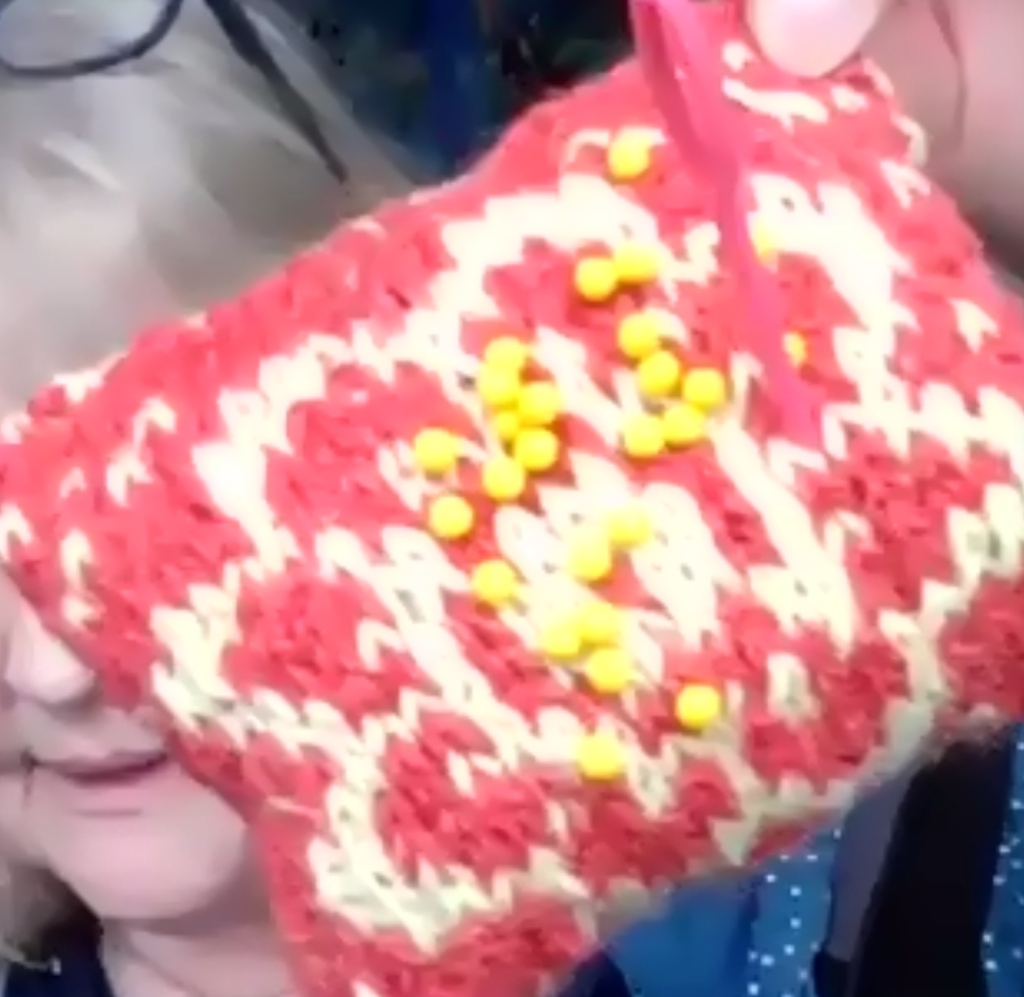
There were more lovely projects on show at Friday’s online Knit and Natter session, which is organised by the social prescribing teams at GP surgeries here in Northumberland. Our big news this week is we’ve had a write up in the UK national knitting press! This follows a request for more information about the group from Simply Knitting magazine.
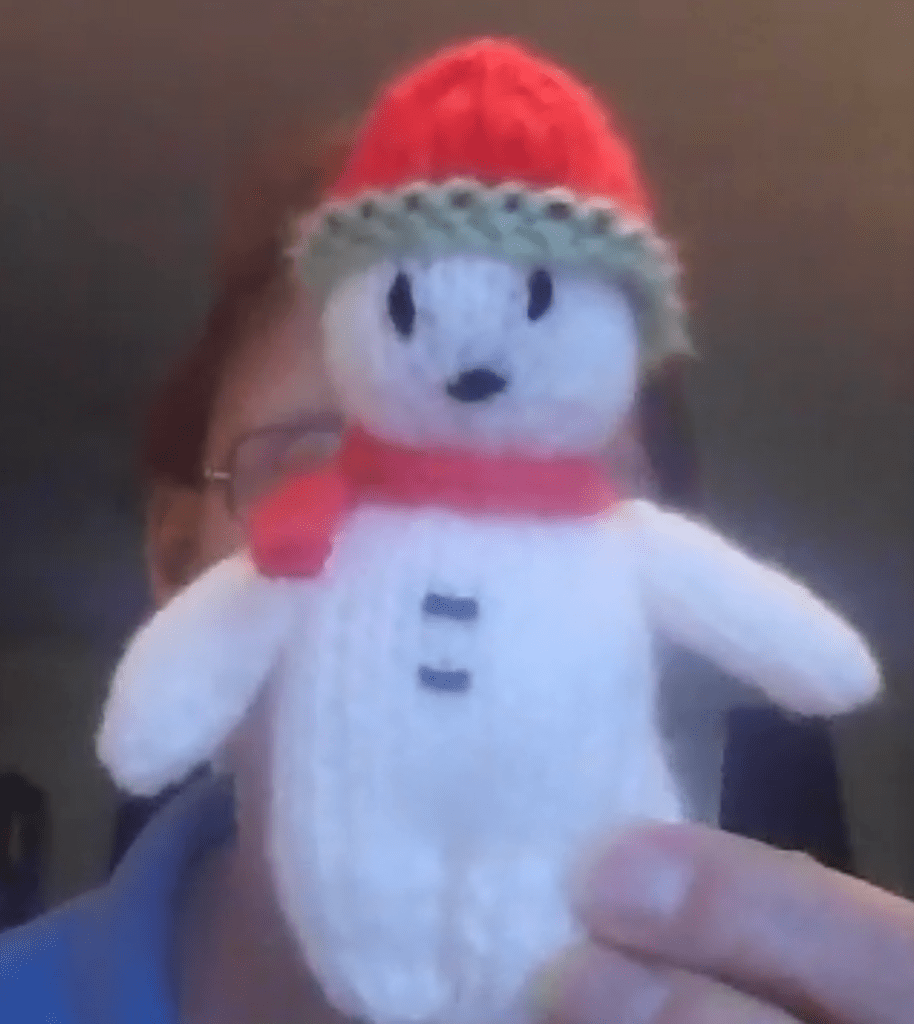
Christmas knits continue with this cute little snowman….
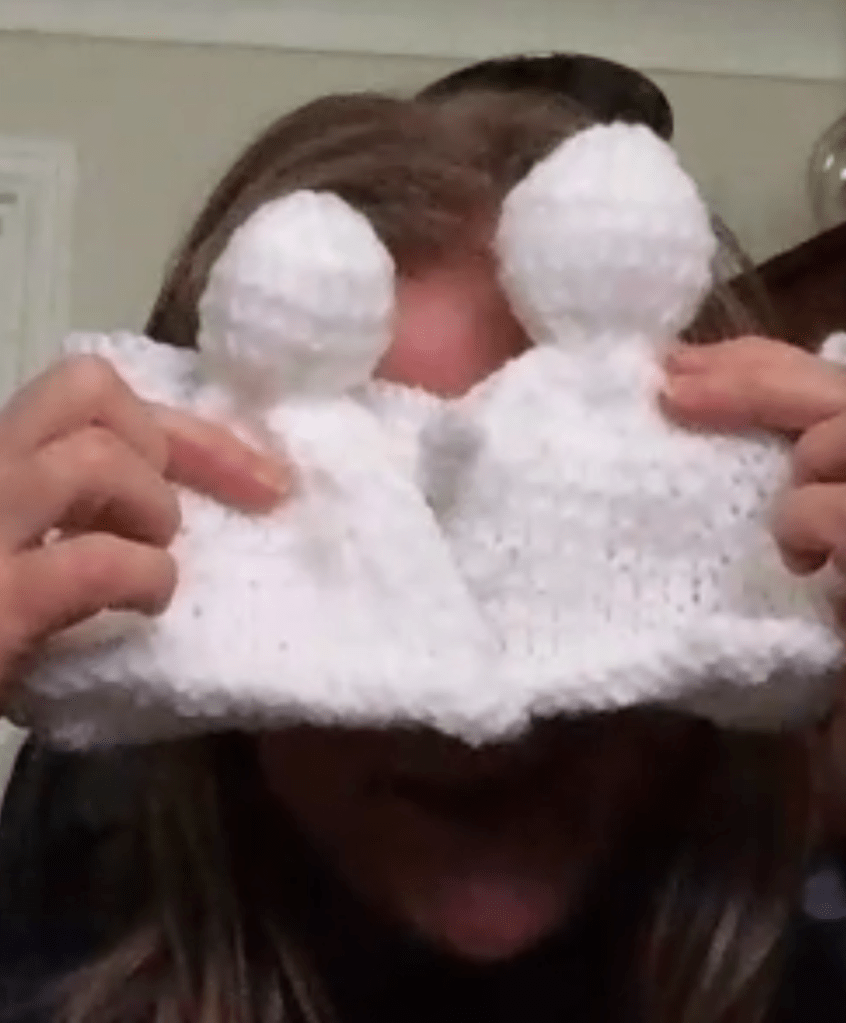
…and a pair of Christmas angels.
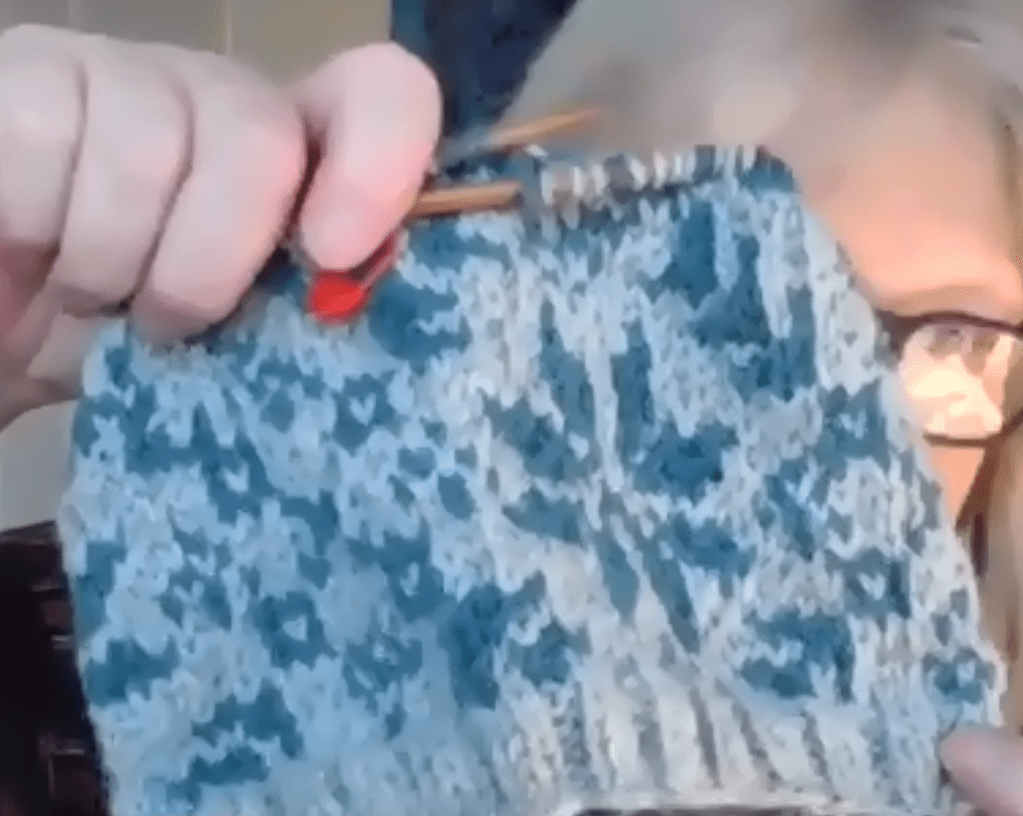
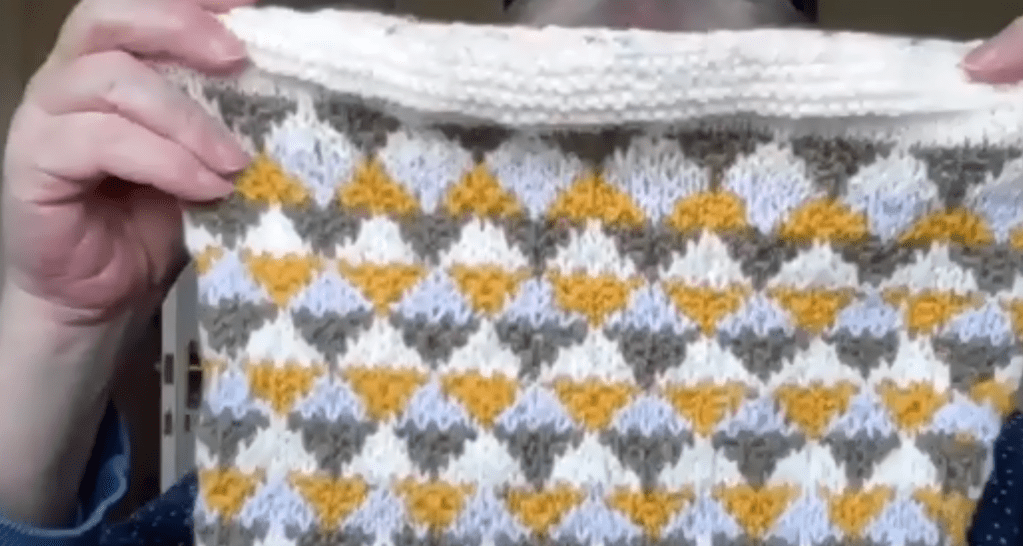
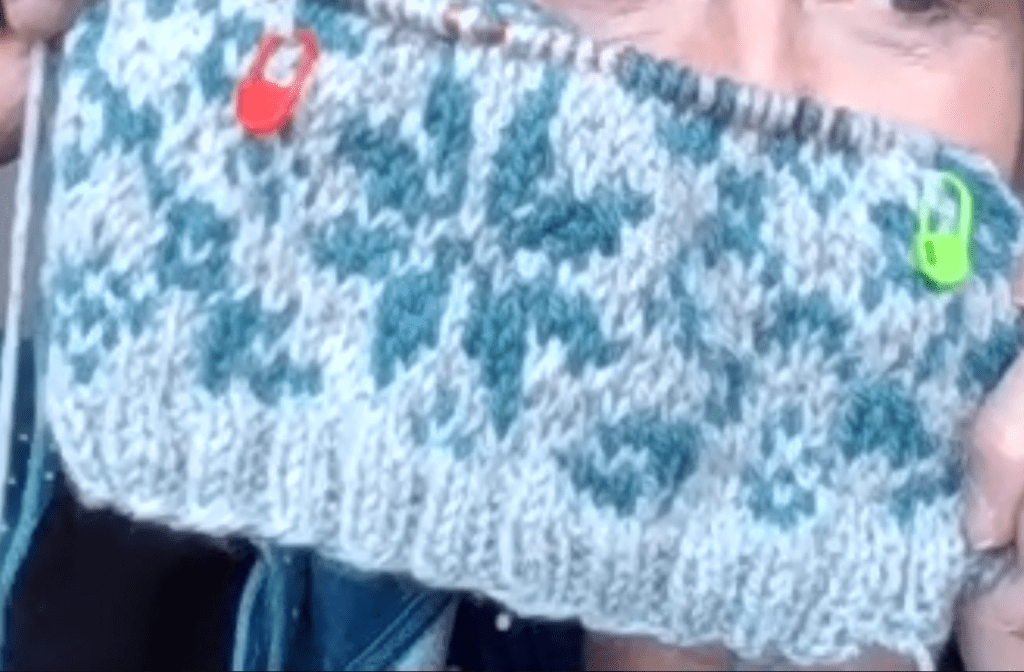
This Fair Isle project is getting bigger. I absolutely love the duck egg/teal colour combination here.
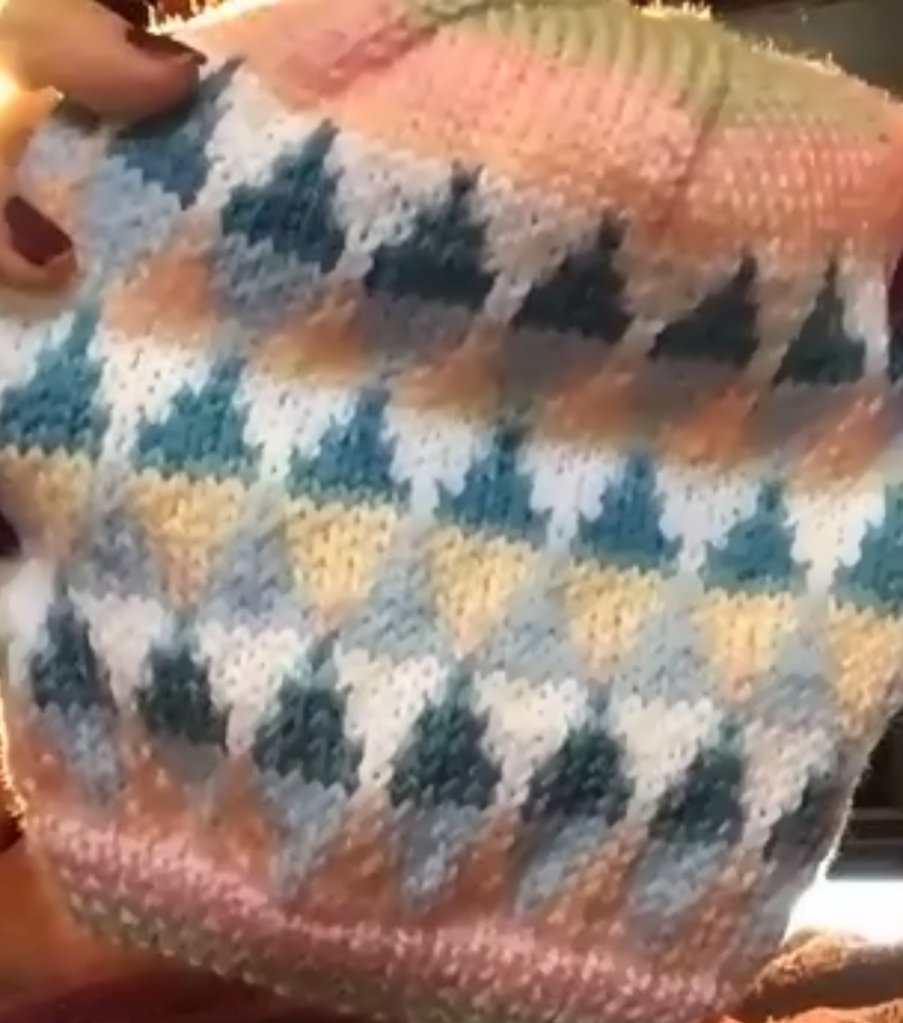
If my memory serves me correctly, this next project is a baby jumper. The central panel with its lacy design is just gorgeous.
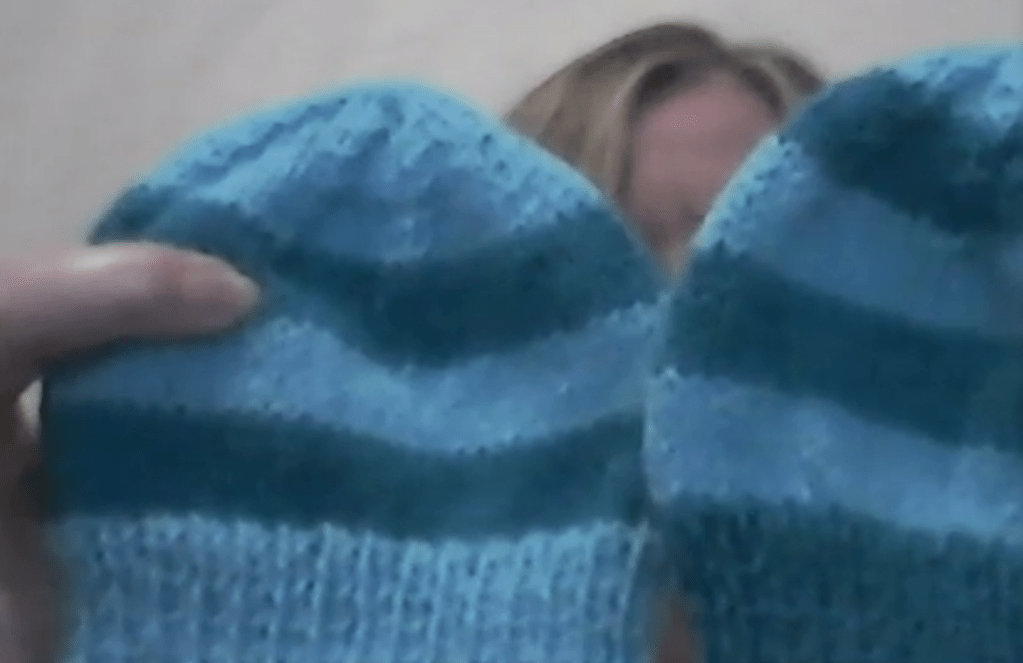
One of our recently joined members has taken knitting up again after a break and though it took her a while to get hold of needles and yarn during lockdown, she is now steaming ahead with charity knits including these two lovely baby hats.
The
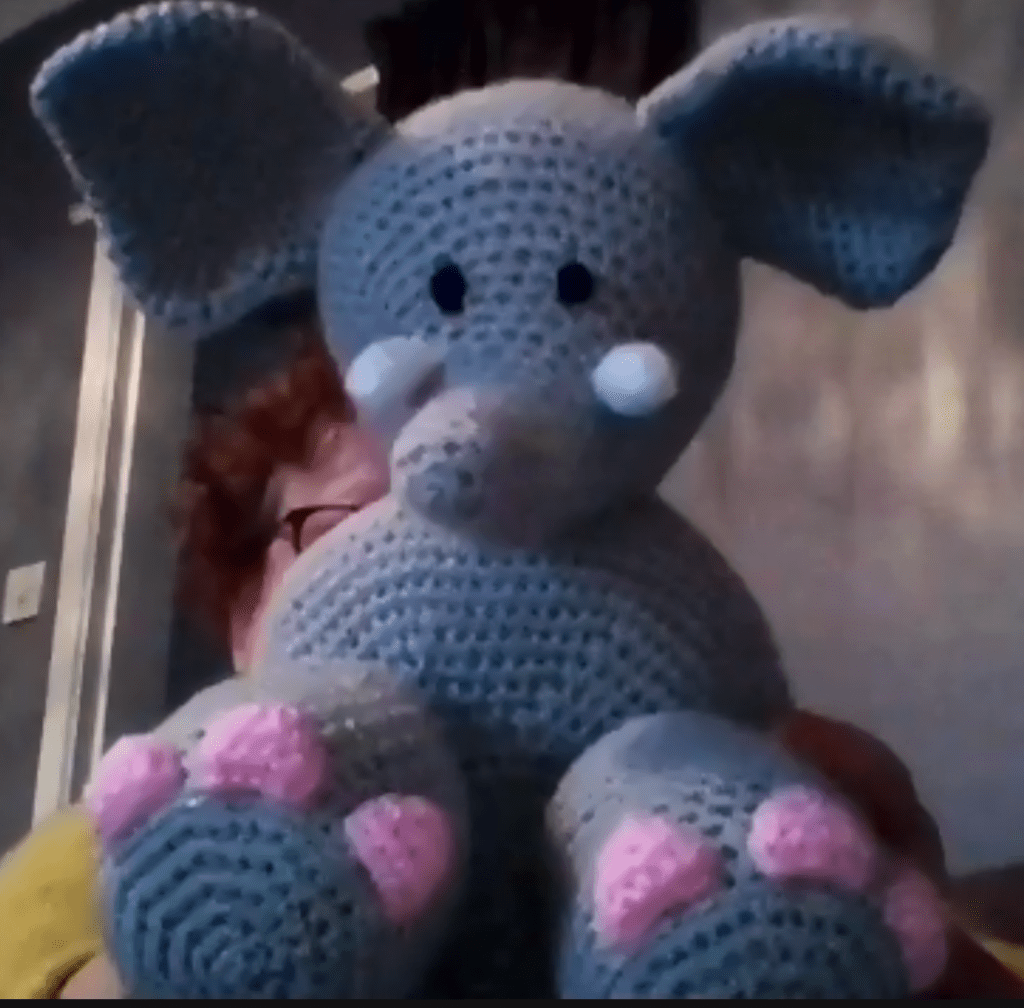
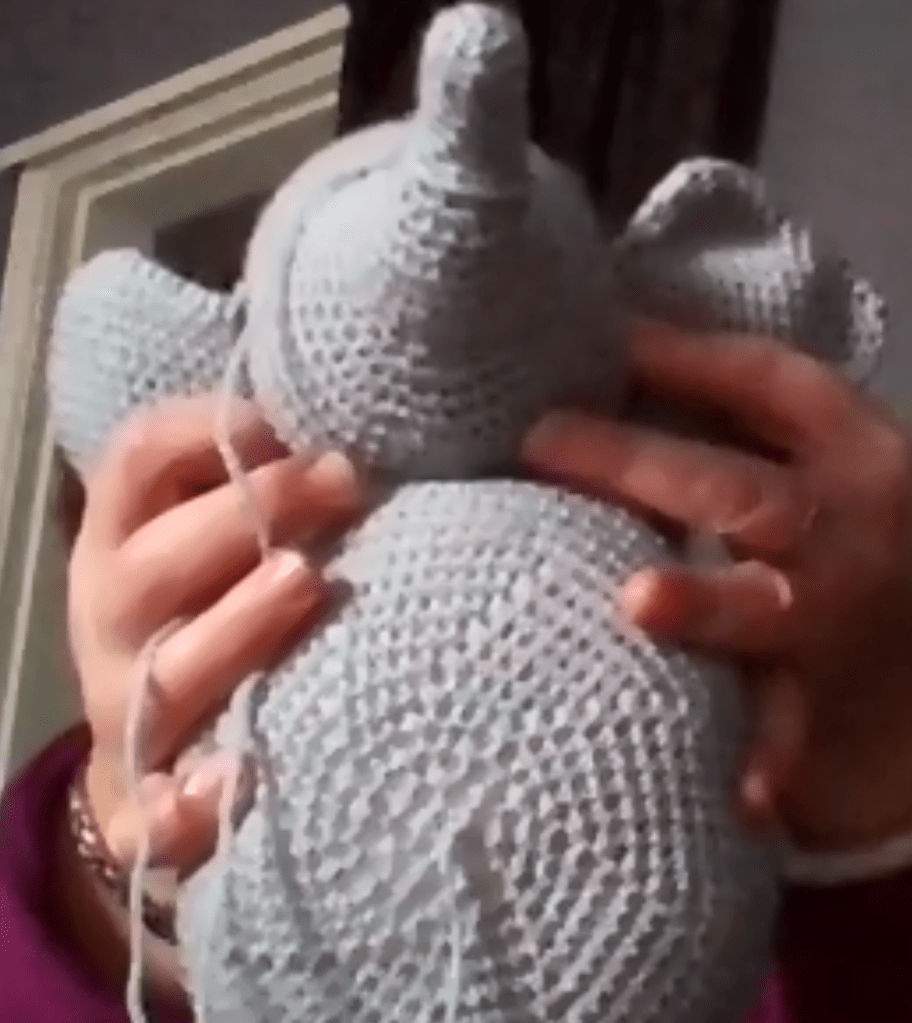
The crocheted elephant that was still in pieces last week is now all done, complete with pink toenails! I think we’ve all fallen in love with him/her, especially having seen him come together over recent weeks.
One of the ladies from the Berwick group joined us on Zoom for the first time this week. She is a keen spinner too. I loved being able to talk to her and her husband (who is also a spinner and joined us briefly). Since I started spinning in September this is the first time I’ve actually had a conversation about my new obsession to a fellow enthusiast! They told me about some great sources of equipment and supplies. She is taking part in a Mystery Knit Along which has been organised by the Macmillan Cancer Support charity. In return for a donation to the charity, sections of a pattern were released gradually over 4 weeks. As the project is well underway now I don’t think it would be spoiling the mystery too much if I show a screenshot of her work on this.
Click on the link above if you’d like access to this lovely pattern by donating to a very worthwhile cause.
I think this was one of the best supported sessions we’ve had since the Zoom group got underway. It’s such a friendly group and I always look forward to Friday lunchtimes and seeing what everyone’s been up to.
I finished off a couple of projects this week which is always satisfying.
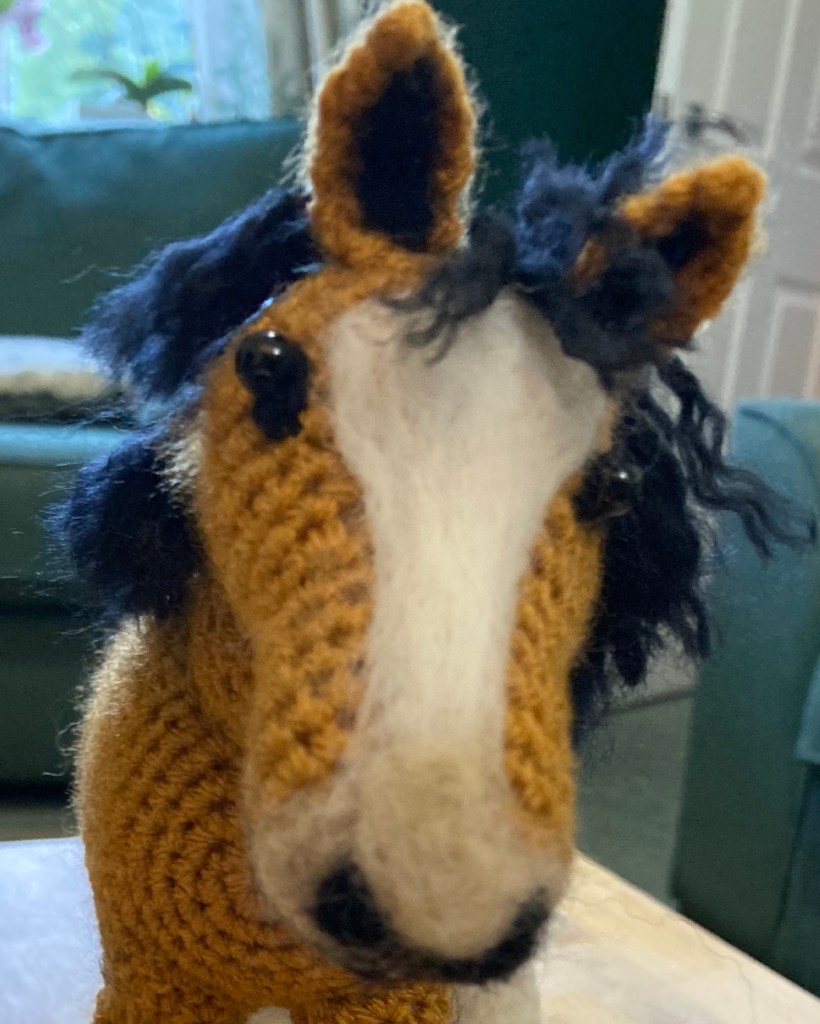
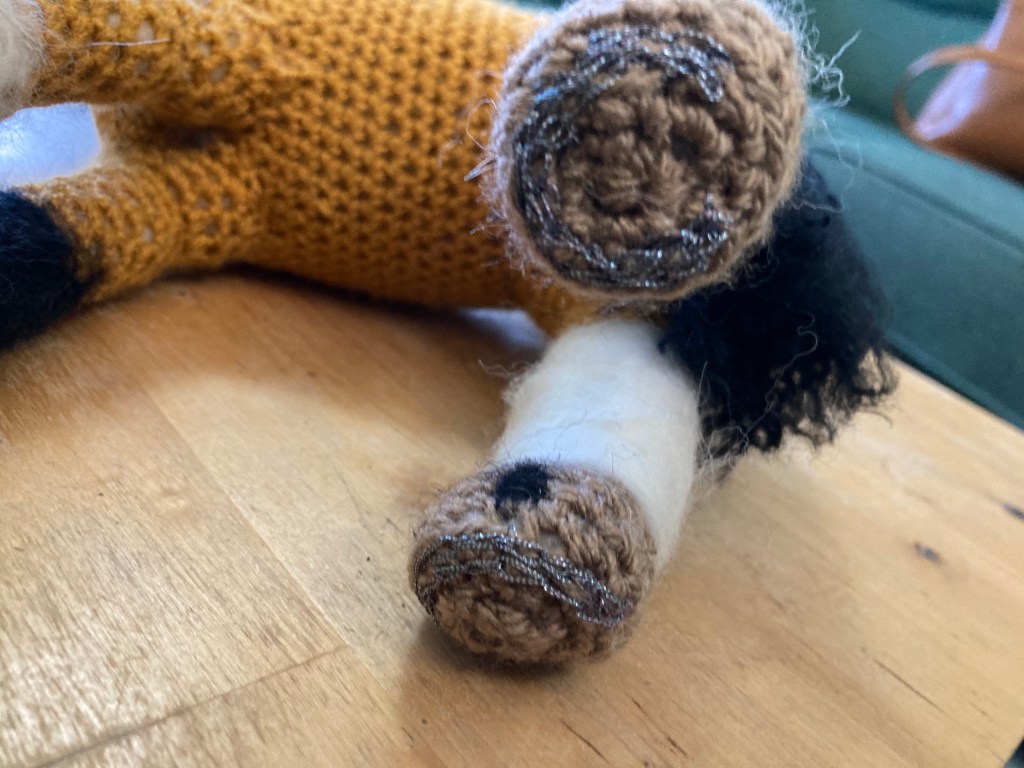
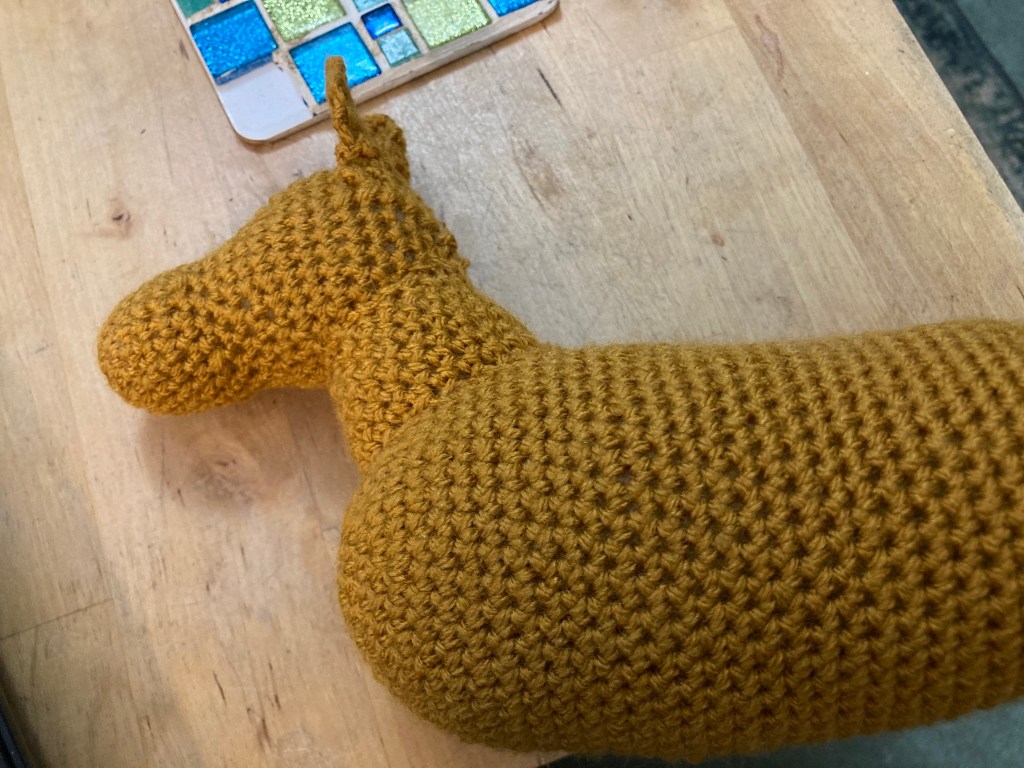
I crocheted this horse – a commission from a friend who will be giving it as a Christmas gift to a horse owner.
He’s a sort of caricature of her actual horse and I’ve replicated the colour and markings. His eyes are glass beads and the details are needle-felted. He’s wearing horseshoes embroidered in metallic thread.
I’ve made several of these over the last few years. One of the hardest things is finding the right colour yarn. I’ve modified the design from a pattern I found online and have refined it a bit more every time I’ve done it.
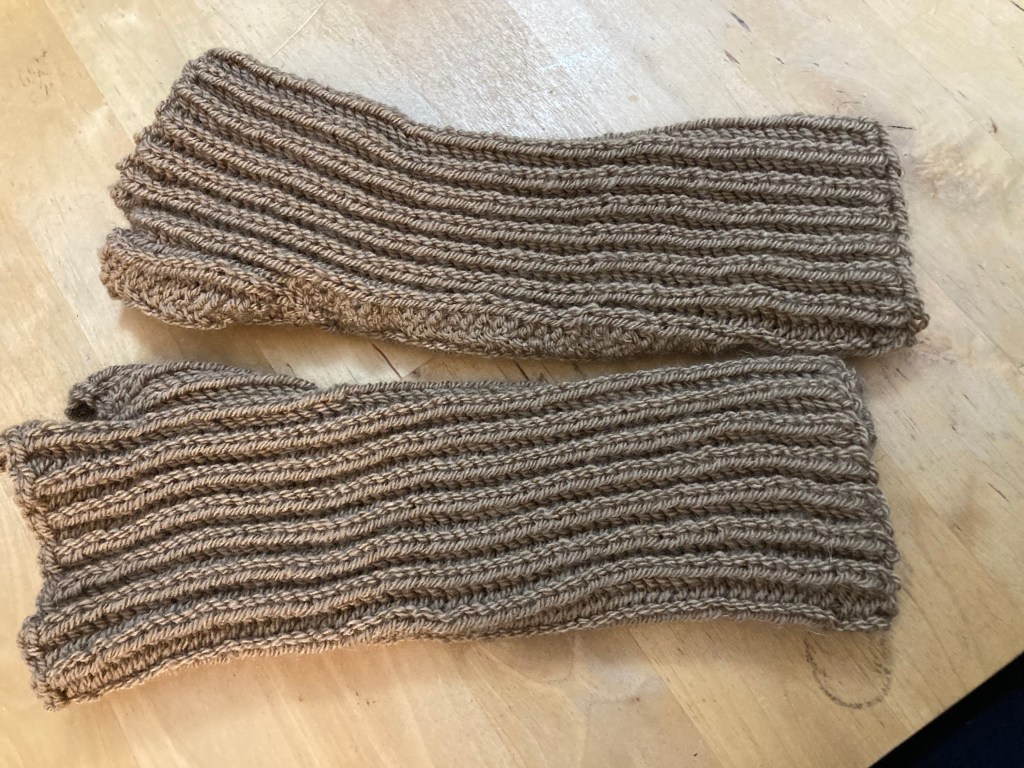
The second item I completed was a pair of brioche hand warmers for K. They will be part of his Christmas present. He’d requested some similar to some I made for myself a while back, but he wanted them in a much more neutral colour than the bright pink and grey stripes I used last time. He intends to use these for fishing – hopefully his hands will stay warm and his fingers will stay unencumbered for tying on lures and so on. I used this from my stash. It’s lost its band but I think it’s Stylecraft Special DK 100% acrylic. Most importantly it’s machine washable as, depending of how successful the fishing is, could potentially end up slimy, wet and stinking of fish after every wearing!
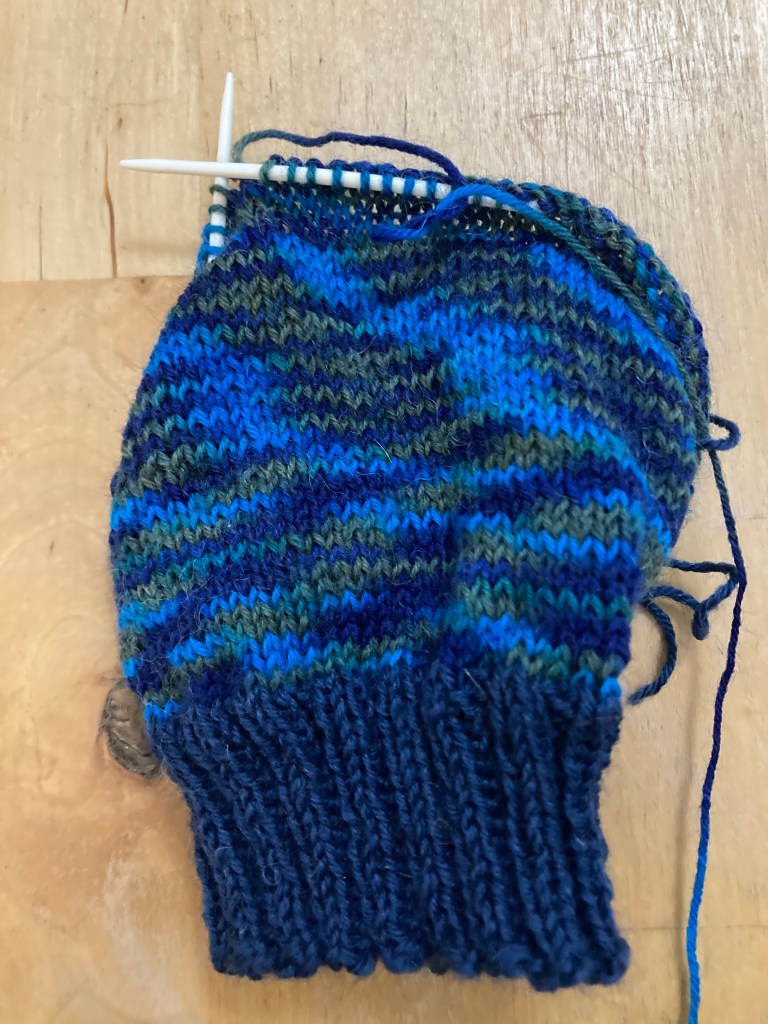
With a knitted project done I had nothing cast on so I’ve started some socks for myself – the pattern was given to me by a friend at one of my knit and natter groups – I’m using the version with the contrasting welt, heel and toe and using more yarn from the stash – I have a feeling both may be from Flying Tiger. I’ve bought all sorts of crafty things from the Newcastle store in recent years but I hear that this branch has now closed – I’m quite sad about that.
I’ve also been prepping and spinning alpaca fibre. I spun some I prepped a while back. The three larger skeins are 2ply, each about 100 yards. The smaller skeins (the white is more alpaca and the blue is merino) are my first attempt at chain plying, using some singles left over on bobbins after plying. I felt that this got better as I went along, but I must remember not to overtwist next time.
I washed a batch of the alpaca fibre I skirted last week and hand carded it. I’m improvising with pet grooming brushes until I get proper carders (I have it on good authority that Santa Claus is bringing me some…if I’m good). I’ve braided the roving as I intend to dye it eventually. It does look rather messier than the braids of fibre that you buy, but in it’s current undyed state I thought it resembled the hair of Elsa from Frozen. I promise not to put it over my shoulder and start singing Let it Go!
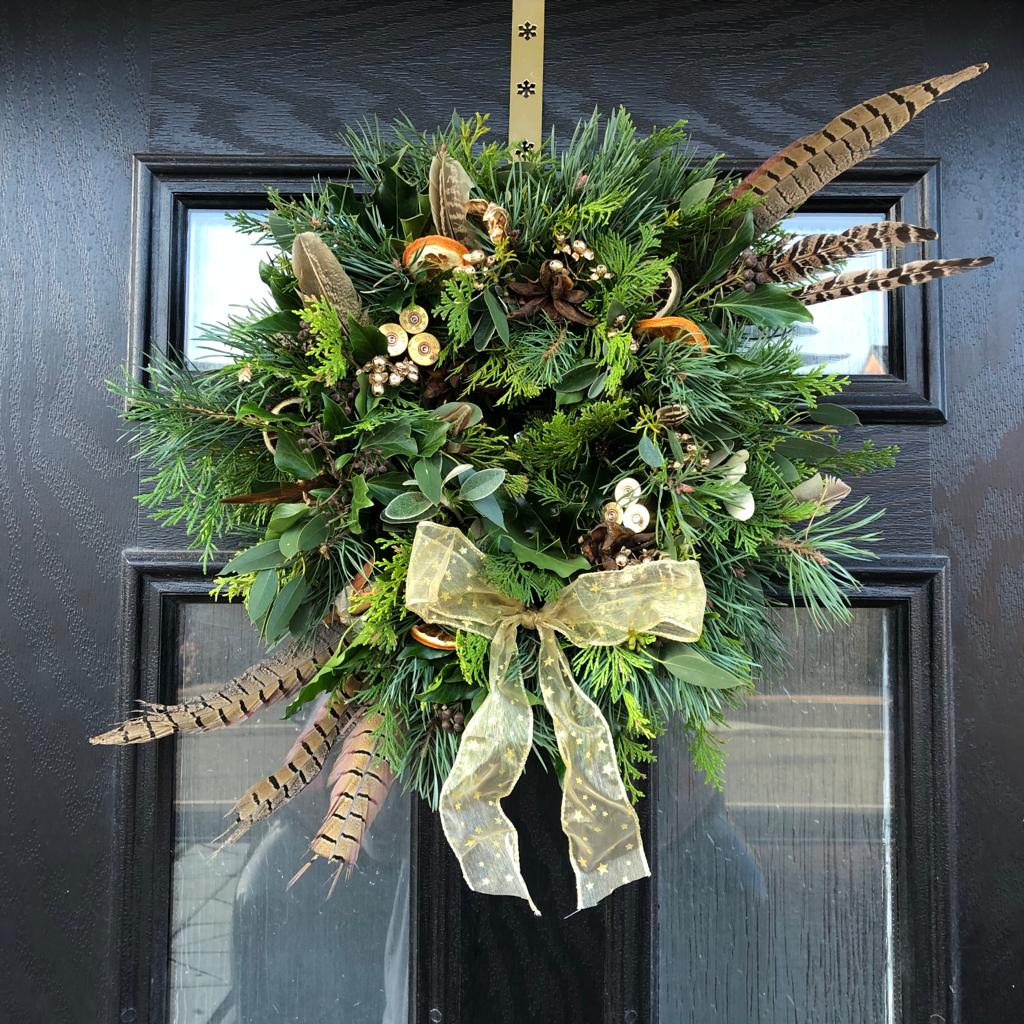
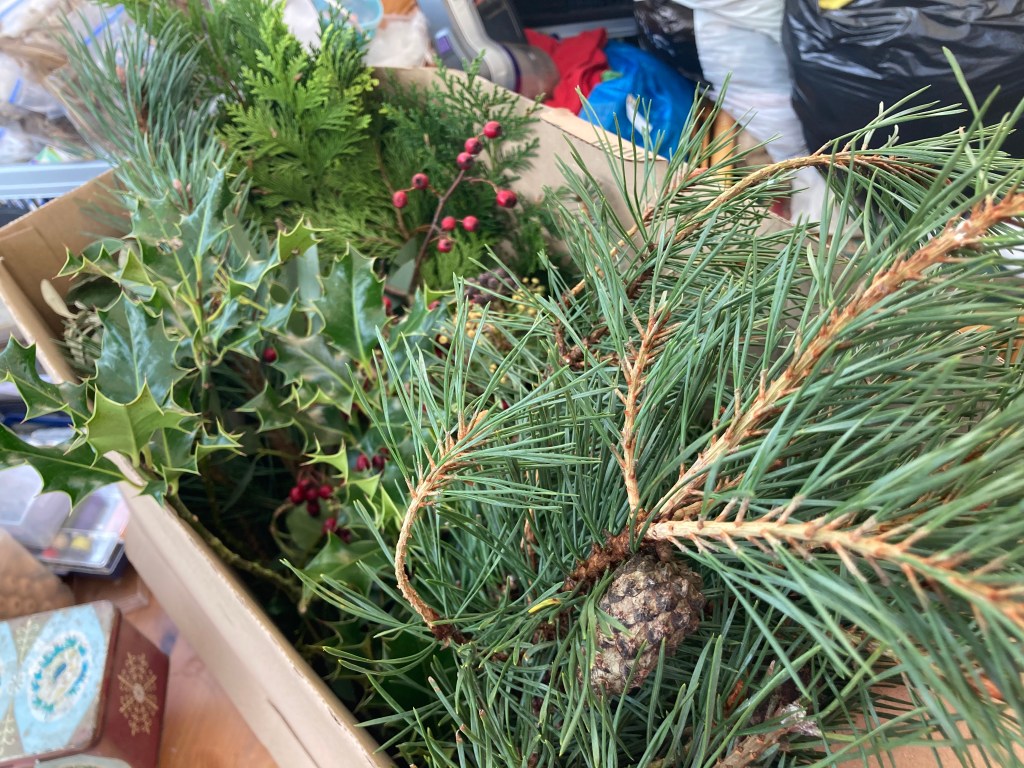
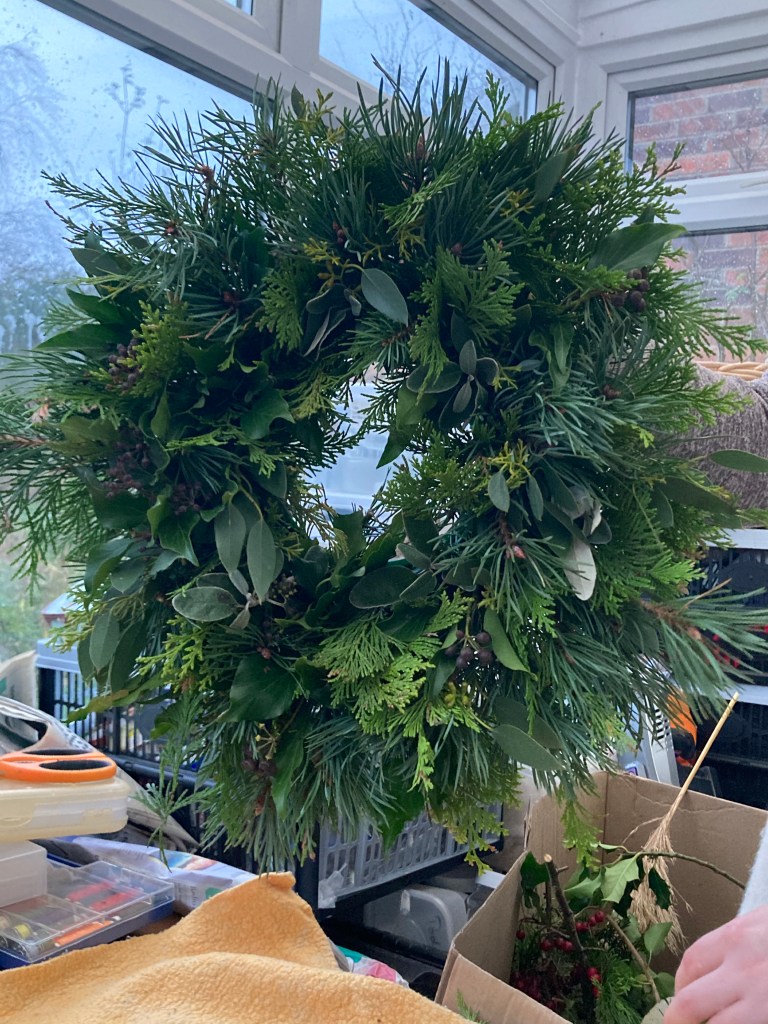
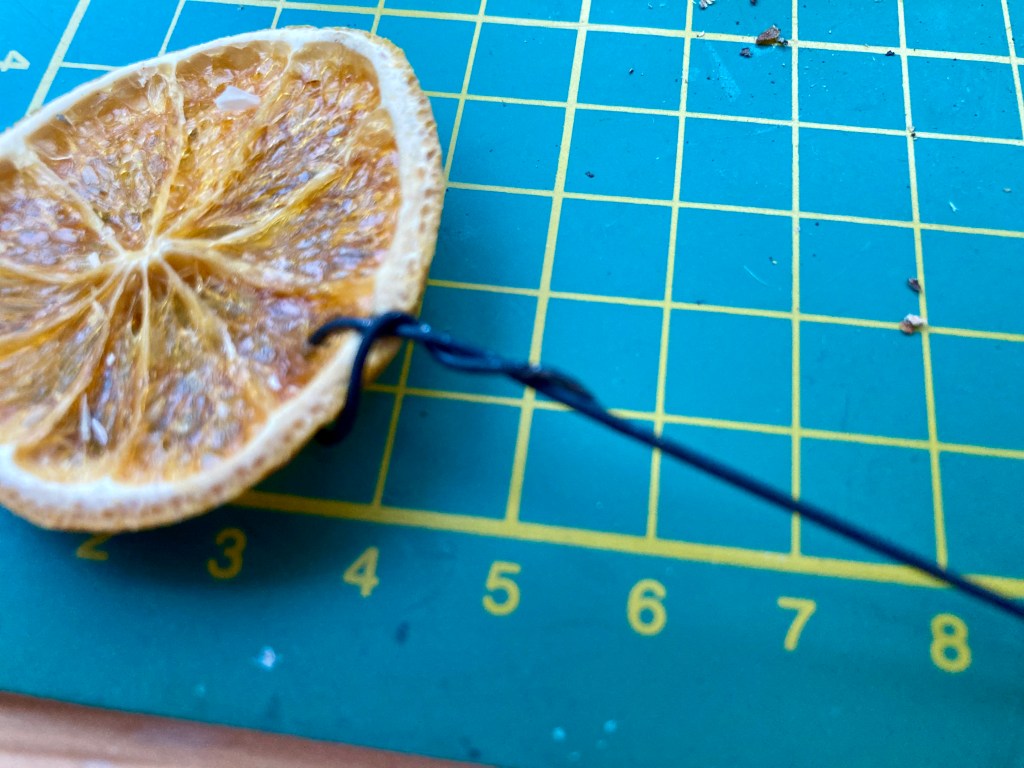
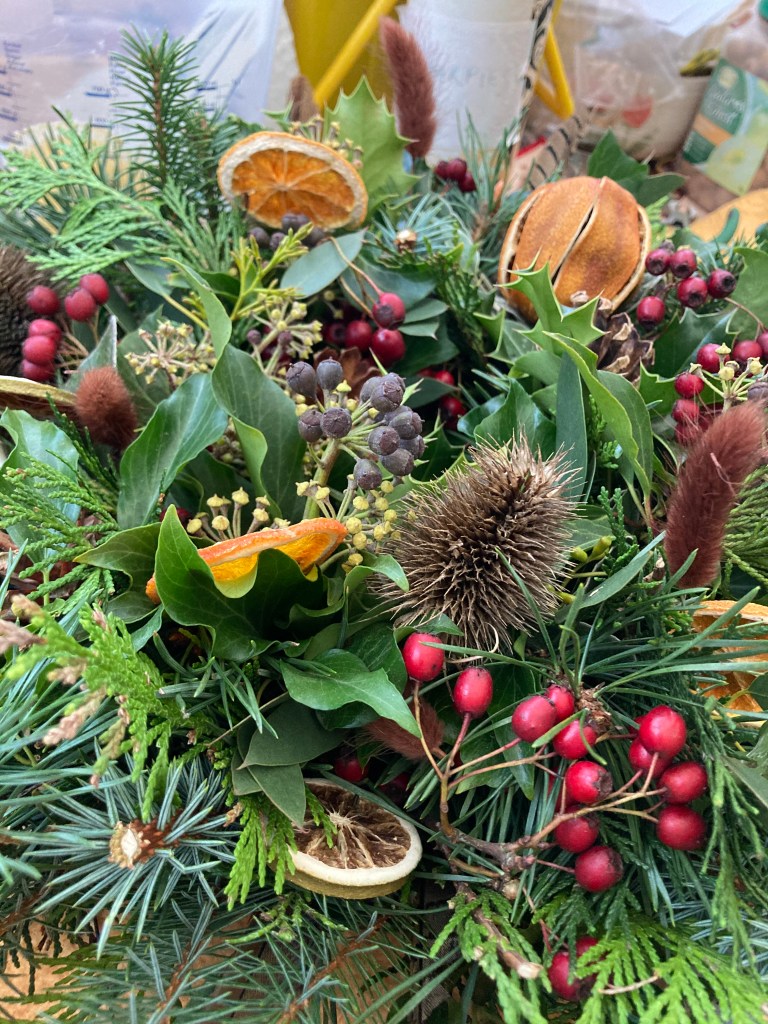
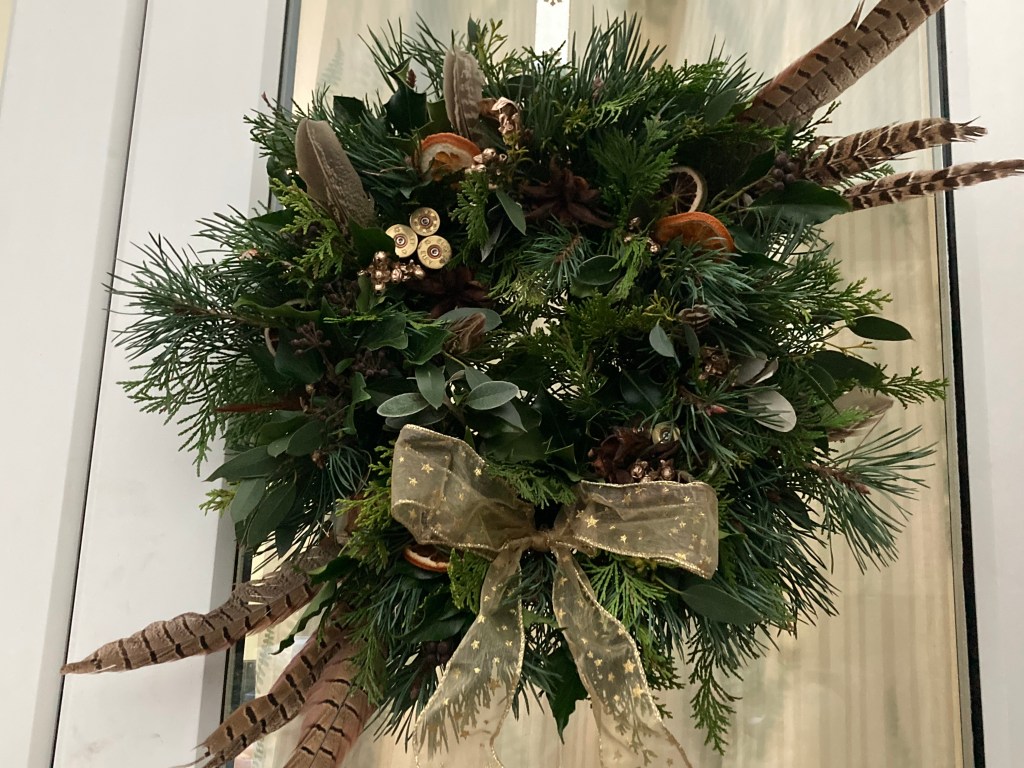
For this week’s Crafty Monday project, Daughter and I made Christmas wreaths. We enjoyed attending a workshop to make these last year, but classes like that are another COVID casualty. One of Daughter’s friends has started a floristry business: Polly’s Petals and makes stunning wreaths and kits with everything needed to make your own. Polly’s family have a large garden and much of the material is sourced from there. She even makes her own dried citrus slices, drying the fruit in the aga. Daughter went to collect the kits we’d ordered yesterday morning and arrived here with two large boxes.
Each included
florists foam ring and base
hanging string
huge amounts of foliage (included cypress, Scots pine, holly, ivy and various other evergreens,
dried seed heads, teasels, grasses, pine cones
dried citrus and cinnamon stick bundles
berries
pheasant feathers
ribbon
florists wire
full instructions
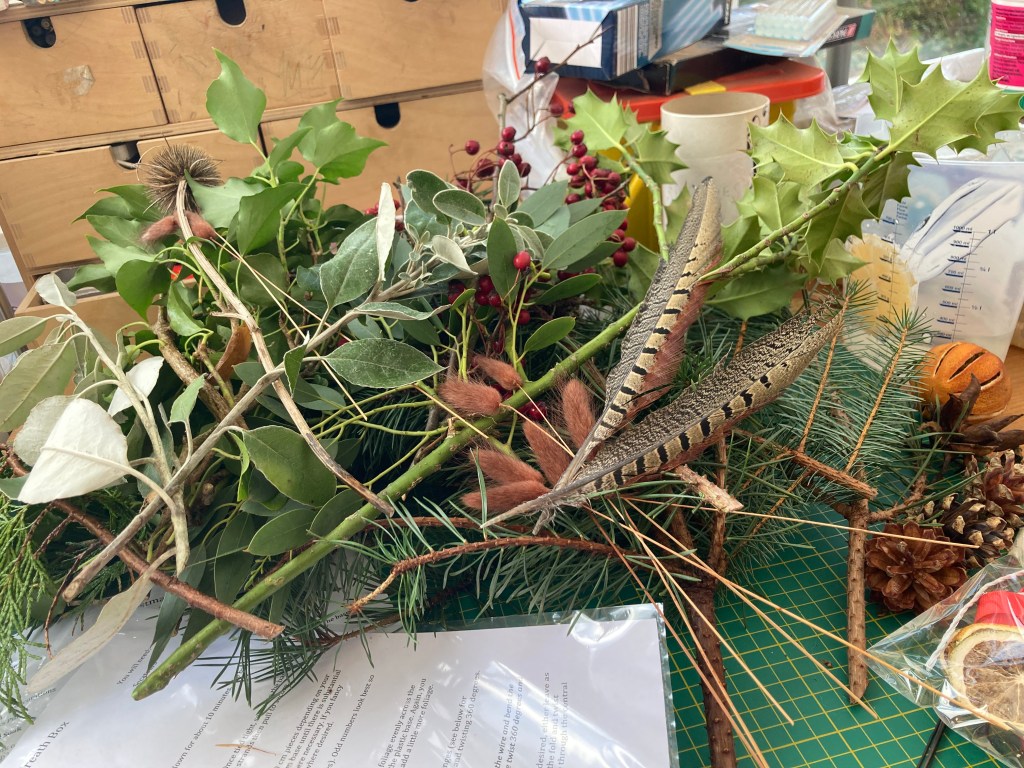
There was more than enough in each to make quite a substantial wreath and all we needed to provide were secateurs or strong scissors. We began by soaking the foam in water for ten minutes and attaching a hanging loop.
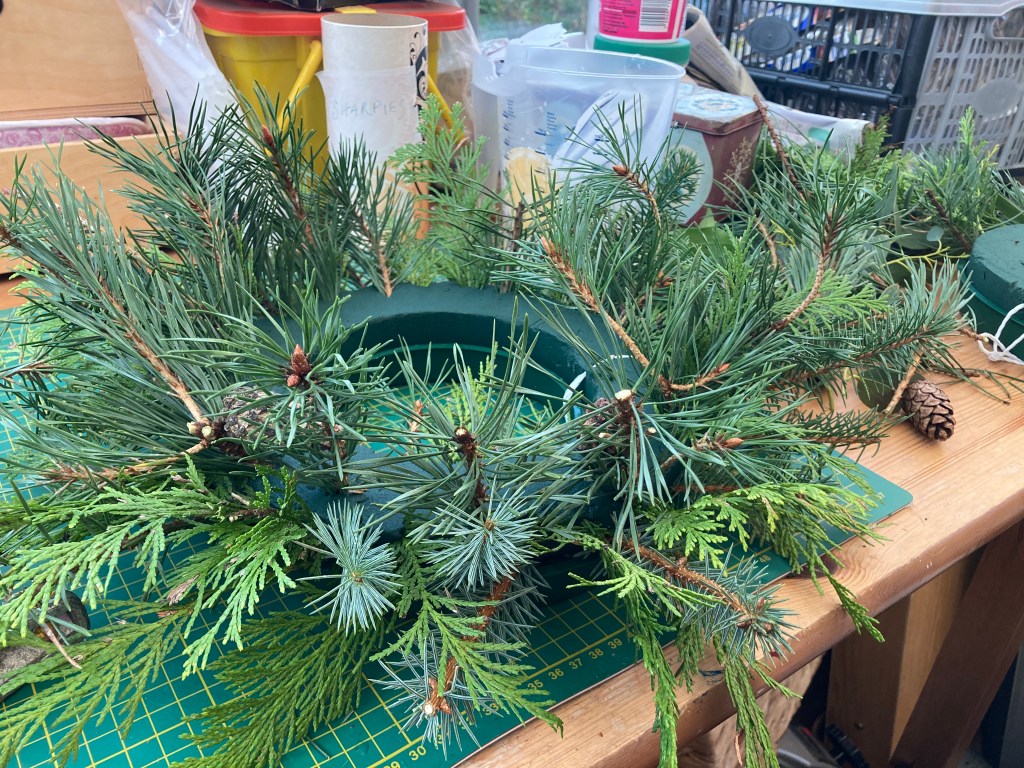
Working from the outside, we began to cut small sprigs of foliage and pushed it into the foam.
We continued until the whole wreath was covered and no foam was showing.
We then added the other items, twisting florists wire round the citrus and cones to make a stem to push in the foam.
I have vast numbers of feathers so I added some of my own. I looked in the ribbon box and found a length in a pinky peachy shade that looked perfect so I used that instead of what came in the kit.
Daughter added some gun cartridge ends and found some gold ribbon
Even though the kit contents were very similar our wreaths are very different. We love them. Thanks Polly!
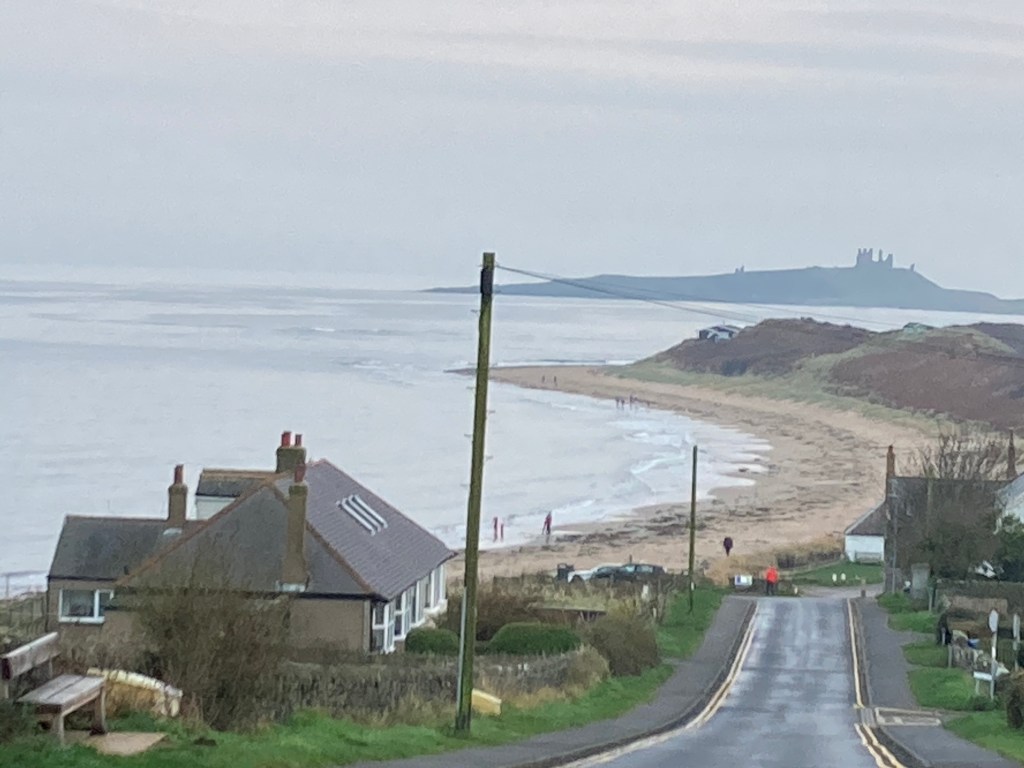
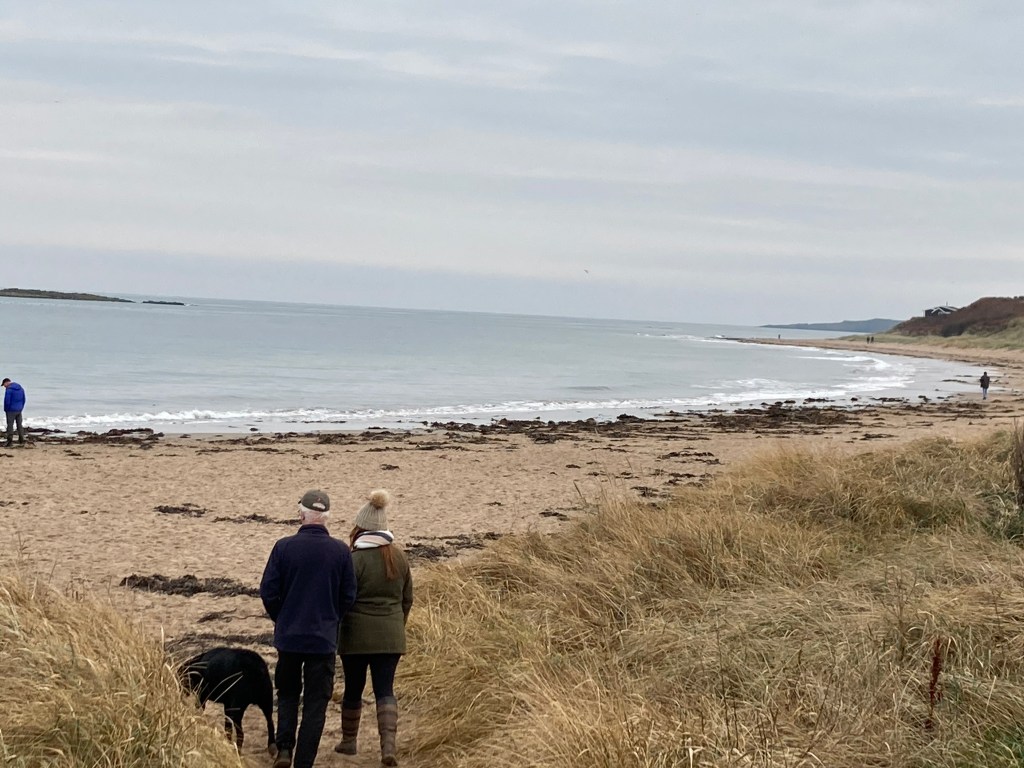
Sunday was a dull, dank sort of a day, but we headed up the coast to Newton-by-the-Sea. Daughter, K and Buddy went along the sand and I took the dune path, which is more scooter friendly.
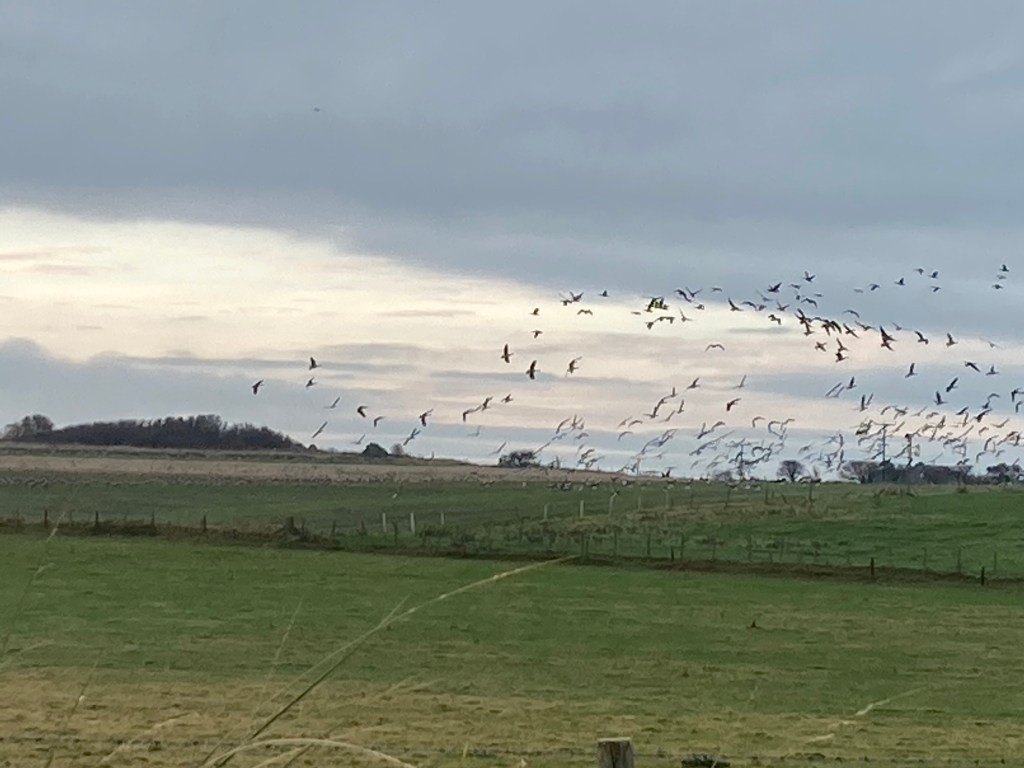
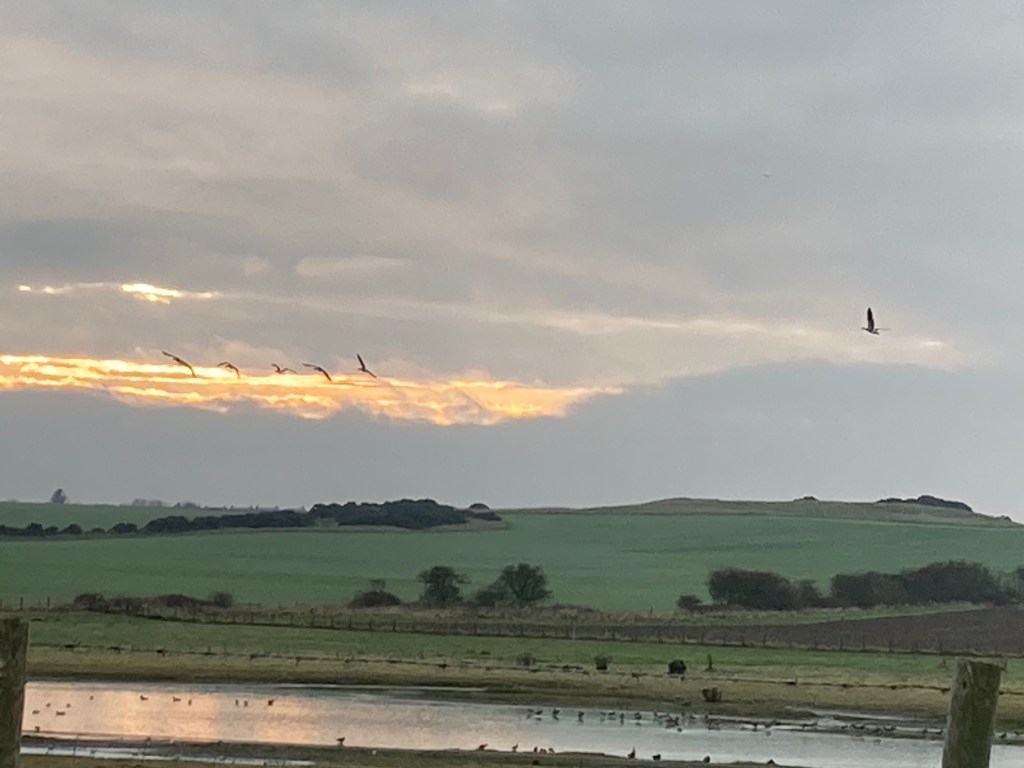
Behind the dunes are a series of ponds that are a magnet for waterfowl. I could hear a flock of geese fly by. As they came down in an adjacent field another flock flew up. What a din they made!
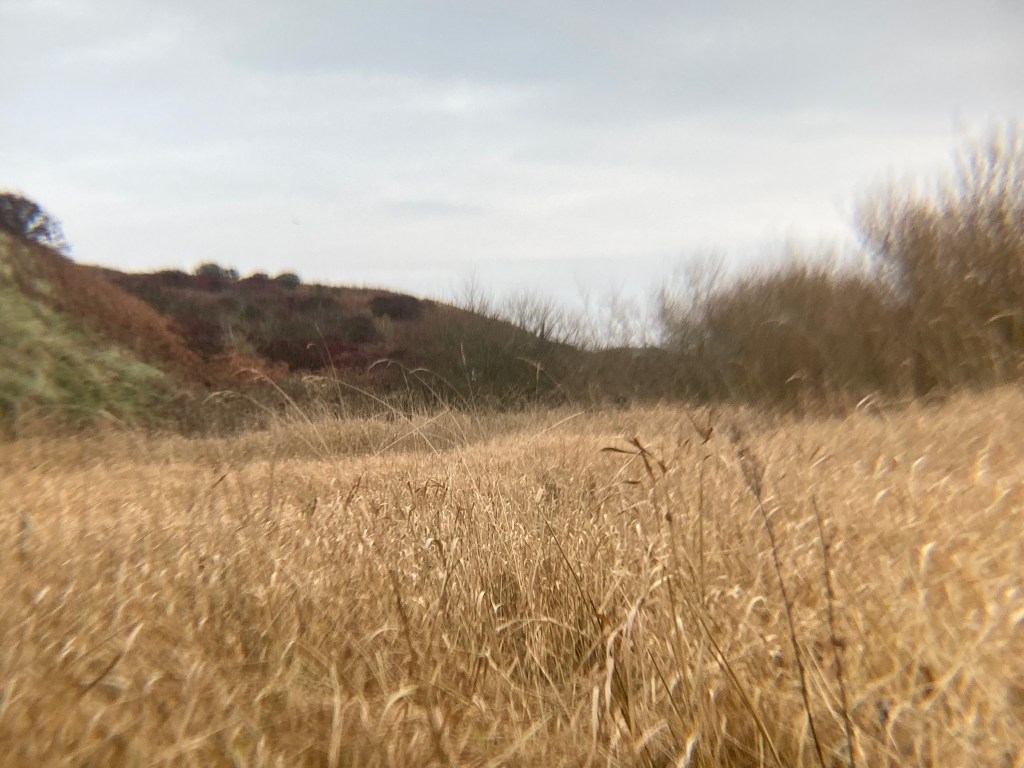
Further on there are reed beds.
The bird hide that overlooks the main pool is locked up at the moment – (another consequence of the pandemic) .
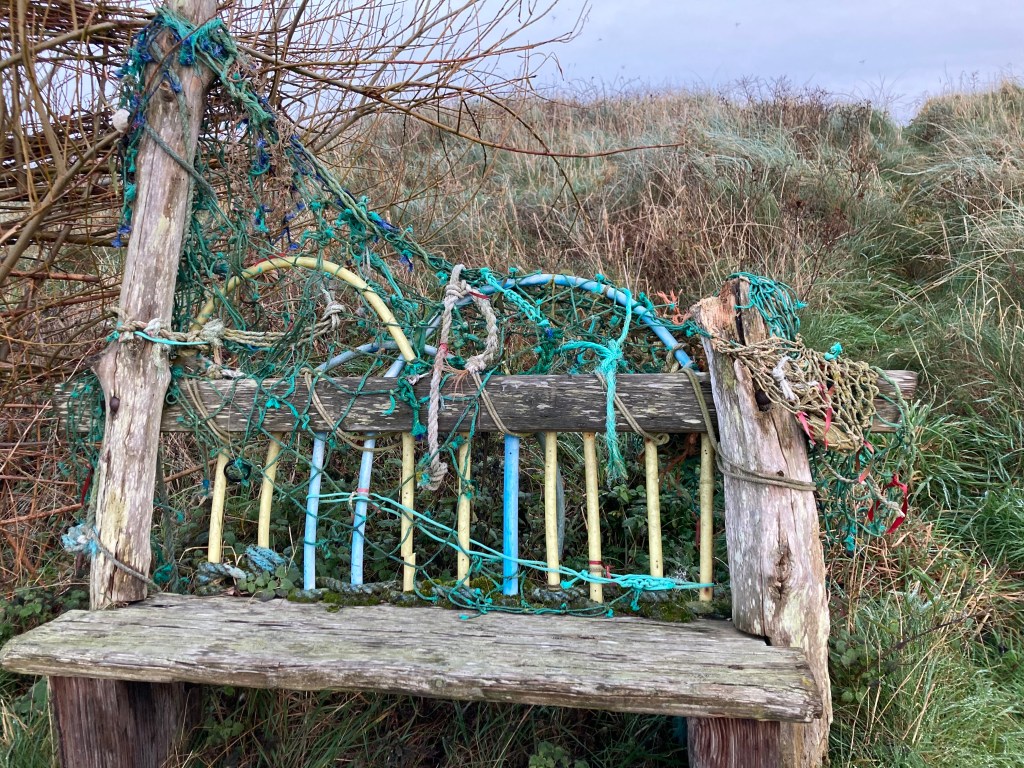
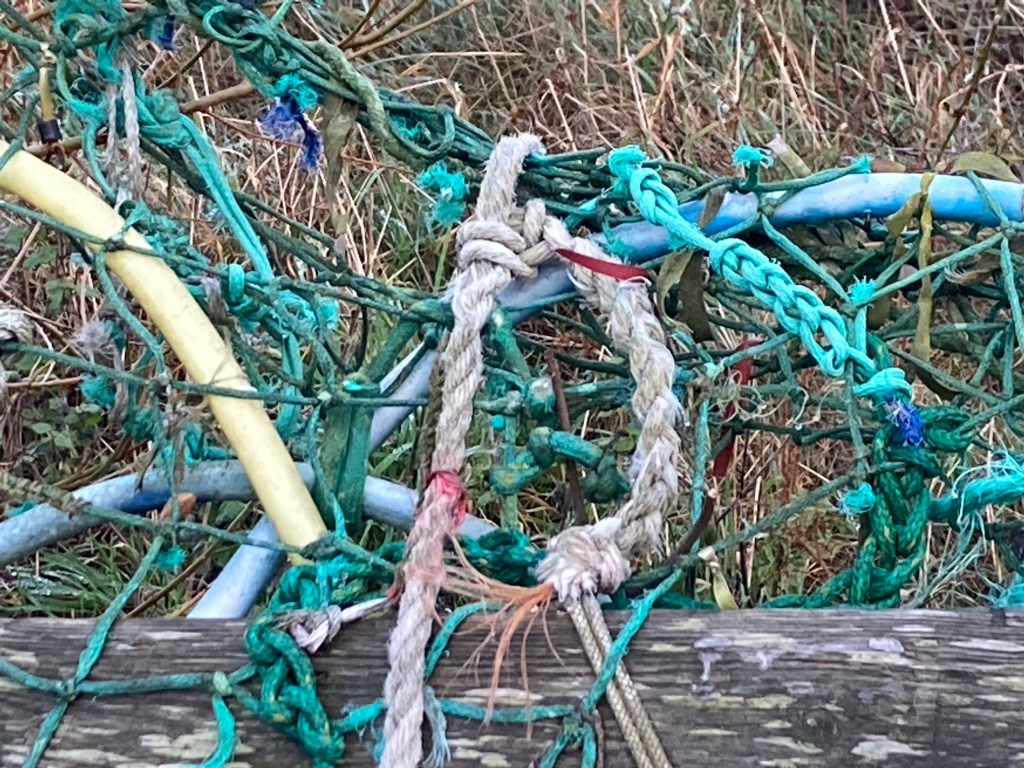
At the side of the path is this rather interesting seat
Sheltered by a woven willow screen, a simple bench has been decorated with driftwood and bits of discarded fishing gear washed up on the tide.
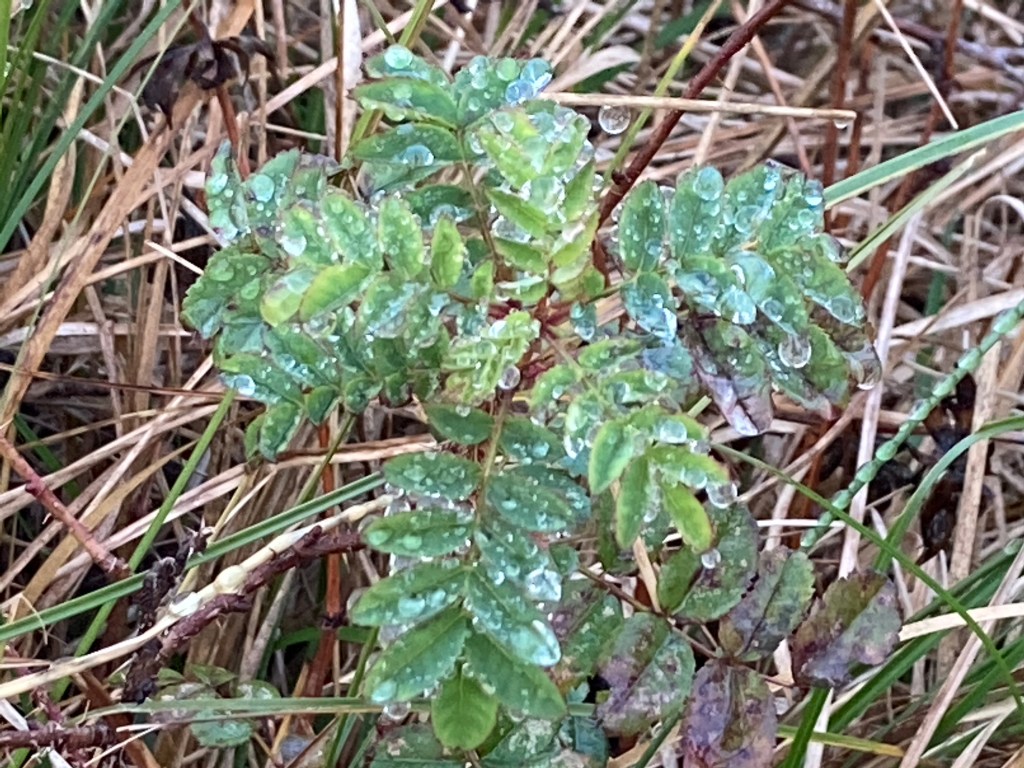
There was so much moisture in the air that dew was condensing on to plants like this Burnet rose.
The cobwebs looked bejewelled with raindrops.
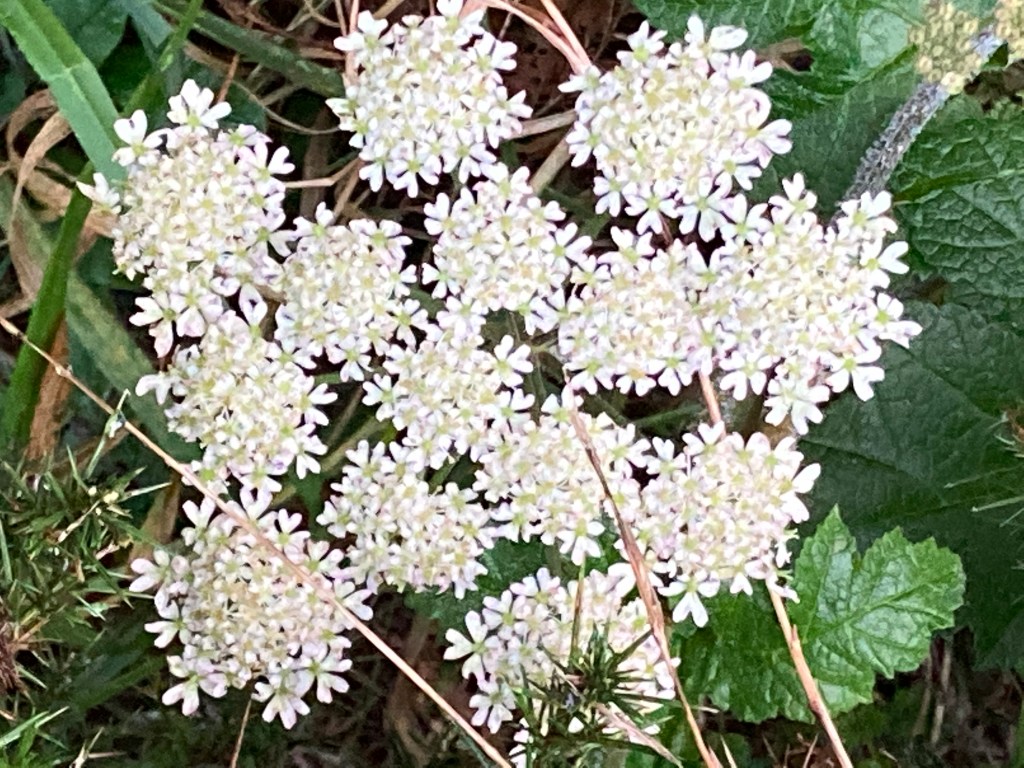
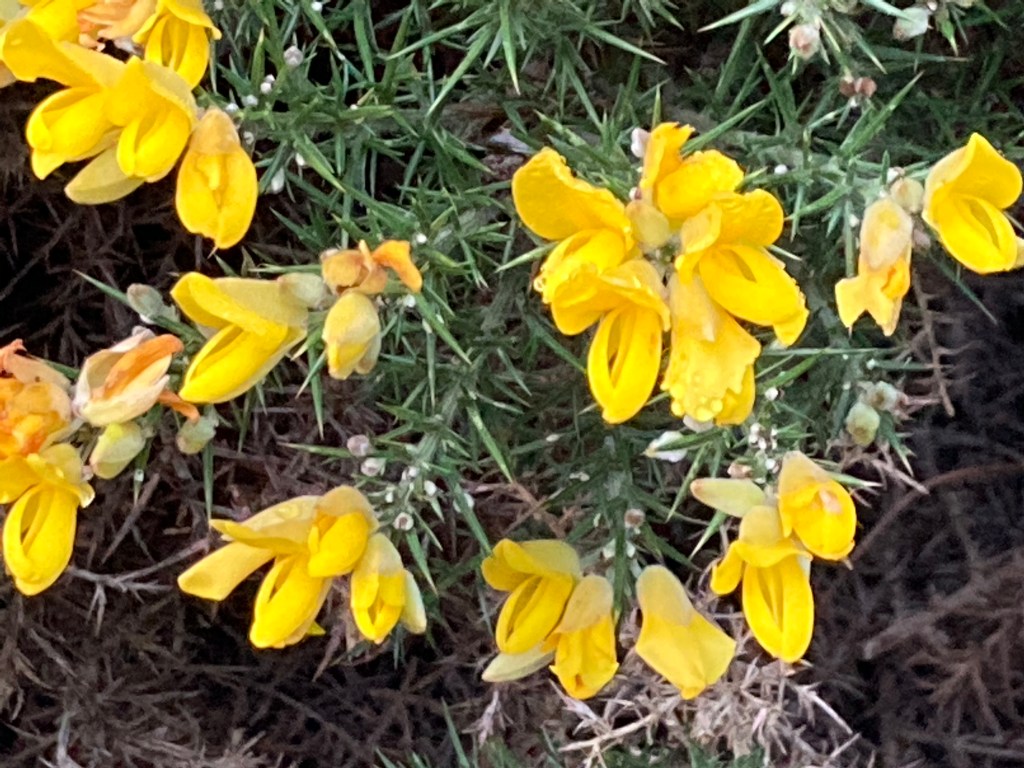
The only wildflowers I saw were an occasional hogweed flower…..
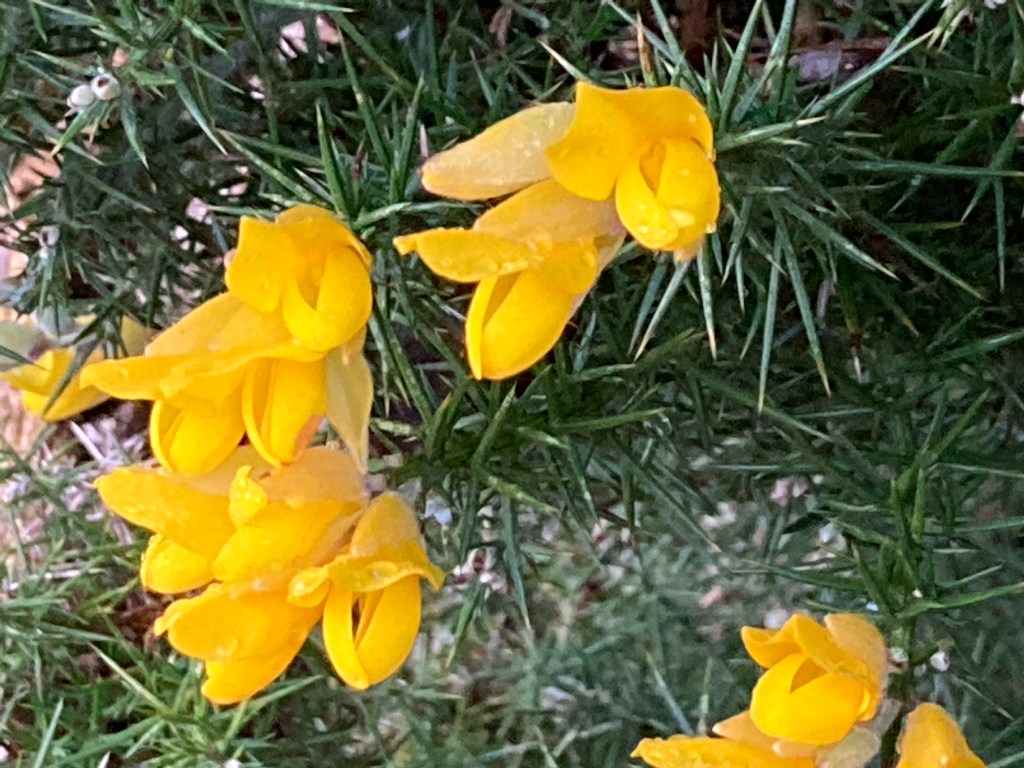
…and bright yellow gorse.
The gorse, known locally as whin, blooms throughout the year. At the end of November it brings a very welcome splash of colour.
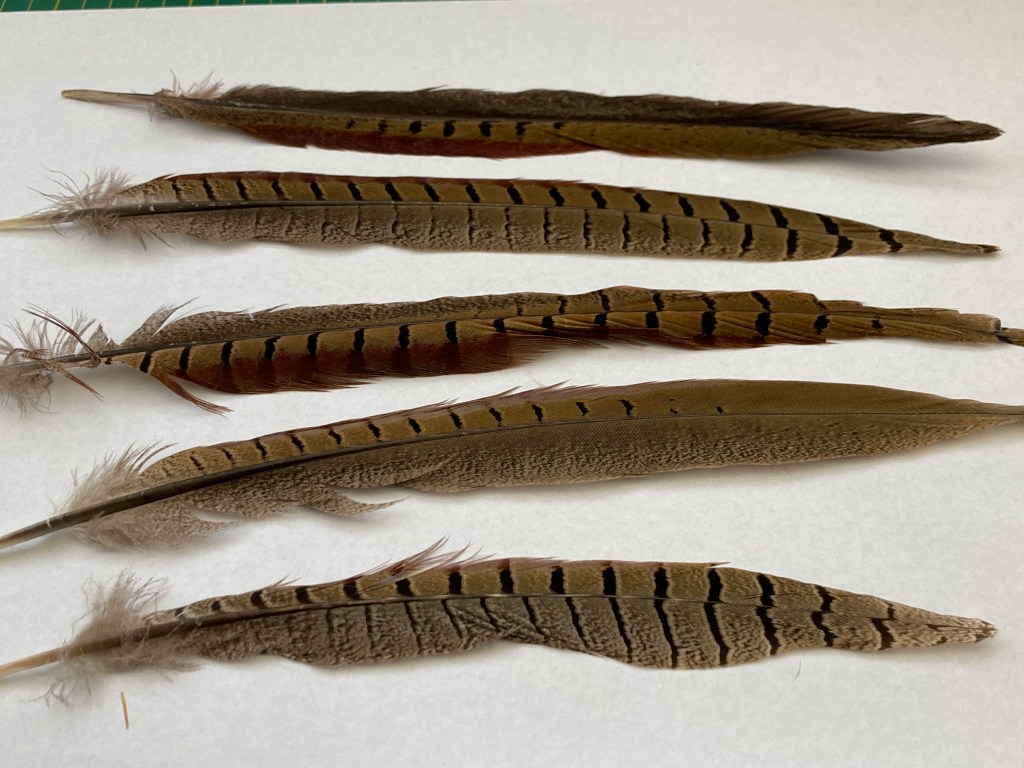
Feathers are pretty multifunctional. First of all, they keep birds warm. The soft fluffy down at the base of the feather traps air to provide an insulating layer. by fluffing up the feathers in cold weather, more air is trapped and the bird stays even warmer. This is particularly important in chicks – they are covered in warm down when very young and their proper feathers grow in later.
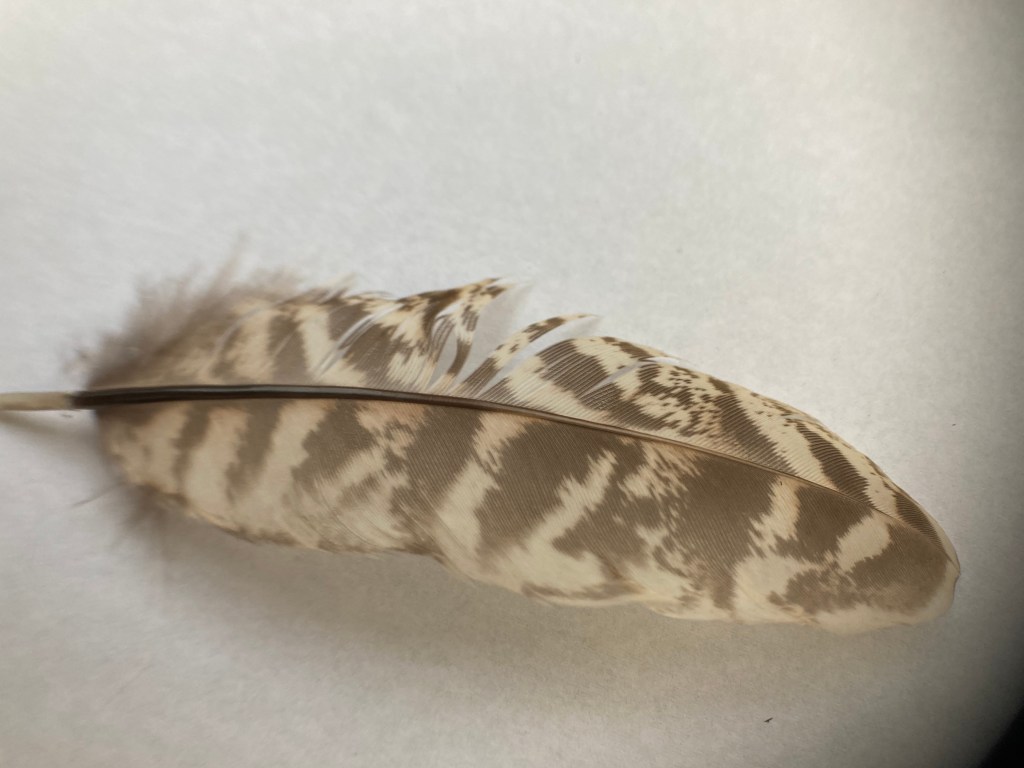
cock pheasant feathers are a rich chestnut colour
They can also keep the bird dry – waterfowl have an oil gland at the base of the tail. The bird spreads the water-repellent oil over the feathers so any water landing on them simply runs off – water off a duck’s back!
Water droplets on a duck feather
Feathers enable flight. They have a central hollow stem – the vane, with hair-like barbs growing out the sides. each barb has a line of tiny hooks known as barbules that hold the barbs together, rather like velcro. We’ve all played with feathers as children, zipping and unzipping them.
Hen pheasant flight feather with close-up to show interlocking barbs
This structure is strong but very light. The flight feathers, on wings and tail are the strongest of all – they overlap to form the thin rear edge of the wing, angled to gain lift and steer the bird.
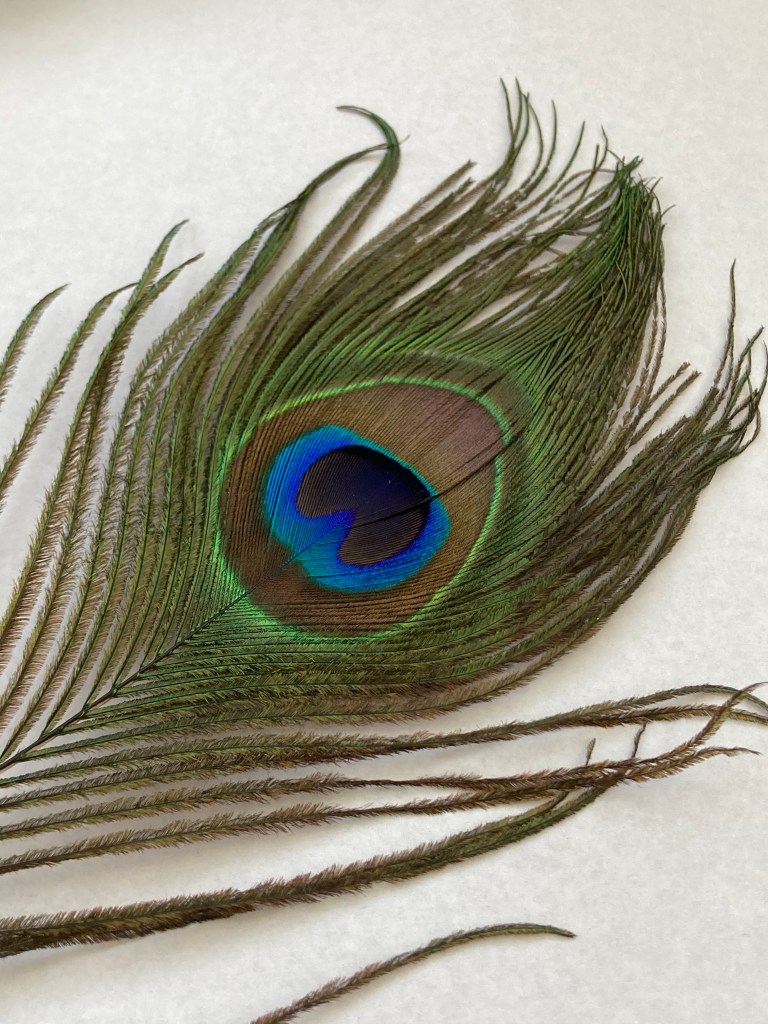
Feather colour varies enormously. It may be dull to camouflage the bird against its background habitat. This is vital to ground nesting birds, to protect them and their eggs and from predators when on the nest. In many species the sexes are different, with the males’ more colourful plumage used to attract a mate. In some cases the feathers might be structurally different too for use in courtship displays. The spectacular fanned tail of the peacock , with shimmering “eyes” is a prime example of this.
Peacock “eye”
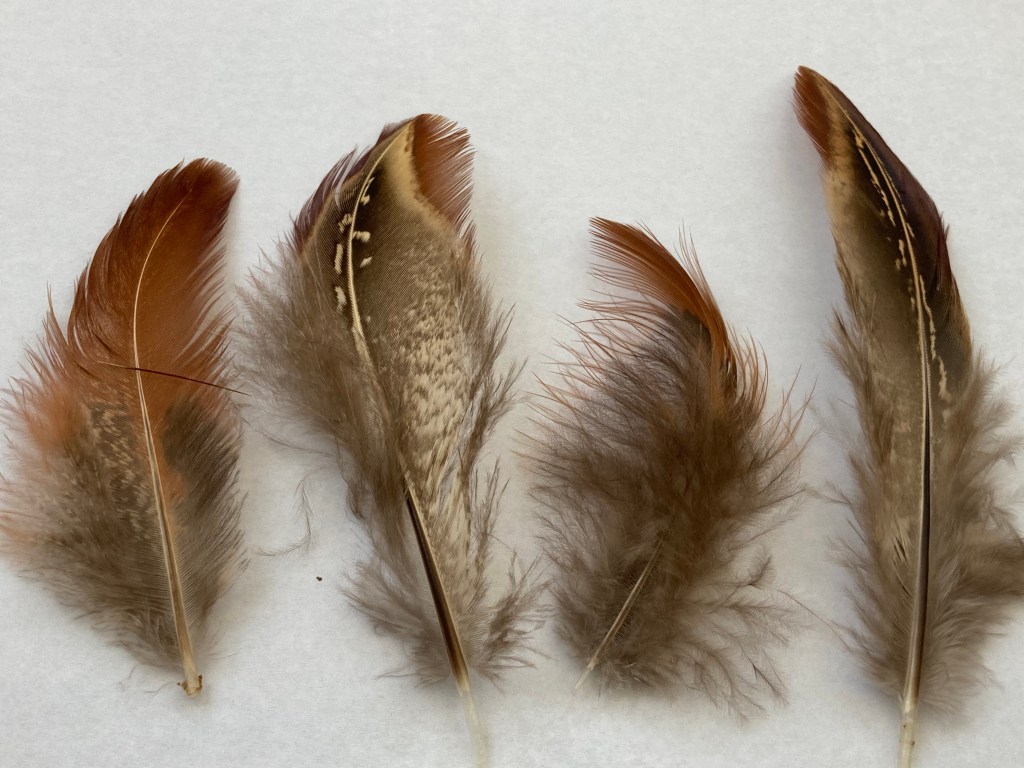
Pretty remarkable really. But it doesn’t explain why I have so many!. Well, a few years back I went on a one-day course about making fascinators. I thought I’d make some with pheasant feathers. Now I knew that a local farmer friend has a pheasant shoot on his land, so I asked him if I could have some feathers. He explained that someone comes in after a shoot and plucks and dresses the birds, after which they go off to a game dealer/butcher but he’d be happy to save some tails for me. A while later he told me he had them and brought three sacks full of pheasant and duck tails and wings out of the back of his Landrover! I spent three days cleaning the feathers!
I did make some nice hats and fasinators though.
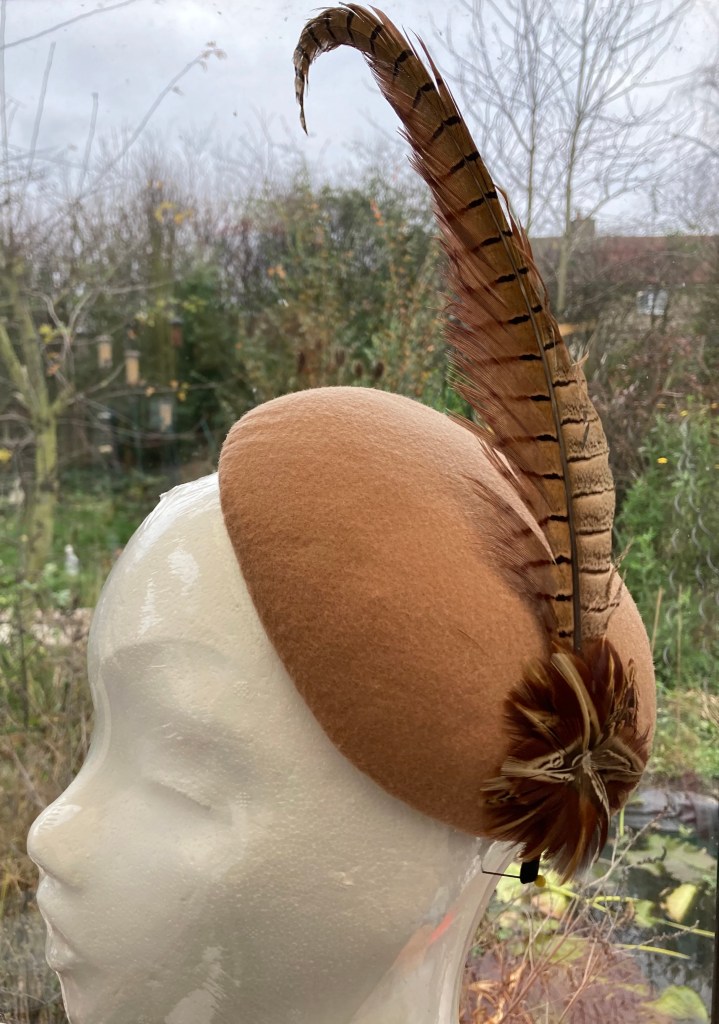
Bolcked felt beret with cock pheasant feather trim
I wore this one for a friend’s wedding.
Fascinator with cock pheasant feathers
My conversation with the farmer was overheard by a lady who asked me if I could make use of peacock feathers too. She explained that there were peacocks living wild where she walks her dog. Apparently someone who used to live nearby had kept them as pets and they escaped – the owner moved away but the peacock colony had become established in a patch of woodland nearby. She was always finding moulted peacock feathers on her dog walks and gave me a few she’d found the next time I saw her. I didn’t see her for a few months, then she phoned me. She’d collected a load more and wondered if I could collect them , which I did. There was a massive armful of them, some almost four feet long!
I have some really generous friends. I will of course never ever be short of feathers for craft projects!
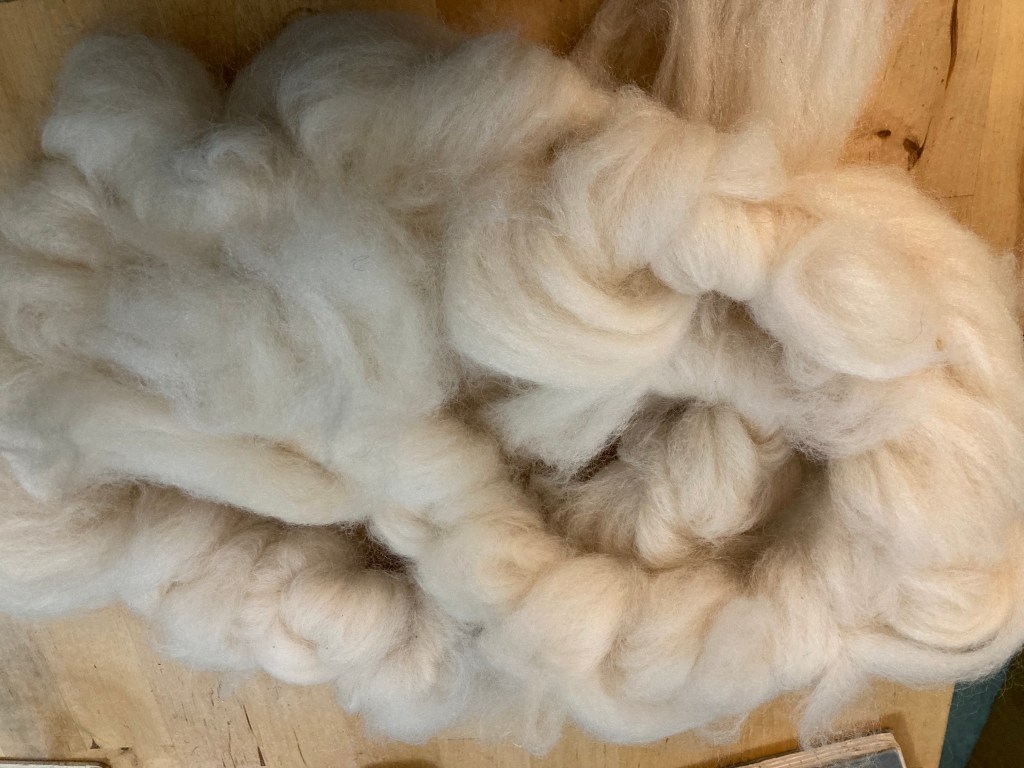
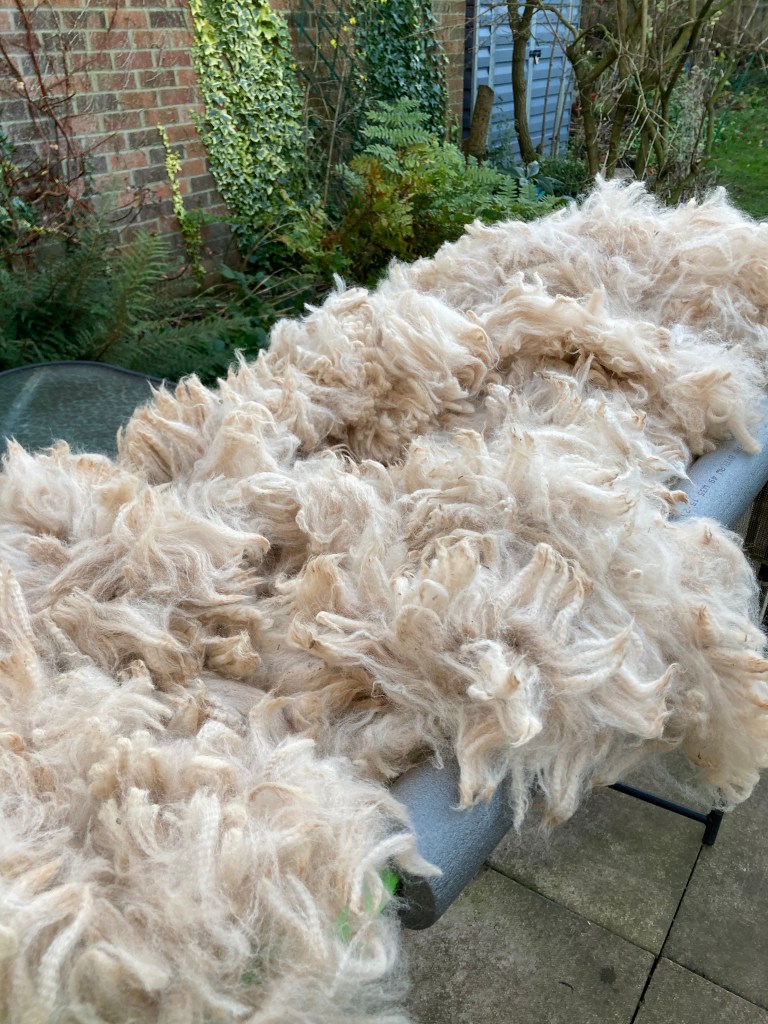
A while ago I was given a huge bag of raw alpaca fleece. So far I’d only processed a very small amount of it, which I spun and knitted to make baby socks and hat as a gift. Today I did the first stage of processing the rest. This is known as skirting. The fleece (known as a blanket when it comes to alpacas) is spread out on a mesh table and agitated to remove dust. Any stained fibre and pieces of vegetable matter (hay, pieces of grass, seeds etc) are removed as well as very short second cuts, (where the shearer has gone over a second time), which are too short to spin. The fibres are then sorted into the various grades, from the finest longest fibres on the animal’s back through to the shorter pieces on the neck and sides – well that’s what the professionals do. I can’t say I did such a thorough job!
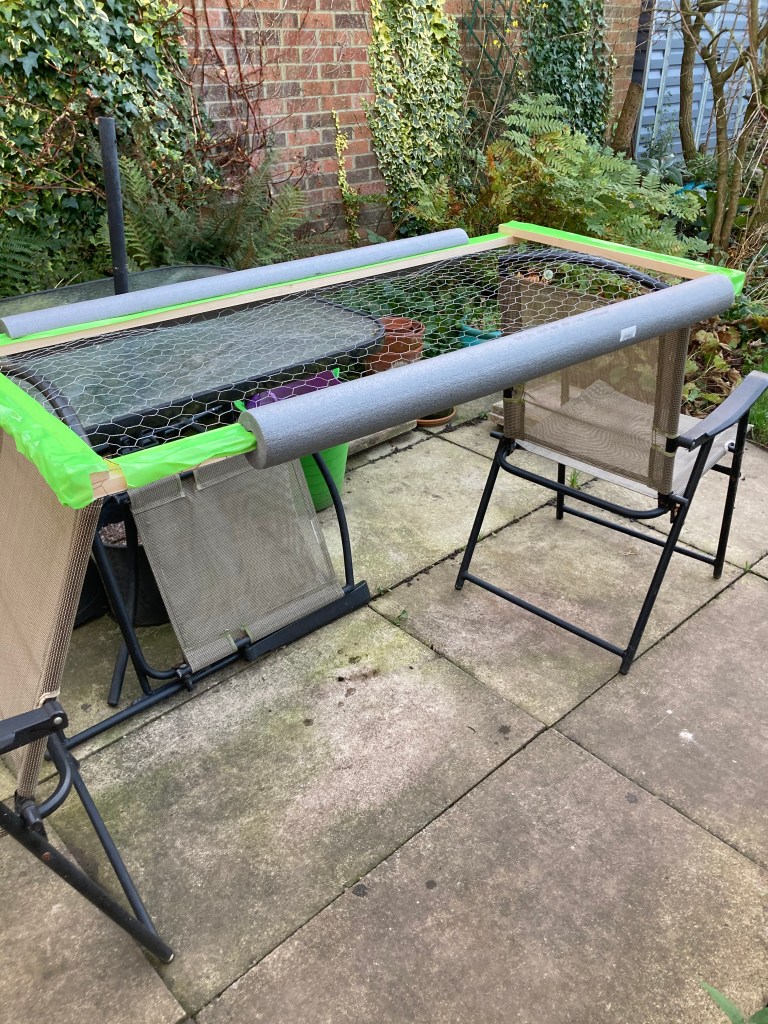
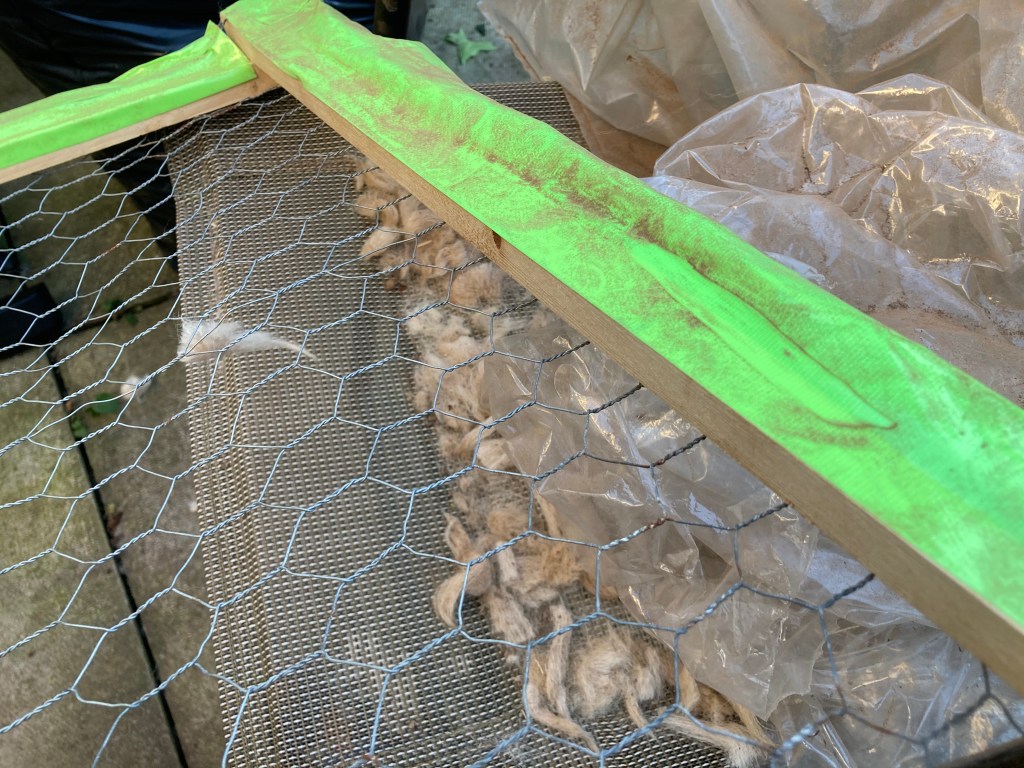
I think the alpacas like to have a good roll about because the fibre is very dusty – everywhere in the conservatory where I do all my crafting was covered just from processing a tiny amount. Lesson learnt, I needed to sort through the rest outside! K has made me this little skirting table. It’s basically a wooden frame with chicken wire stretched over it – he’s added tape and some pipe insulation to stop the edges of the wire catching. This just rests on a couple of garden chairs.
It’s not quite big enough to spread a whole blanket out but it’s perfect for my purposes.
I’d been waiting for a sunny dry day without much wind. Alpaca is light as a feather and if I’d tried doing this in the gales we’ve had recently most of it would have ended up in the next county! As I tipped the fibre out on to the skirting table there were clouds of dust. I kept agitating the blanket to release as much of the dust as possible.
I picked out the larger pieces of vegetation – there wasn’t a great deal of it and some of the tinier fragments will come out of the fleece during the later stages of processing. You can see a couple of small pieces of leaf towards the bottom of the next photo.
I separated out the best long fibres, which are around 5 inches long, from the rest This is mostly around 2-3 inches long so still perfectly good to spin. Now most of the dust is out I can sort this more fully indoors and not need to rely on the weather. You can see the layer of dust left where I ran my finger across the green tape.
I’ve now got all the fibre in labelled plastic bags.
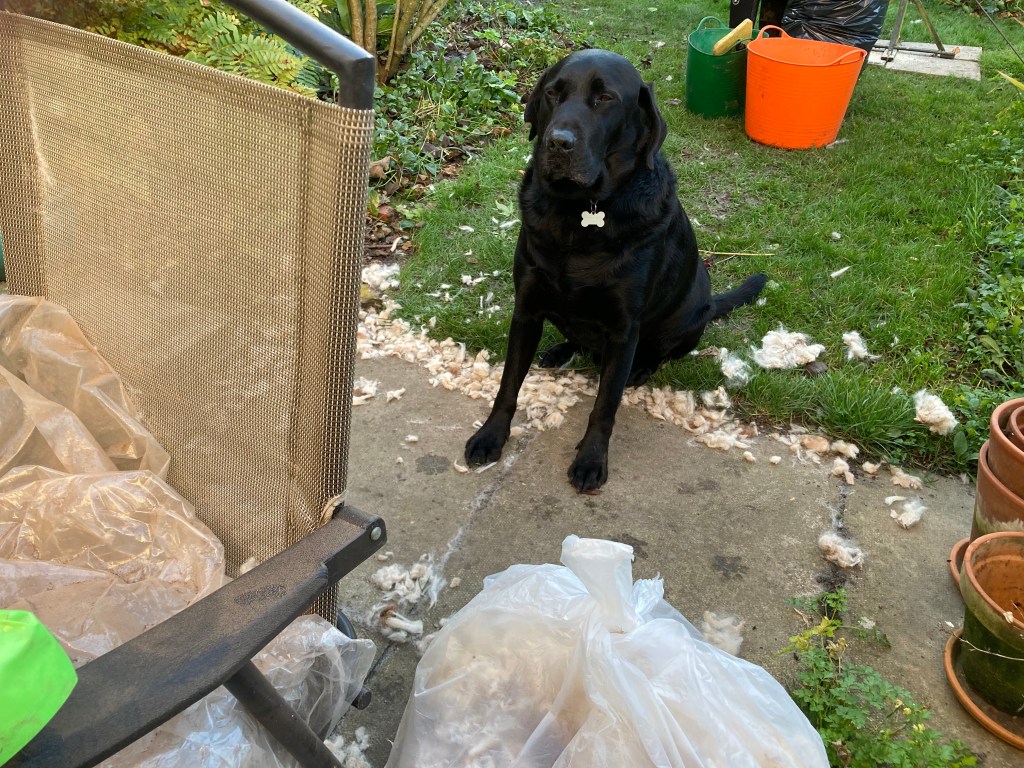
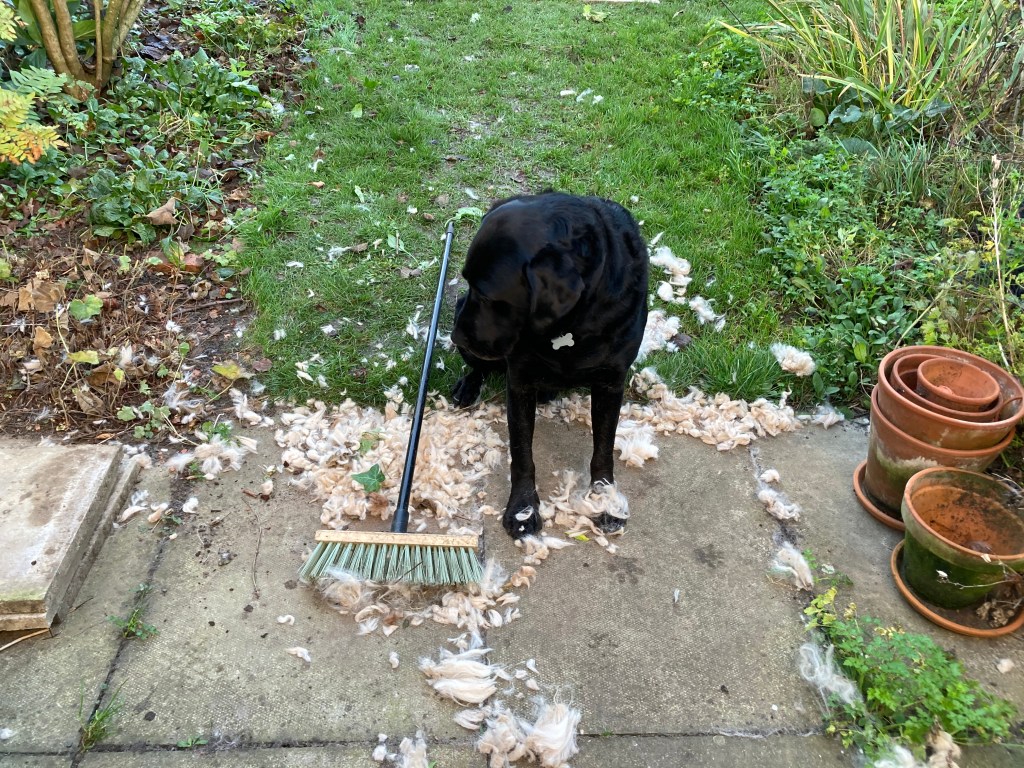
Buddy took great interest in what I was doing.
As you can see there was quite a lot of spillage, mostly the very short second cuts. He did offer to sweep the patio though!
I’ve been promised more fibre from Aero and Wispa, our friends’ alpacas (how lucky am I?). I think I’ll definitely wait until the Spring for my next skirting session. By then the birds visiting our garden during the nesting season could really make use of the bits of fibre that I drop!
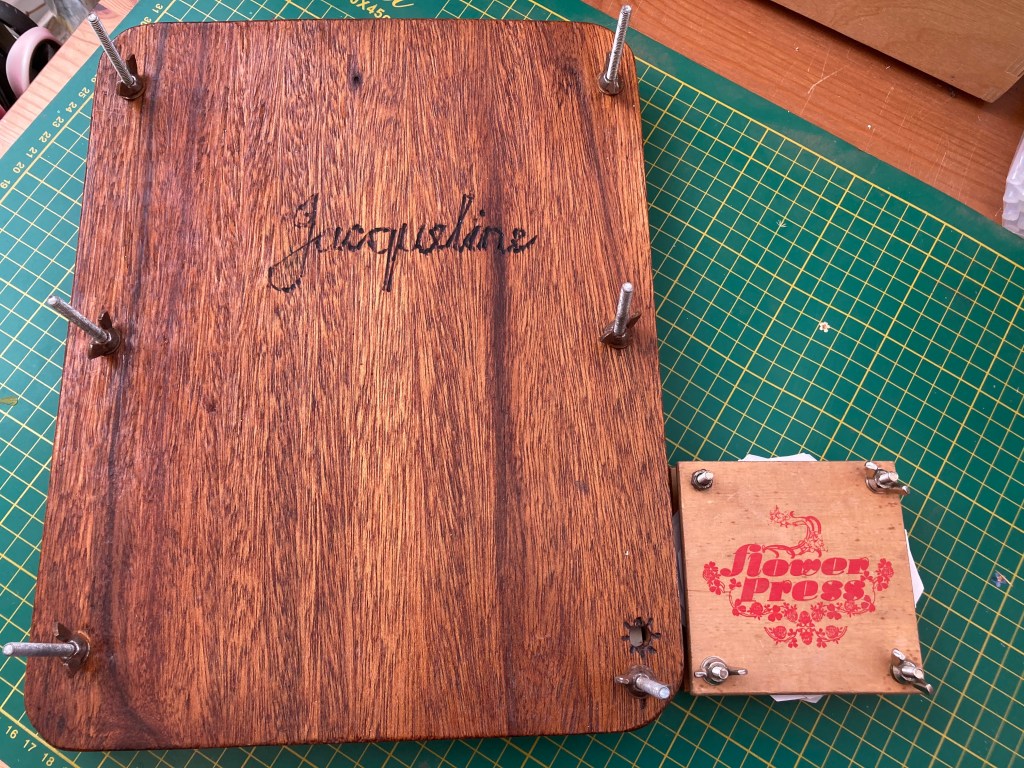
For yesterday’s Crafty Monday session I opened up the flower presses to see what I had. I’ve been pressing flowers since I was a kid, when my lovely grandfather made me a press. He even put my name on it. I also have a tiny flower press that’s ok for smaller items
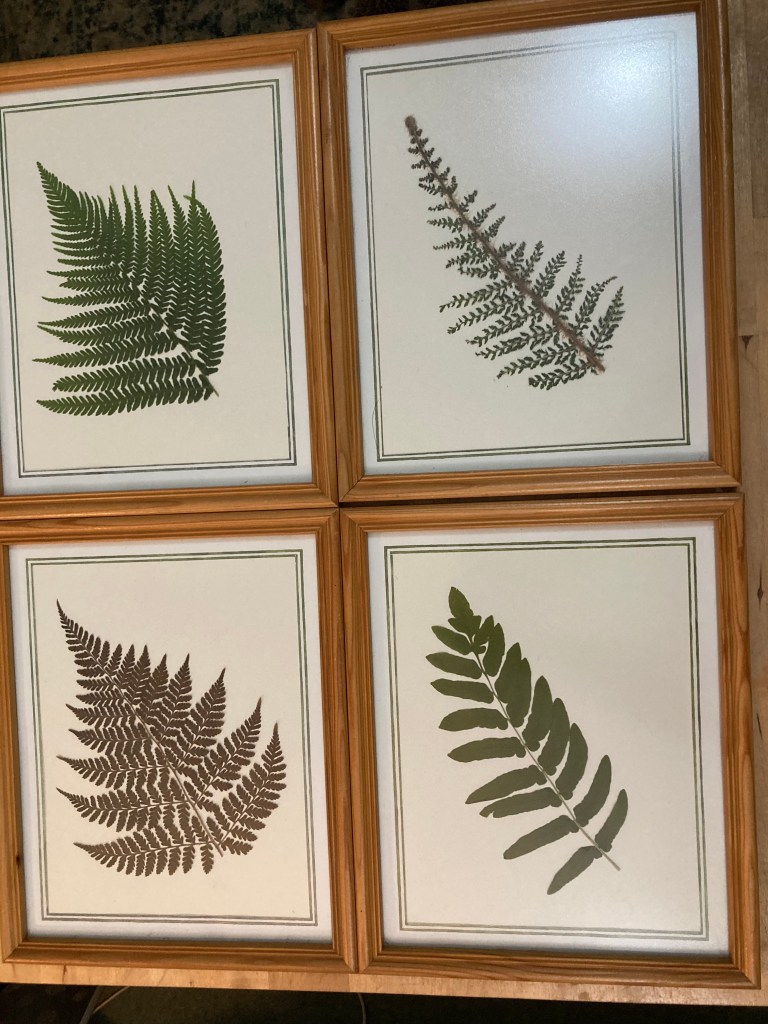
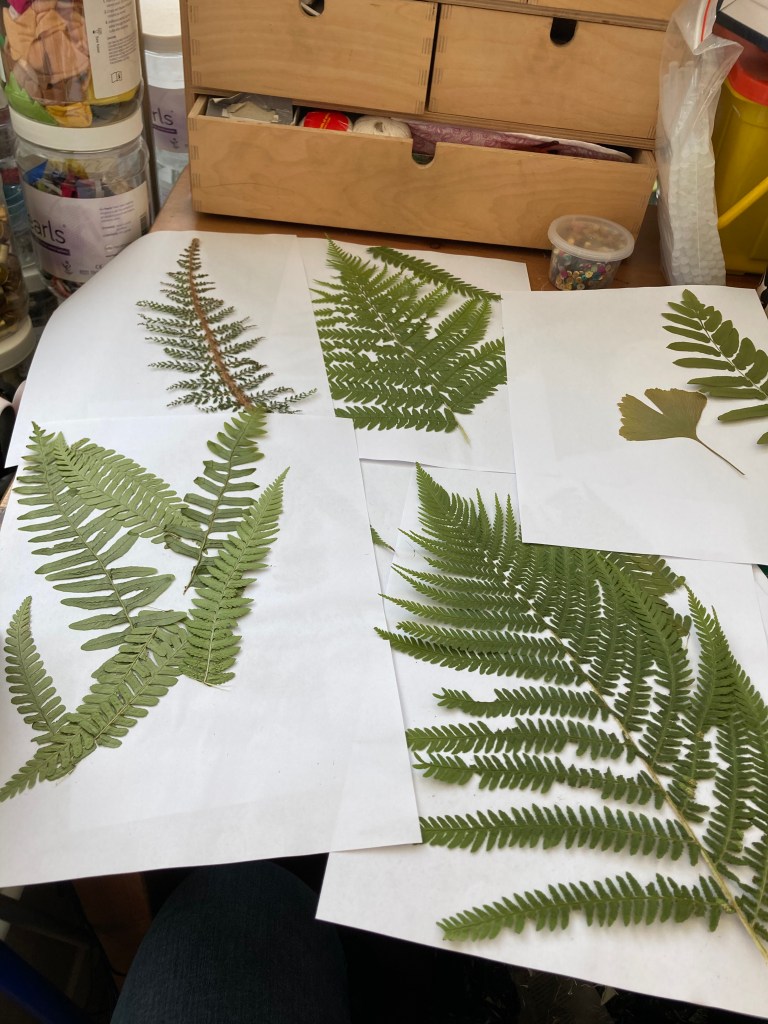
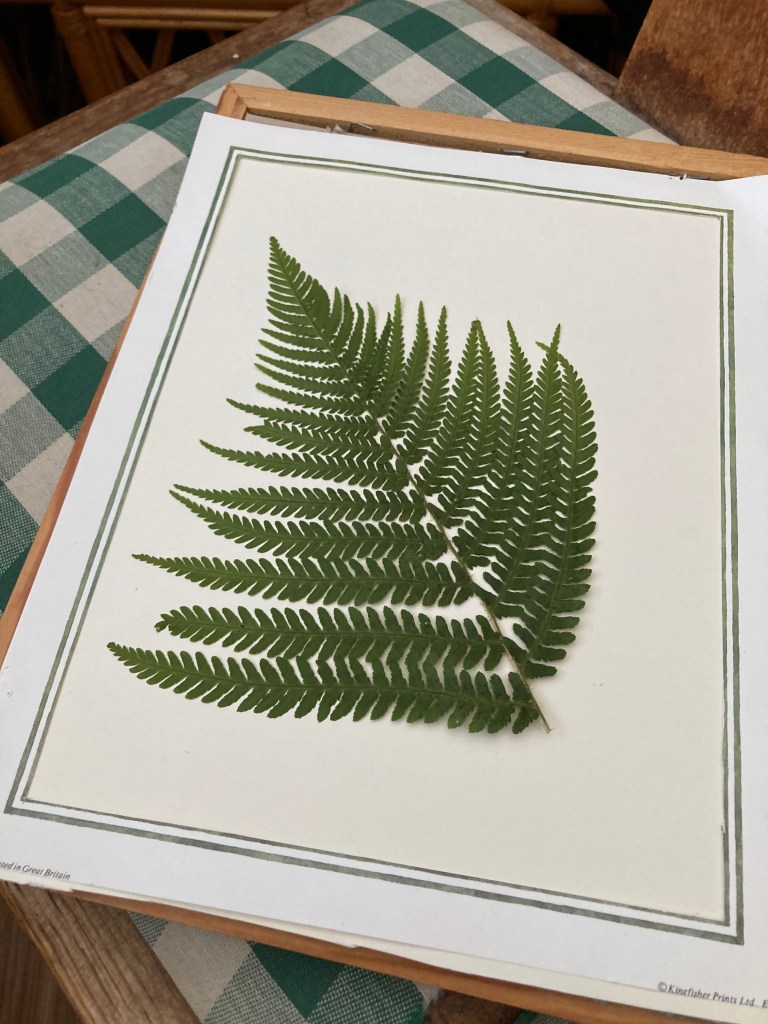
I’ve made pictures and greetings cards in the past but nothing recently. Earlier in the year I came up with the idea of doing pressed fern pictures as they would look great with the curtains in my living room – the fabric has a fern design.
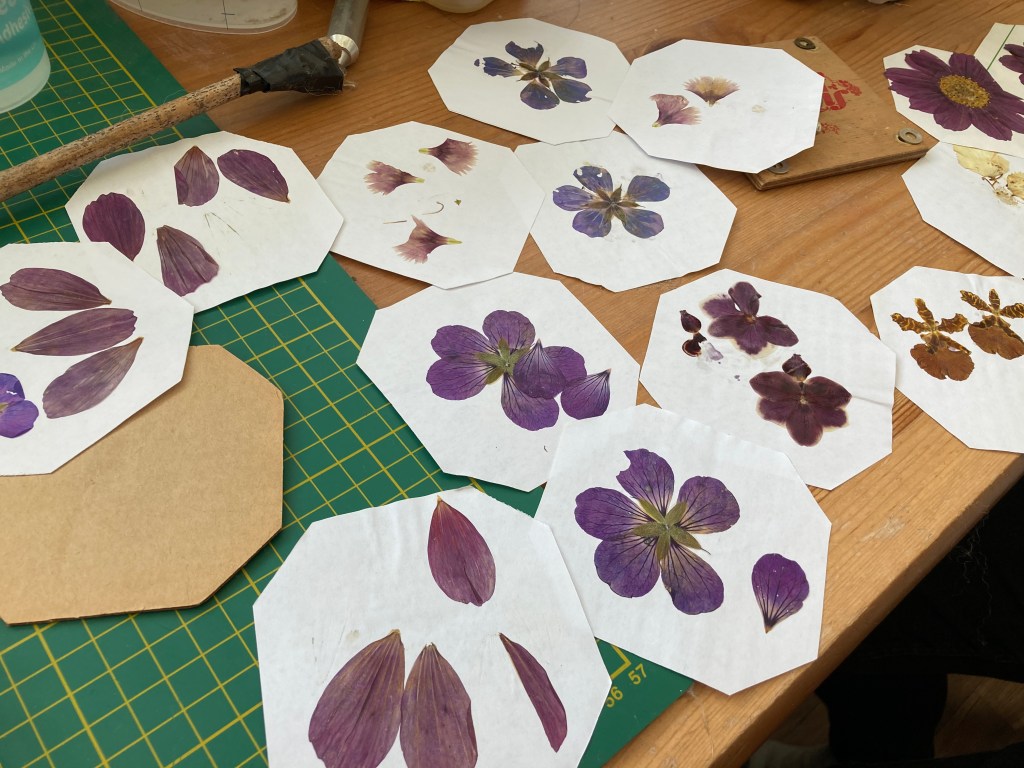
I picked and pressed a few different kinds of fern, mostly from the garden , but also some I’d found growing wild – I’m always careful only to pick what is growing in abundance. For the best results choose perfect specimens, free of insects and completely dry. Most leaves dry quite well. Flowers are more variable. Fragile petals are even more fragile when pressed and very full double flowers such as roses are too three-dimensional to preserve in this way: flat blooms work better. Brightly coloured flowers tend to keep their colour. White ones go brown. You don’t need a flower press – you can press flowers, leaves and ferns inside the pages of a book, preferably weighted under other books. Put the items between sheets of scrap paper to protect your book from pollen or other stains. Within a few weeks the plant material will have dried out and you can use it.
The presses revealed quite a selection. These cranesbills were a bit too fragile and pressing them had separated the petals from the flower centre.
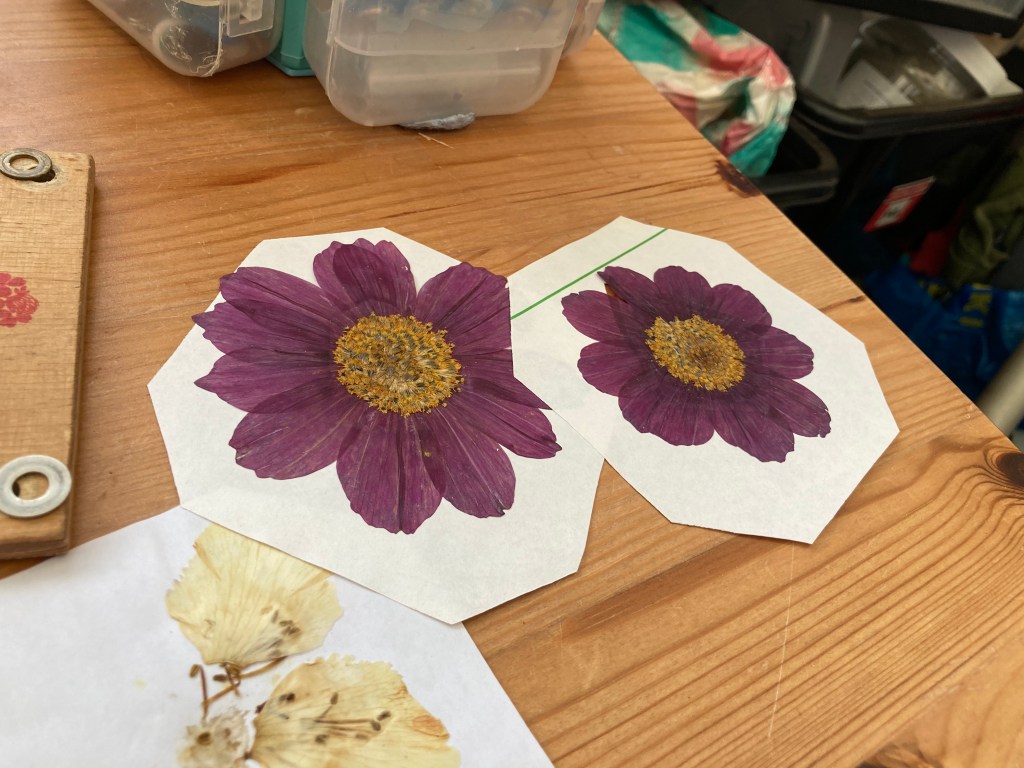
The cosmos worked really well. The centres of these are quite thick so I cut holes out of the centre of several paper sheets to place over these to ensure that both the petals and centres were properly pressed.
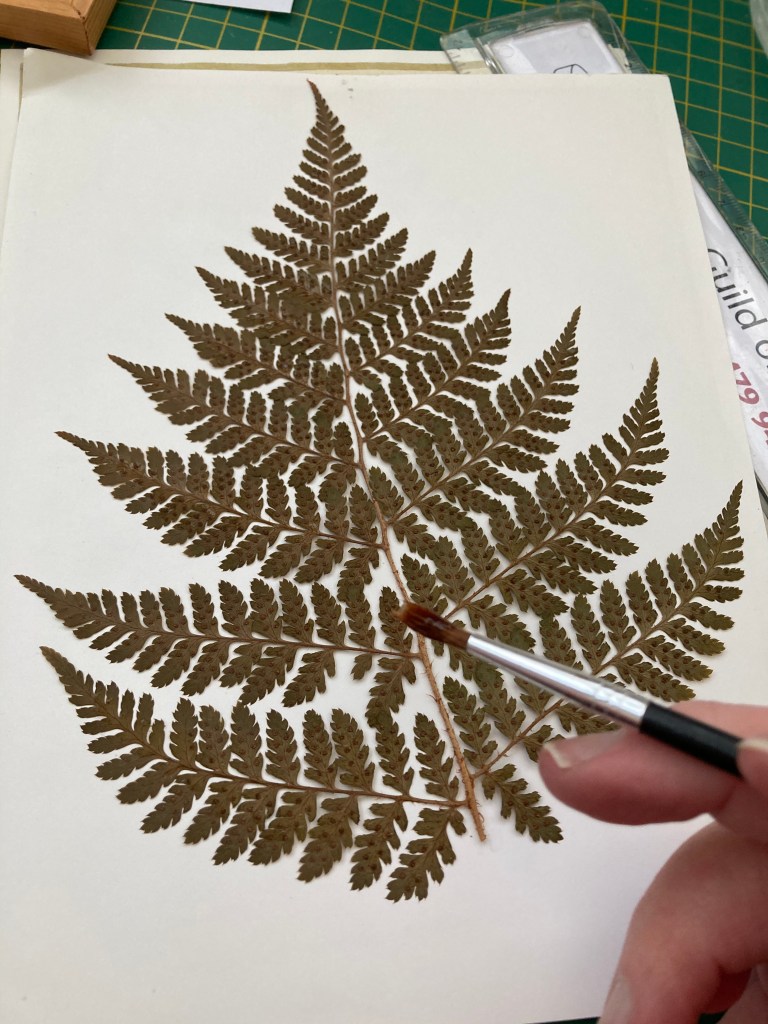
I was really pleased with the way the ferns turned out. They have retained colour well through the pressing process.
I wanted to recycle the frames and mounts from some prints that I no longer use. I cut sheets of card to size and for each picture I positioned the fern frond until I was happy with the placement within the mount. In some cases I trimmed off the lower part of the fern to get a better fit.
Using a small paintbrush I applied clear PVA glue sparingly to the back of the frond and stuck the fern in place.
I allowed the glue to dry thoroughly before reframed the pictures. Framing always takes me ages. It is so annoying when you seal the picture inside only to find there’s a large speck of something stuck on the inside of the glass! I take the time to make sure everything is clear and free of dust before I close the tabs or tape on the back of the frame.
I’m happy with the way the pictures look. I haven’t decided exactly where to hang them yet but I will put them somewhere out of direct sunlight to help them retain their colour.
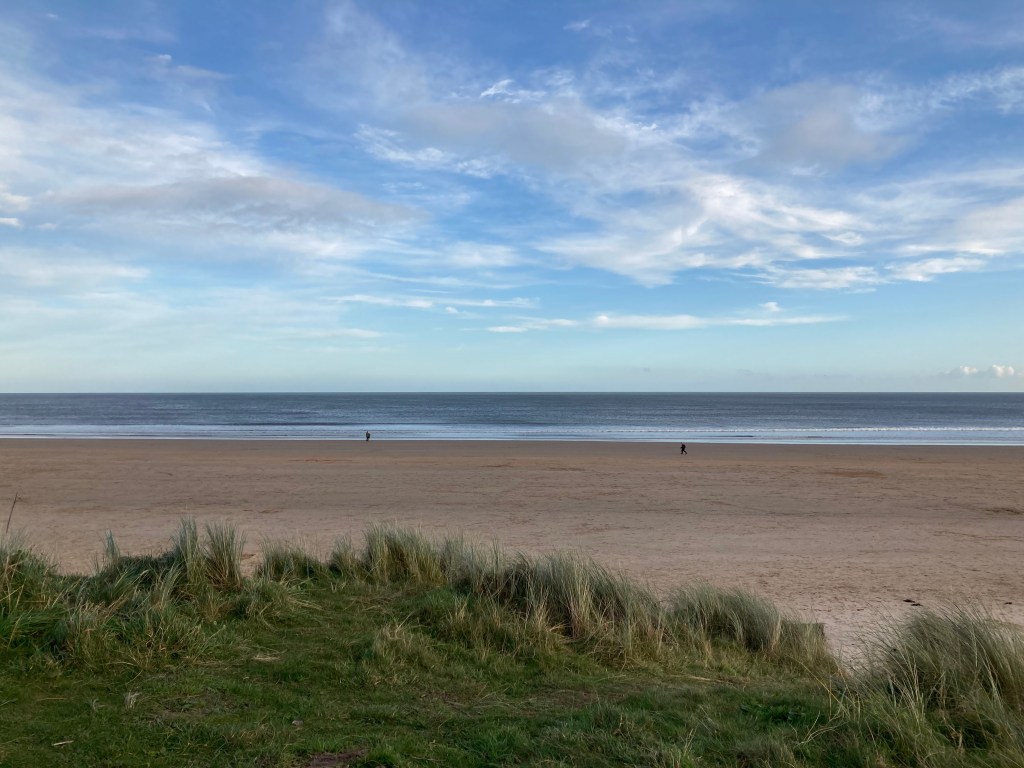
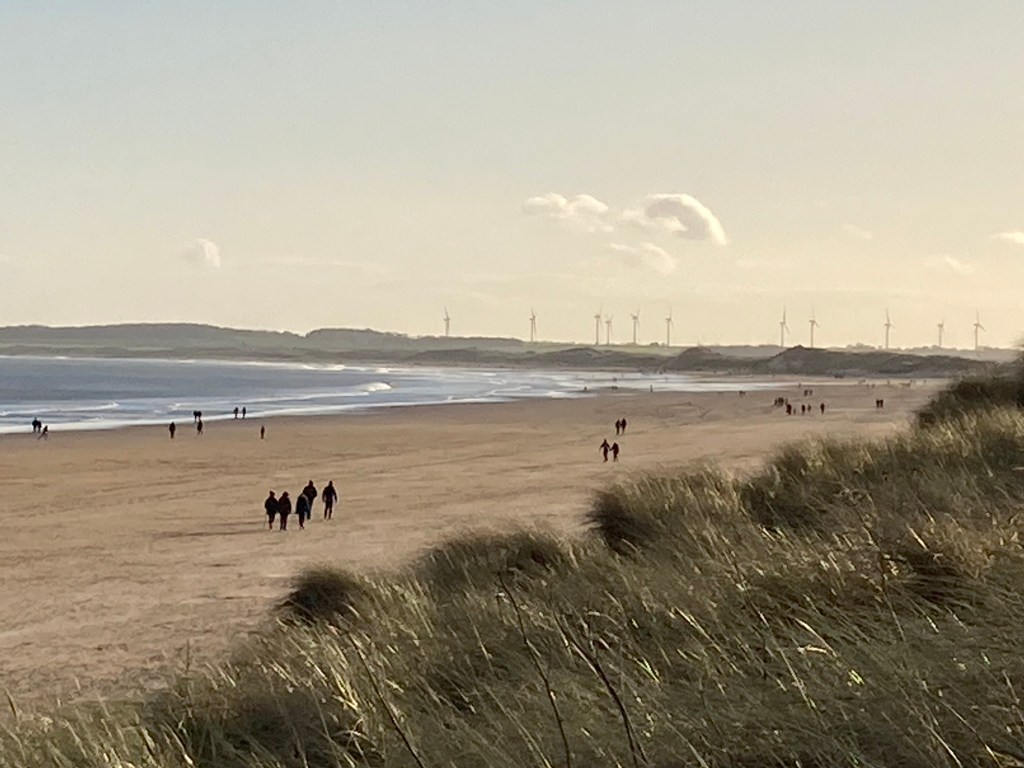
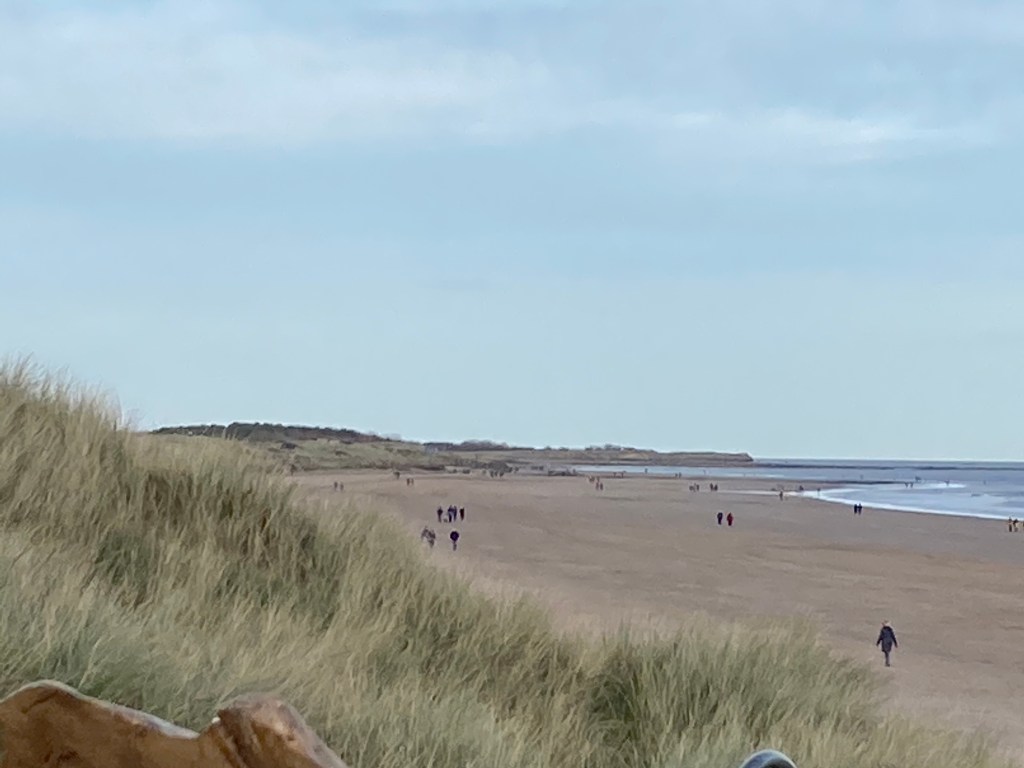
Sunday was a lovely day, cold but sunny. We met daughter at the Country Park and walked through to Druridge Bay. The sunshine had brought a lot of stir crazy lockdowners out for a beach walk in the fresh air. Although there were a lot of people out, there was plenty of space for everyone’s walk, from near Ashington to the south……
…to Amble in the north
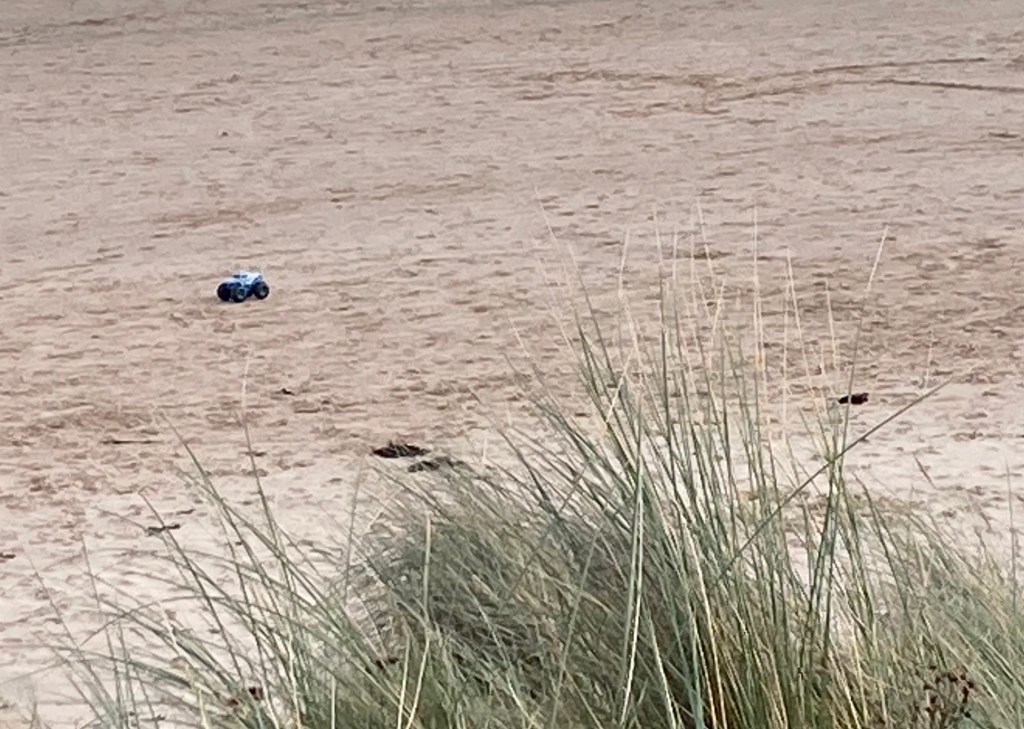
There were children building sandcastles and flying kites. We even saw this remote control truck.
At one point we noticed a large flock of gulls had gathered the shoreline, with a few more feeding in the shallows. We reckon that a large shoal of small fish had come in, possibly chased ashore by predators. There was no sign of dolphins. It could have been predatory fish like bass.
There were lots of dogs being walked. Buddy made friends with a handsome Rhodesian Ridgeback named Charlie and they played together for a while.
It was getting colder so we went back to Daughter’s house to warm ourselves up with hot chocolate. Buddy fell fast asleep on the rug, exhausted by his game with Charlie.